
Courses
-
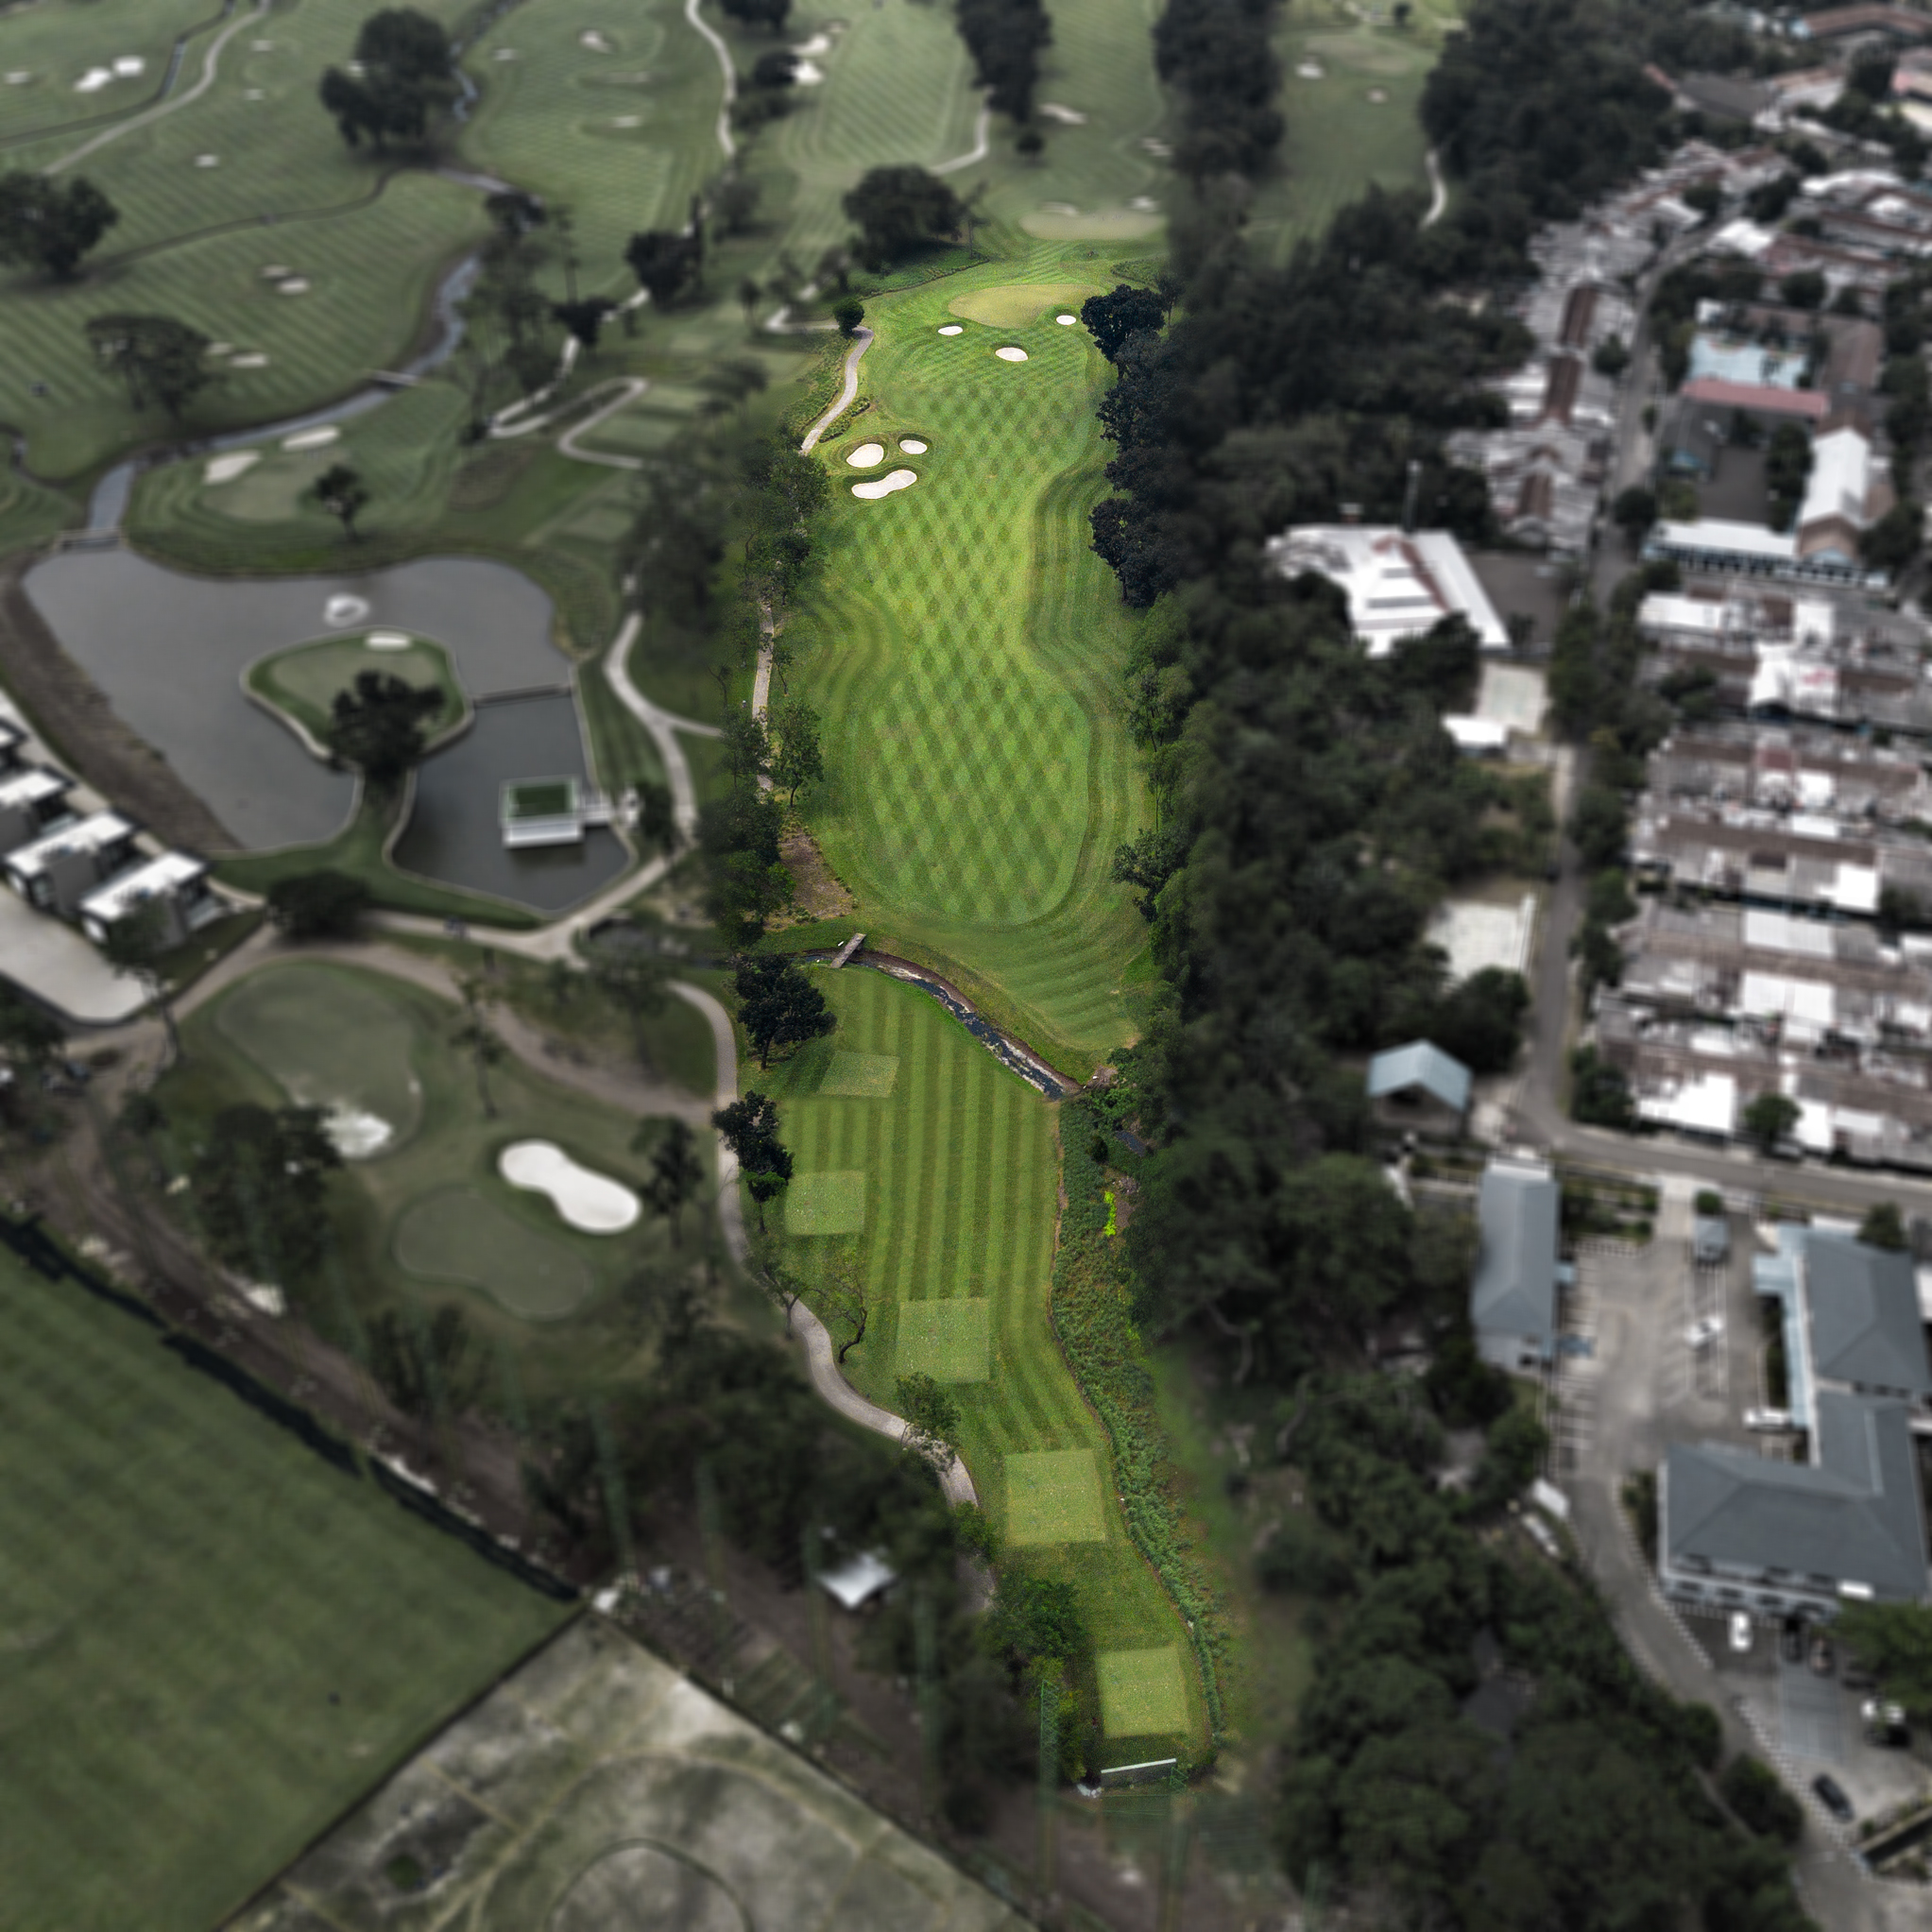
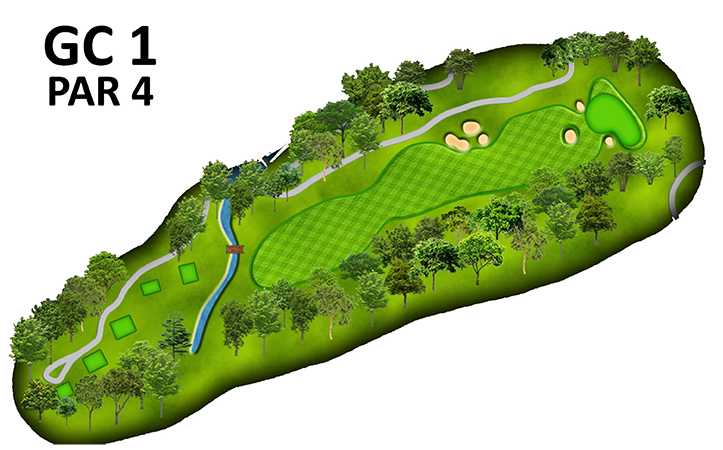
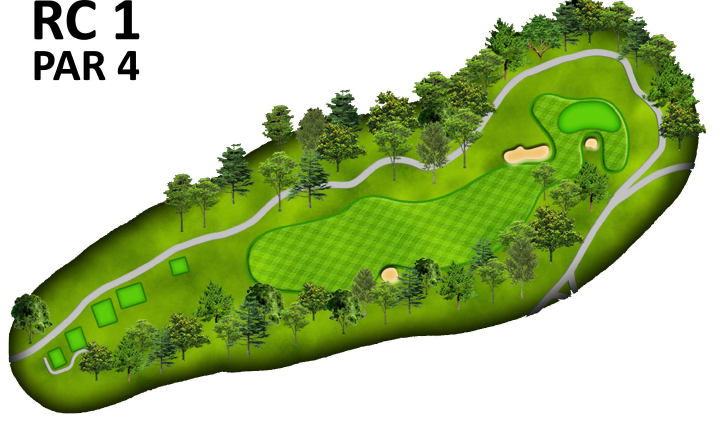
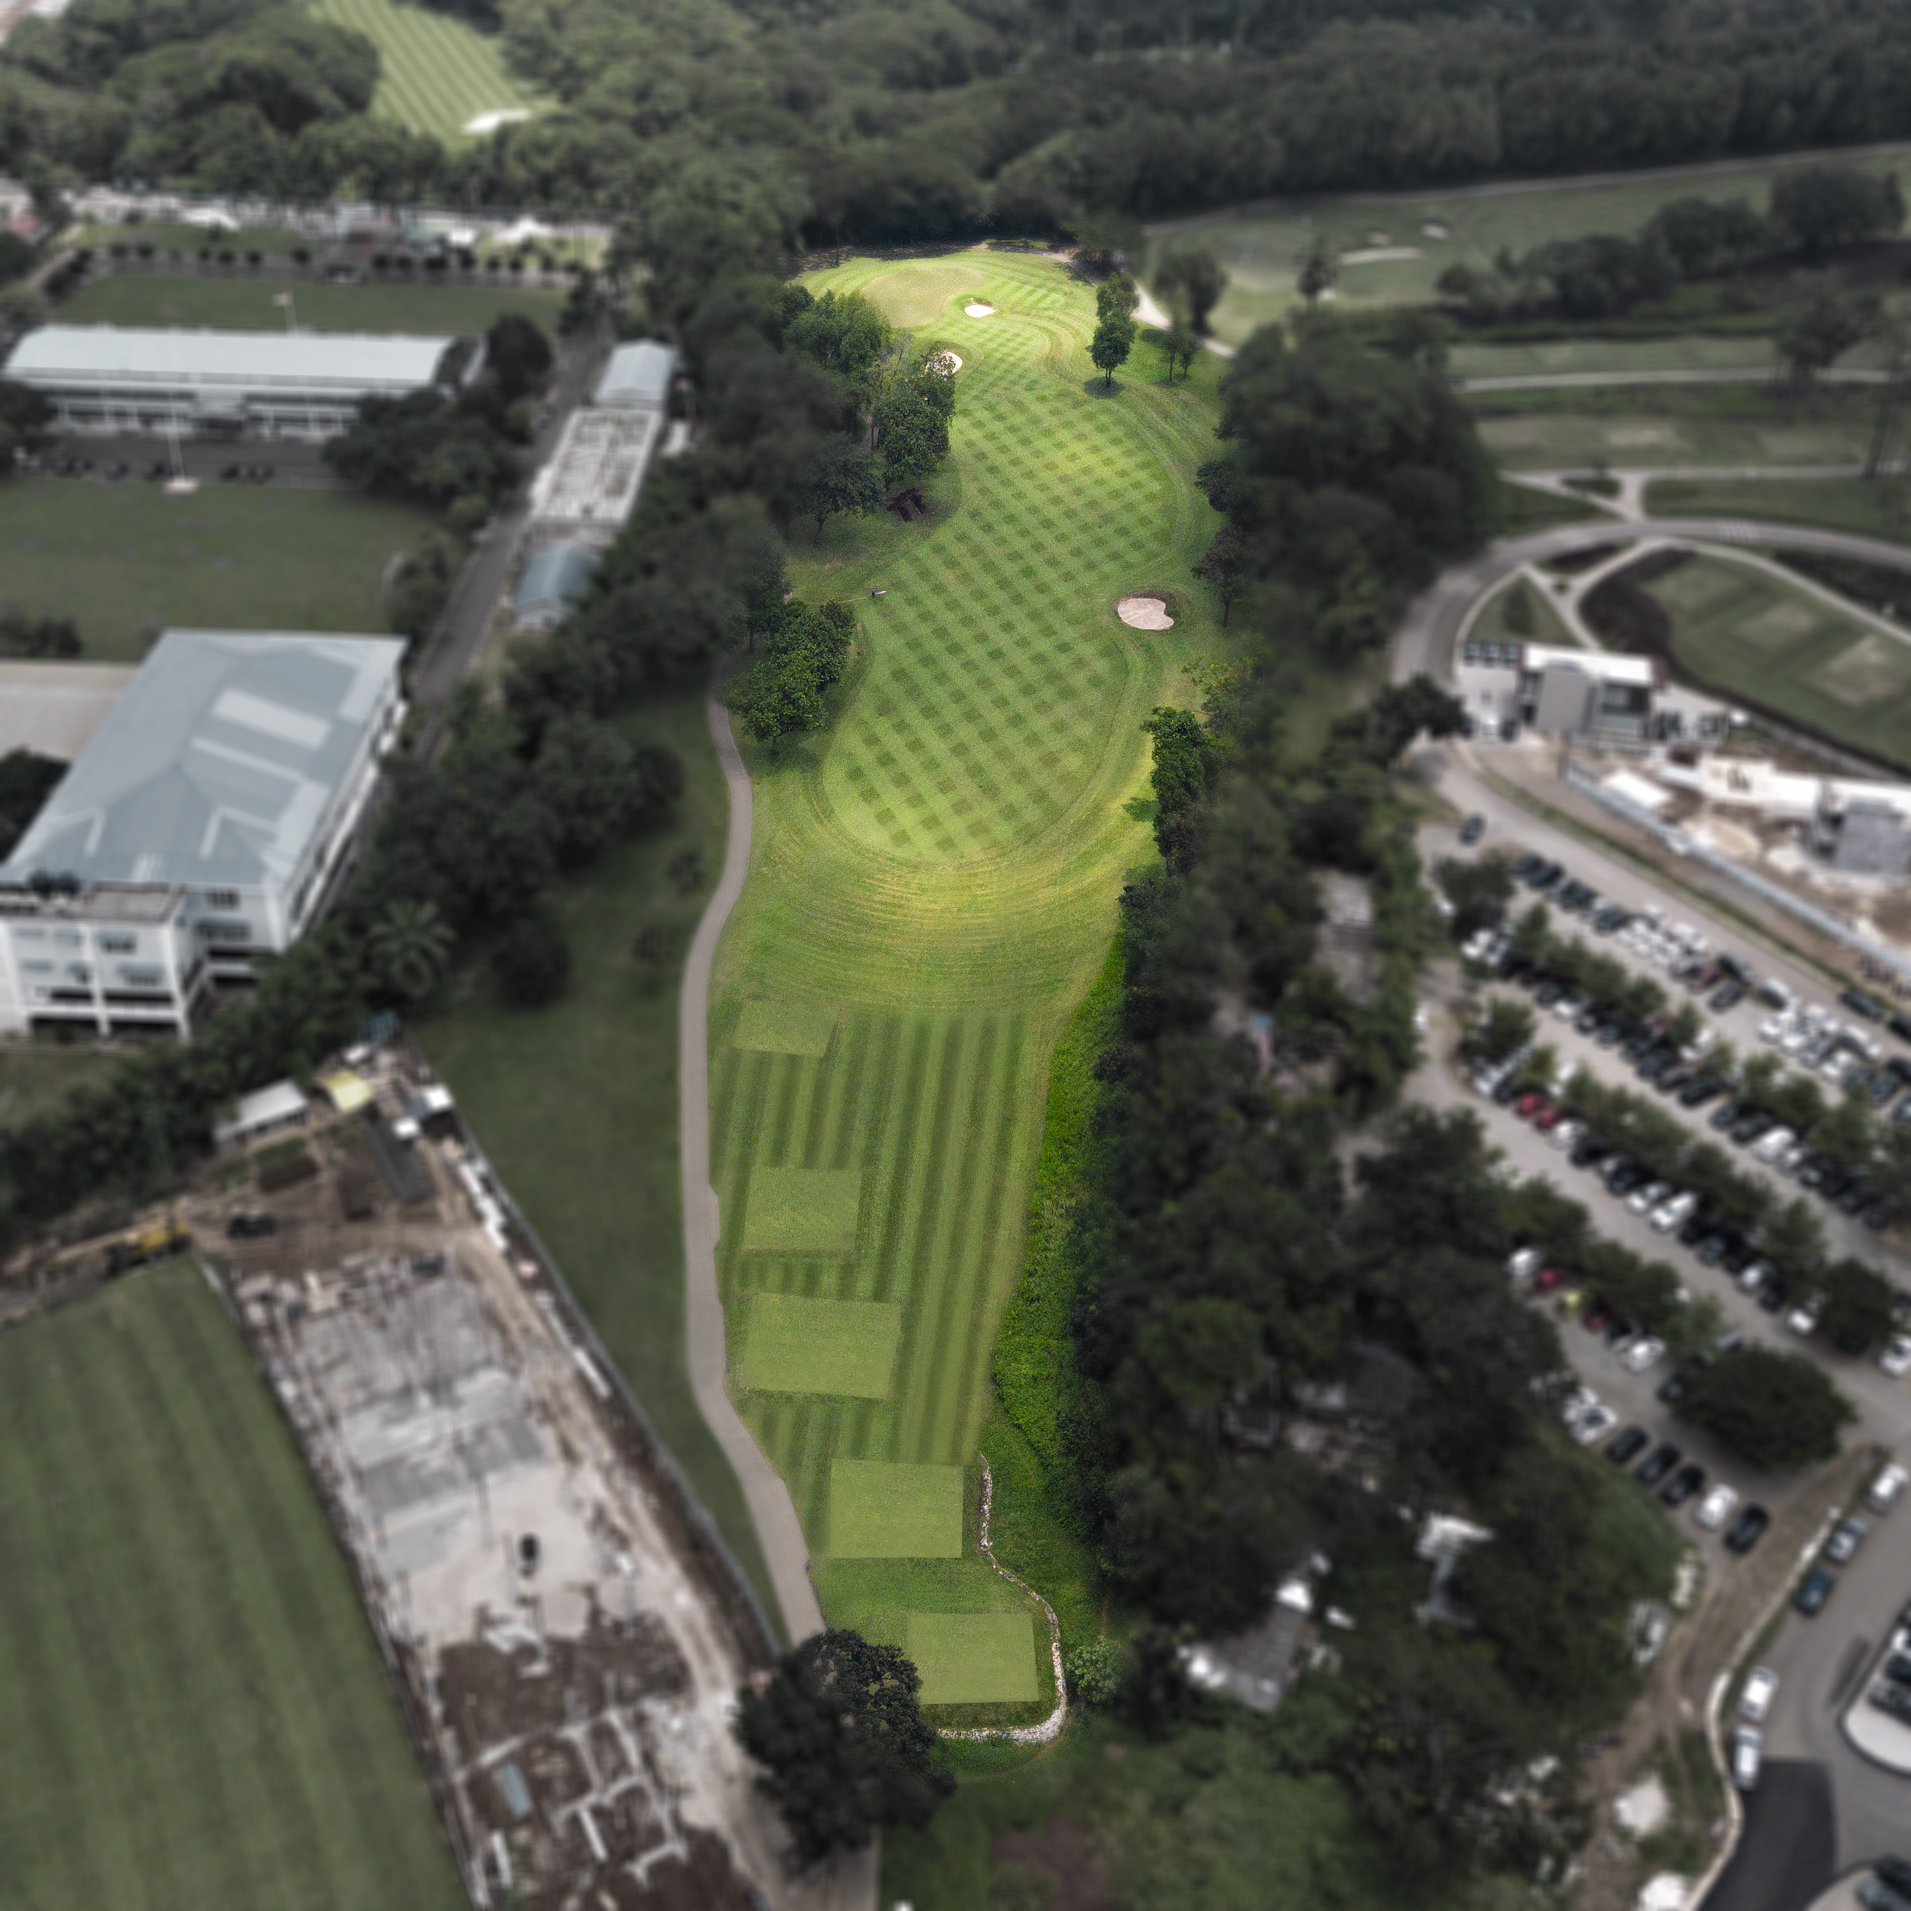
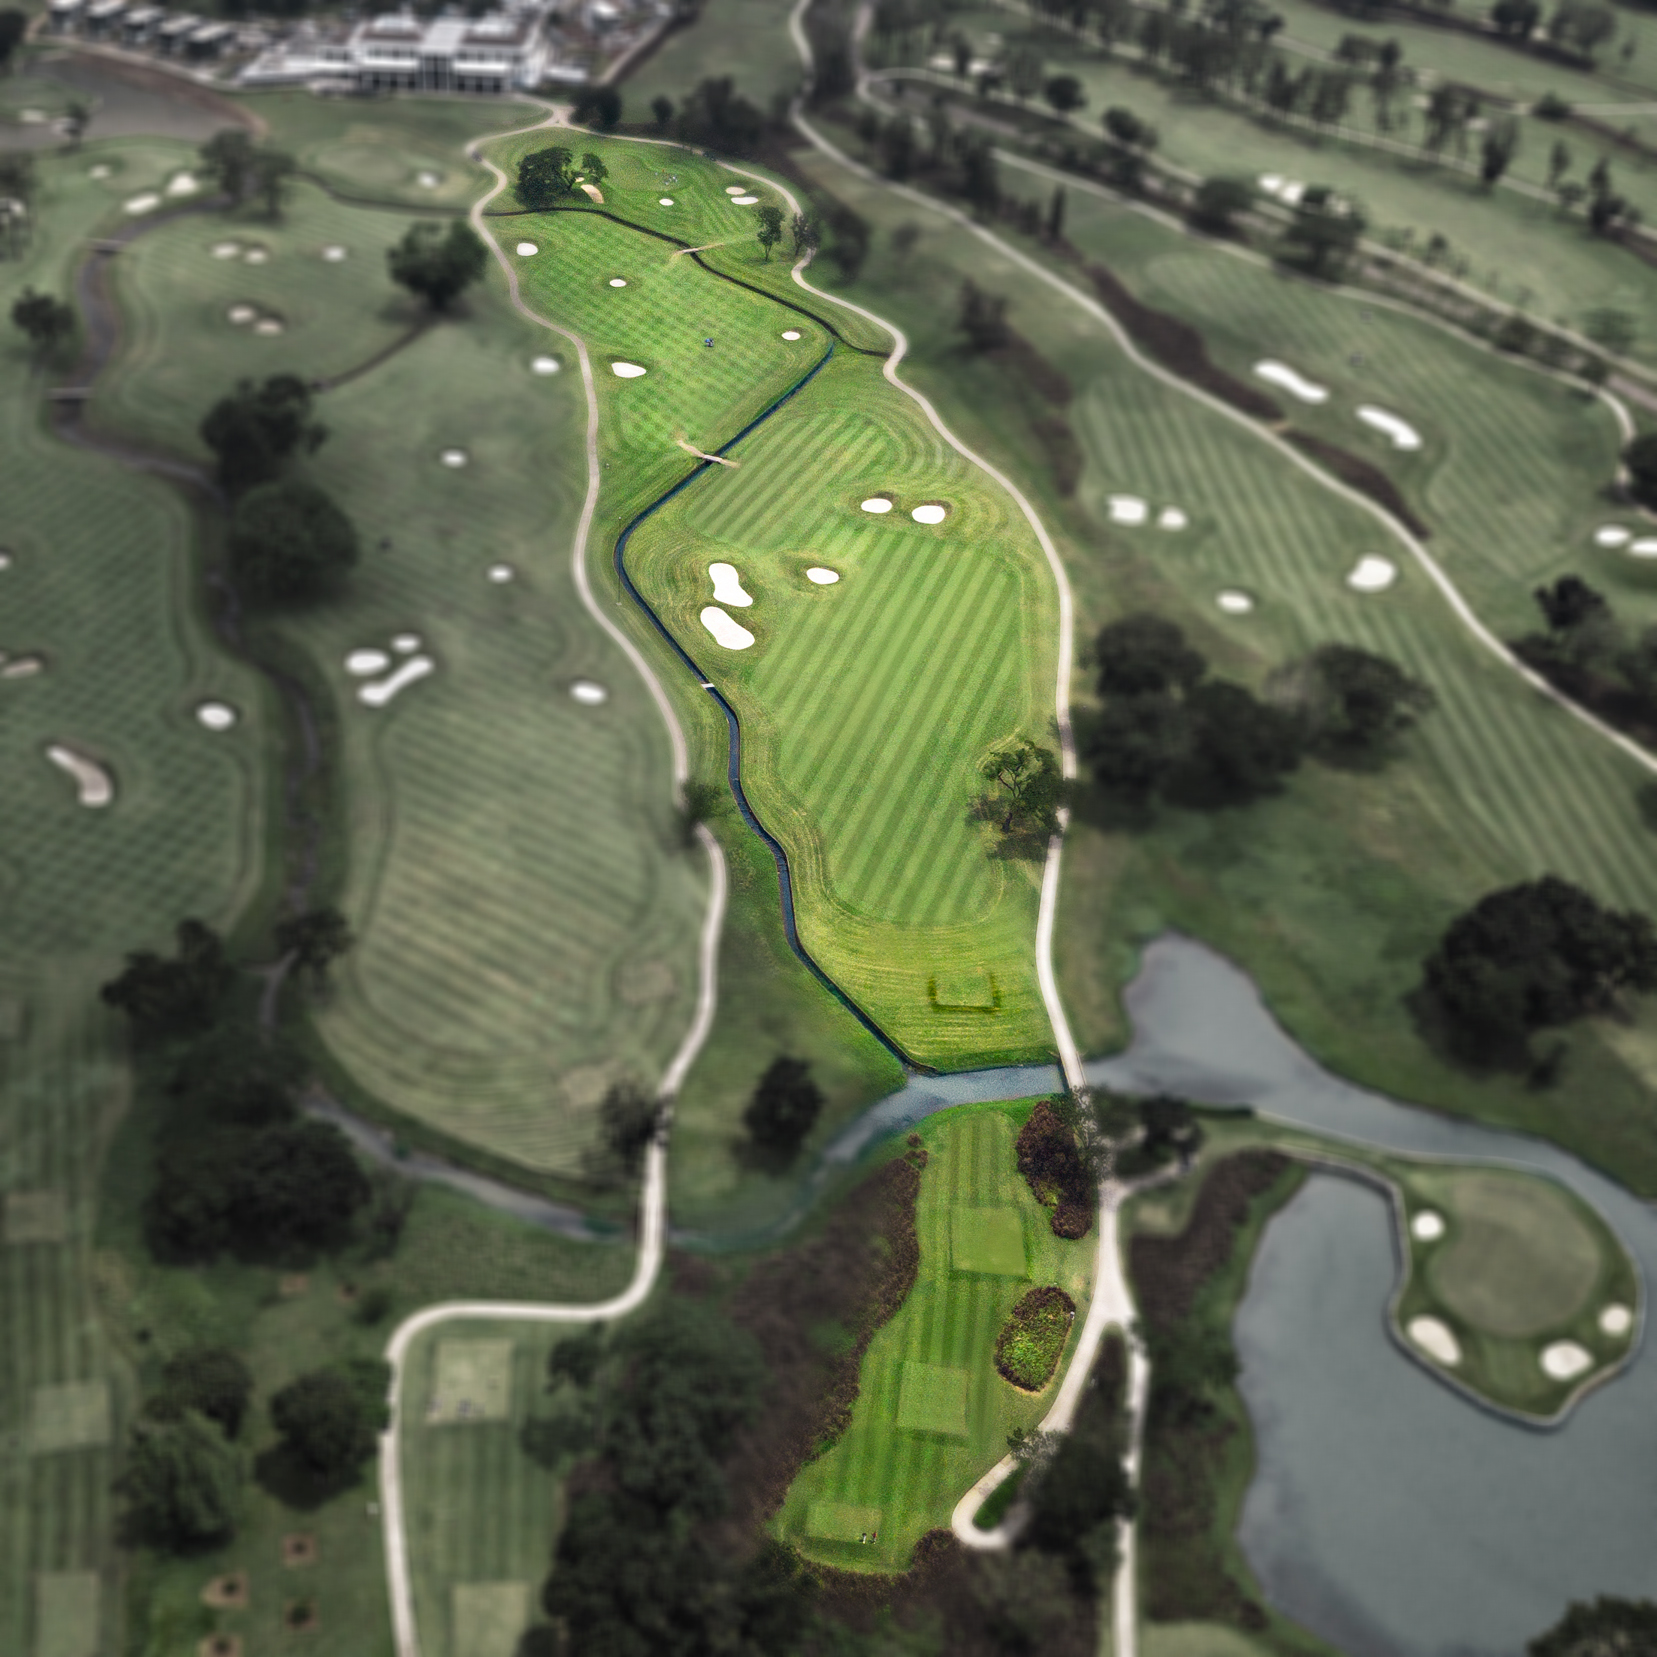
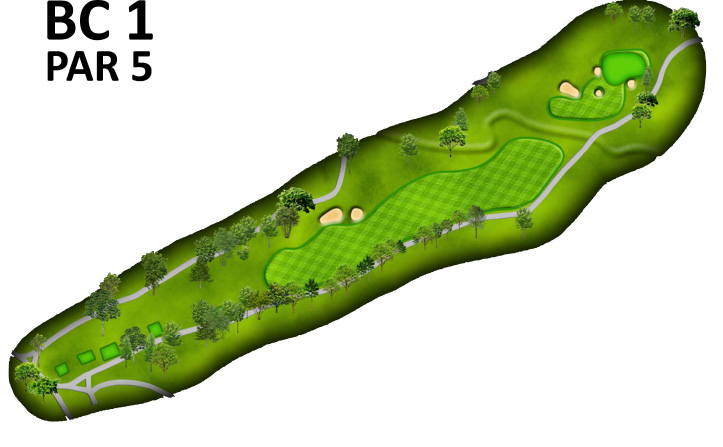
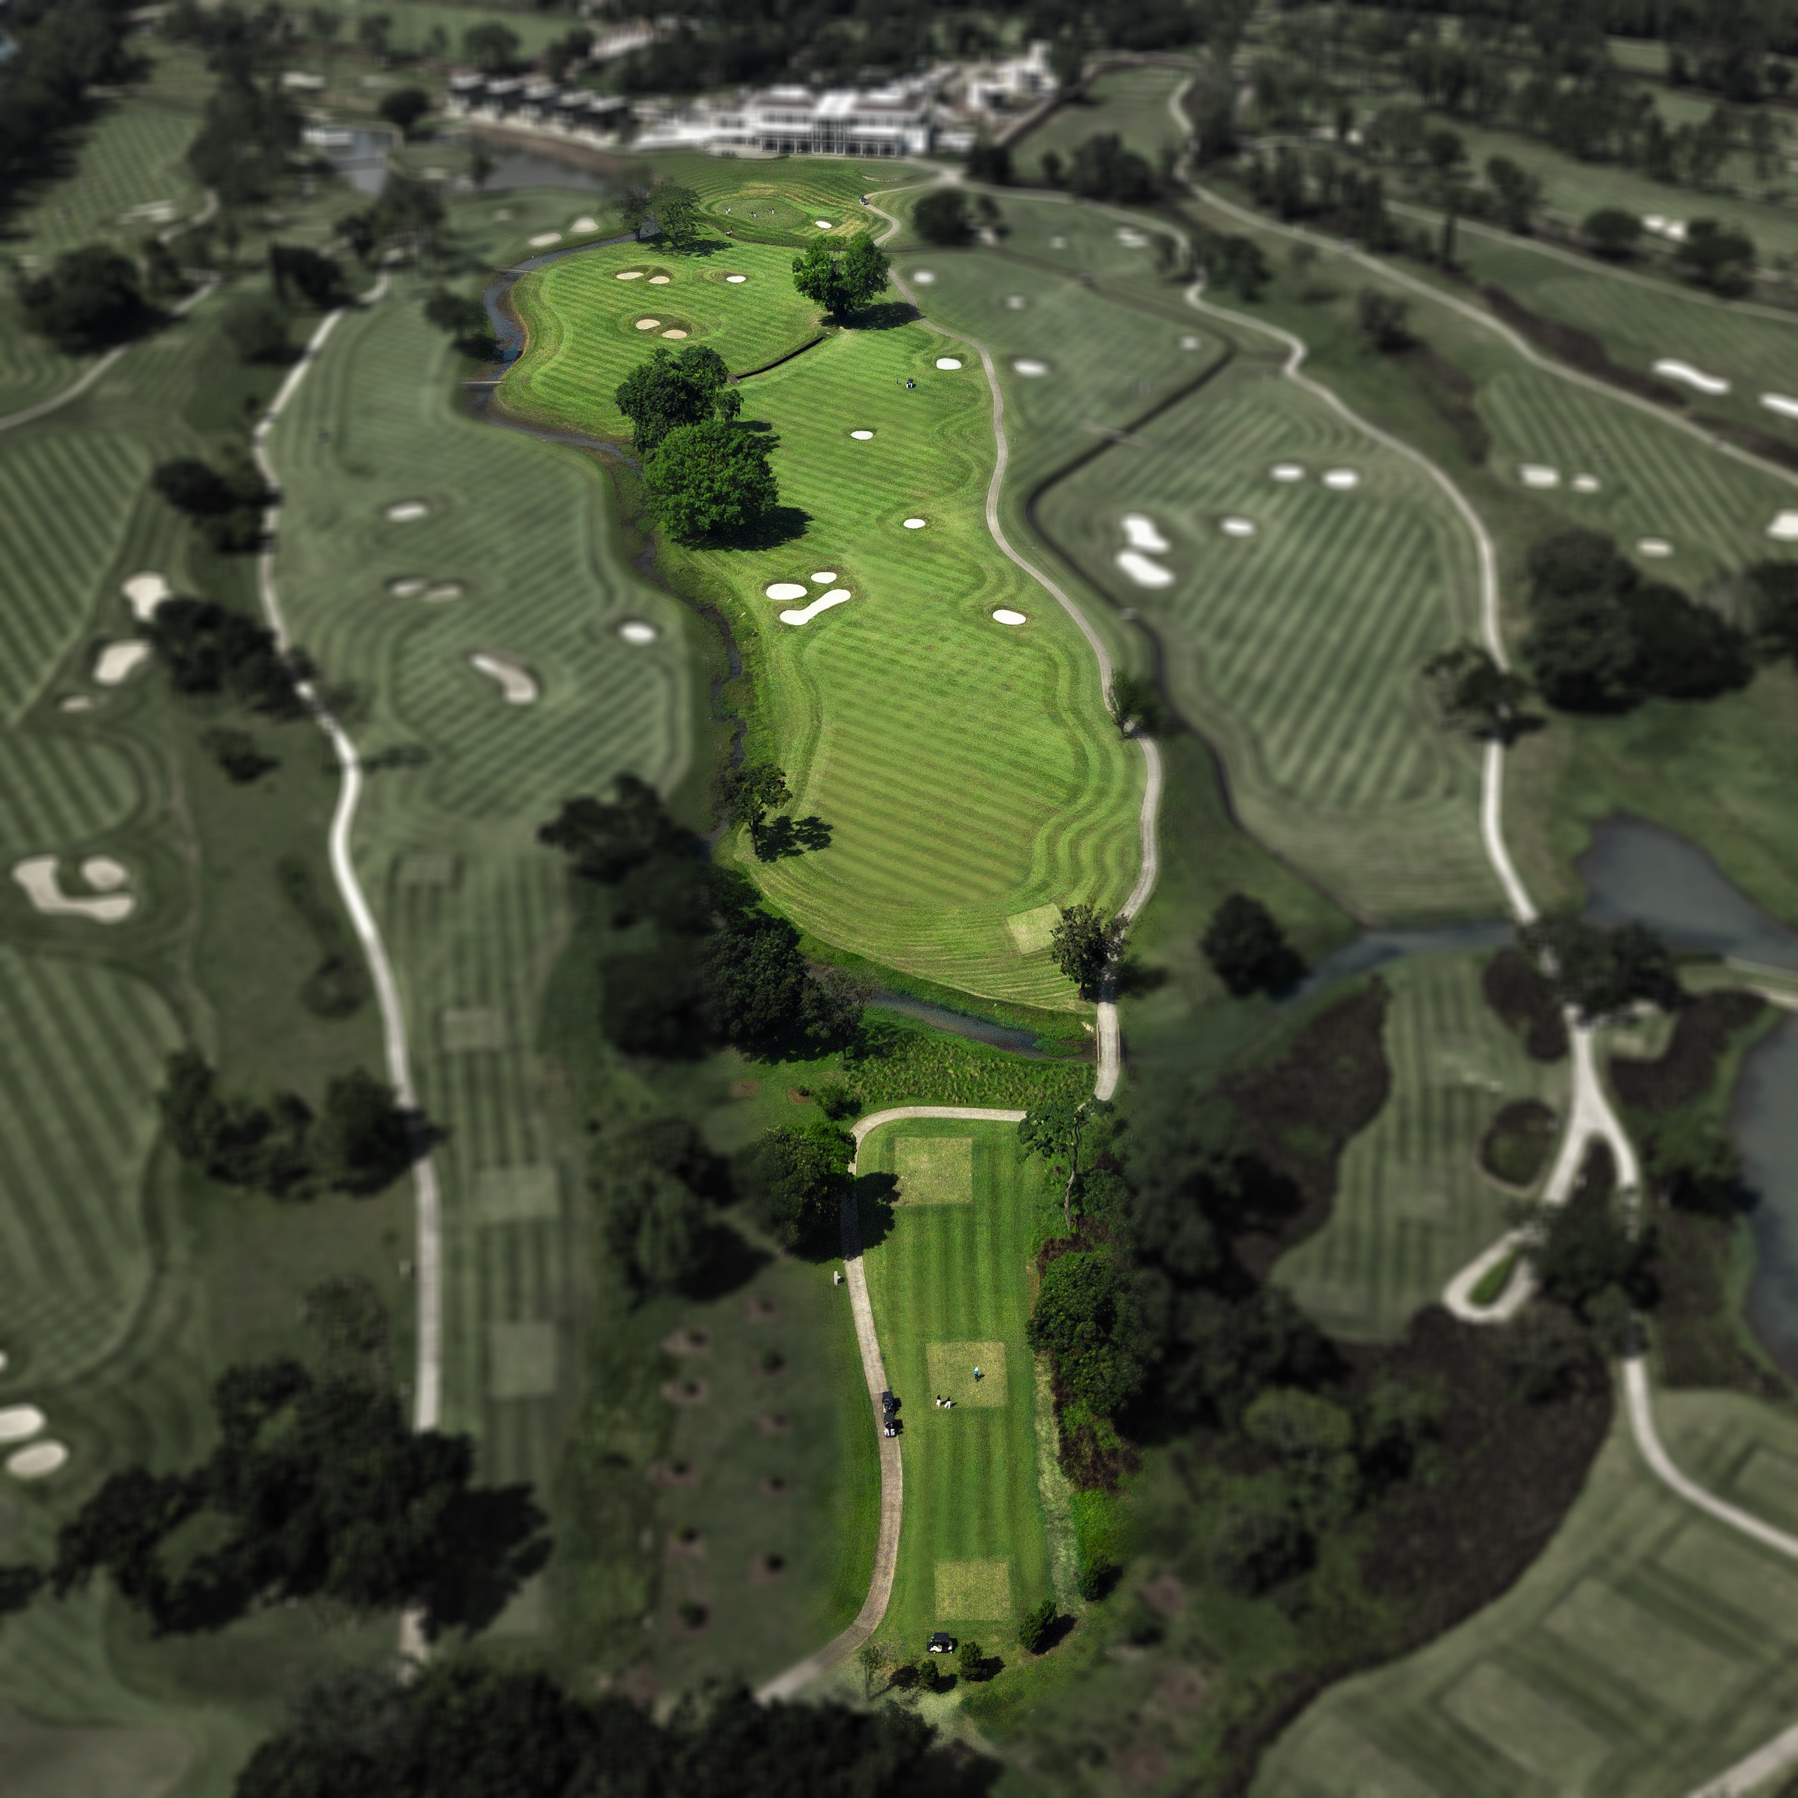
Green Course 1
-
This gentle uphill starting hole is framed by large, heritage trees. A conservative tee shot will favor the left side of the fairway. Longer tee shots will bring fairway bunkers and a deep, meandering, grassy hollow into play. Do not come up short on the uphill approach shot to this deep and receptive green.
(Show More)
-
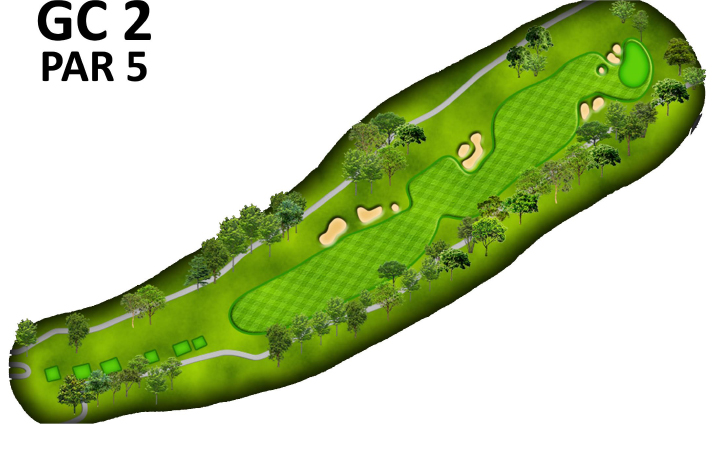
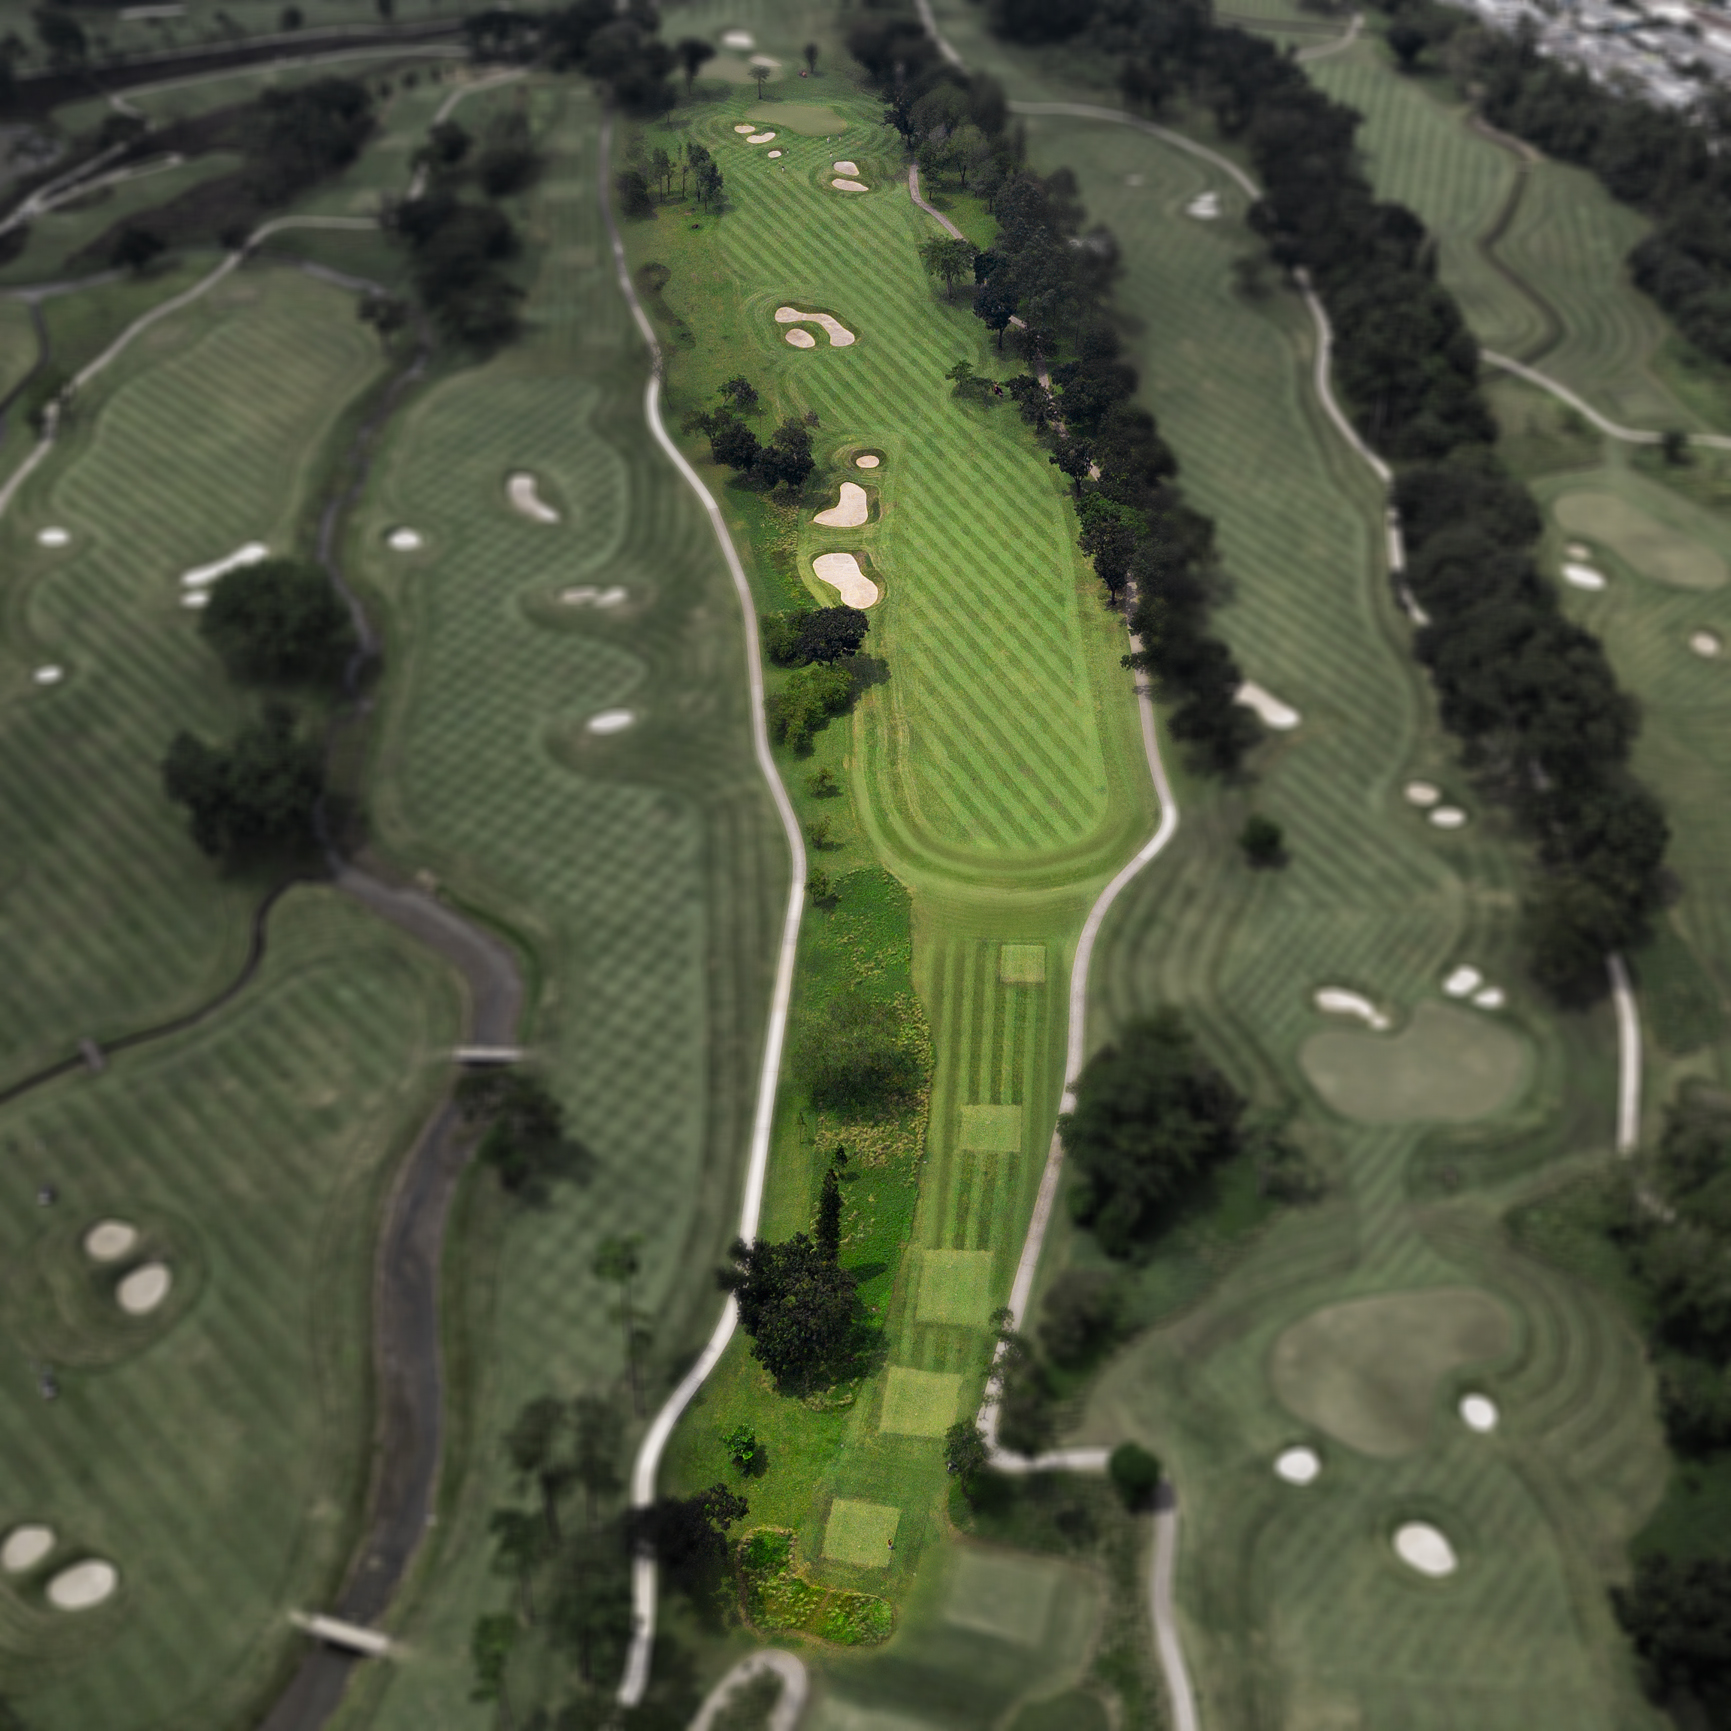
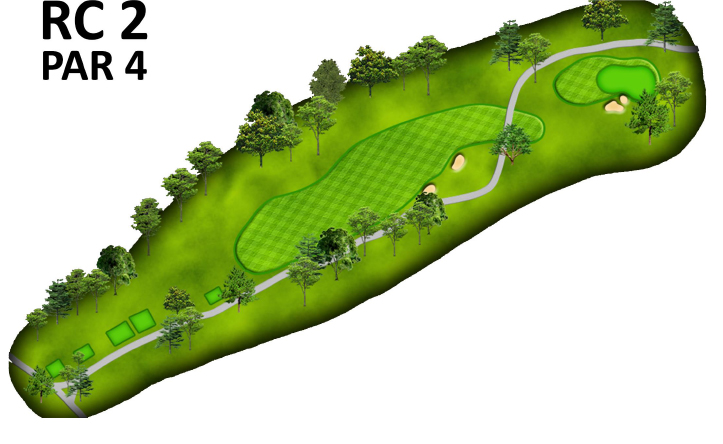
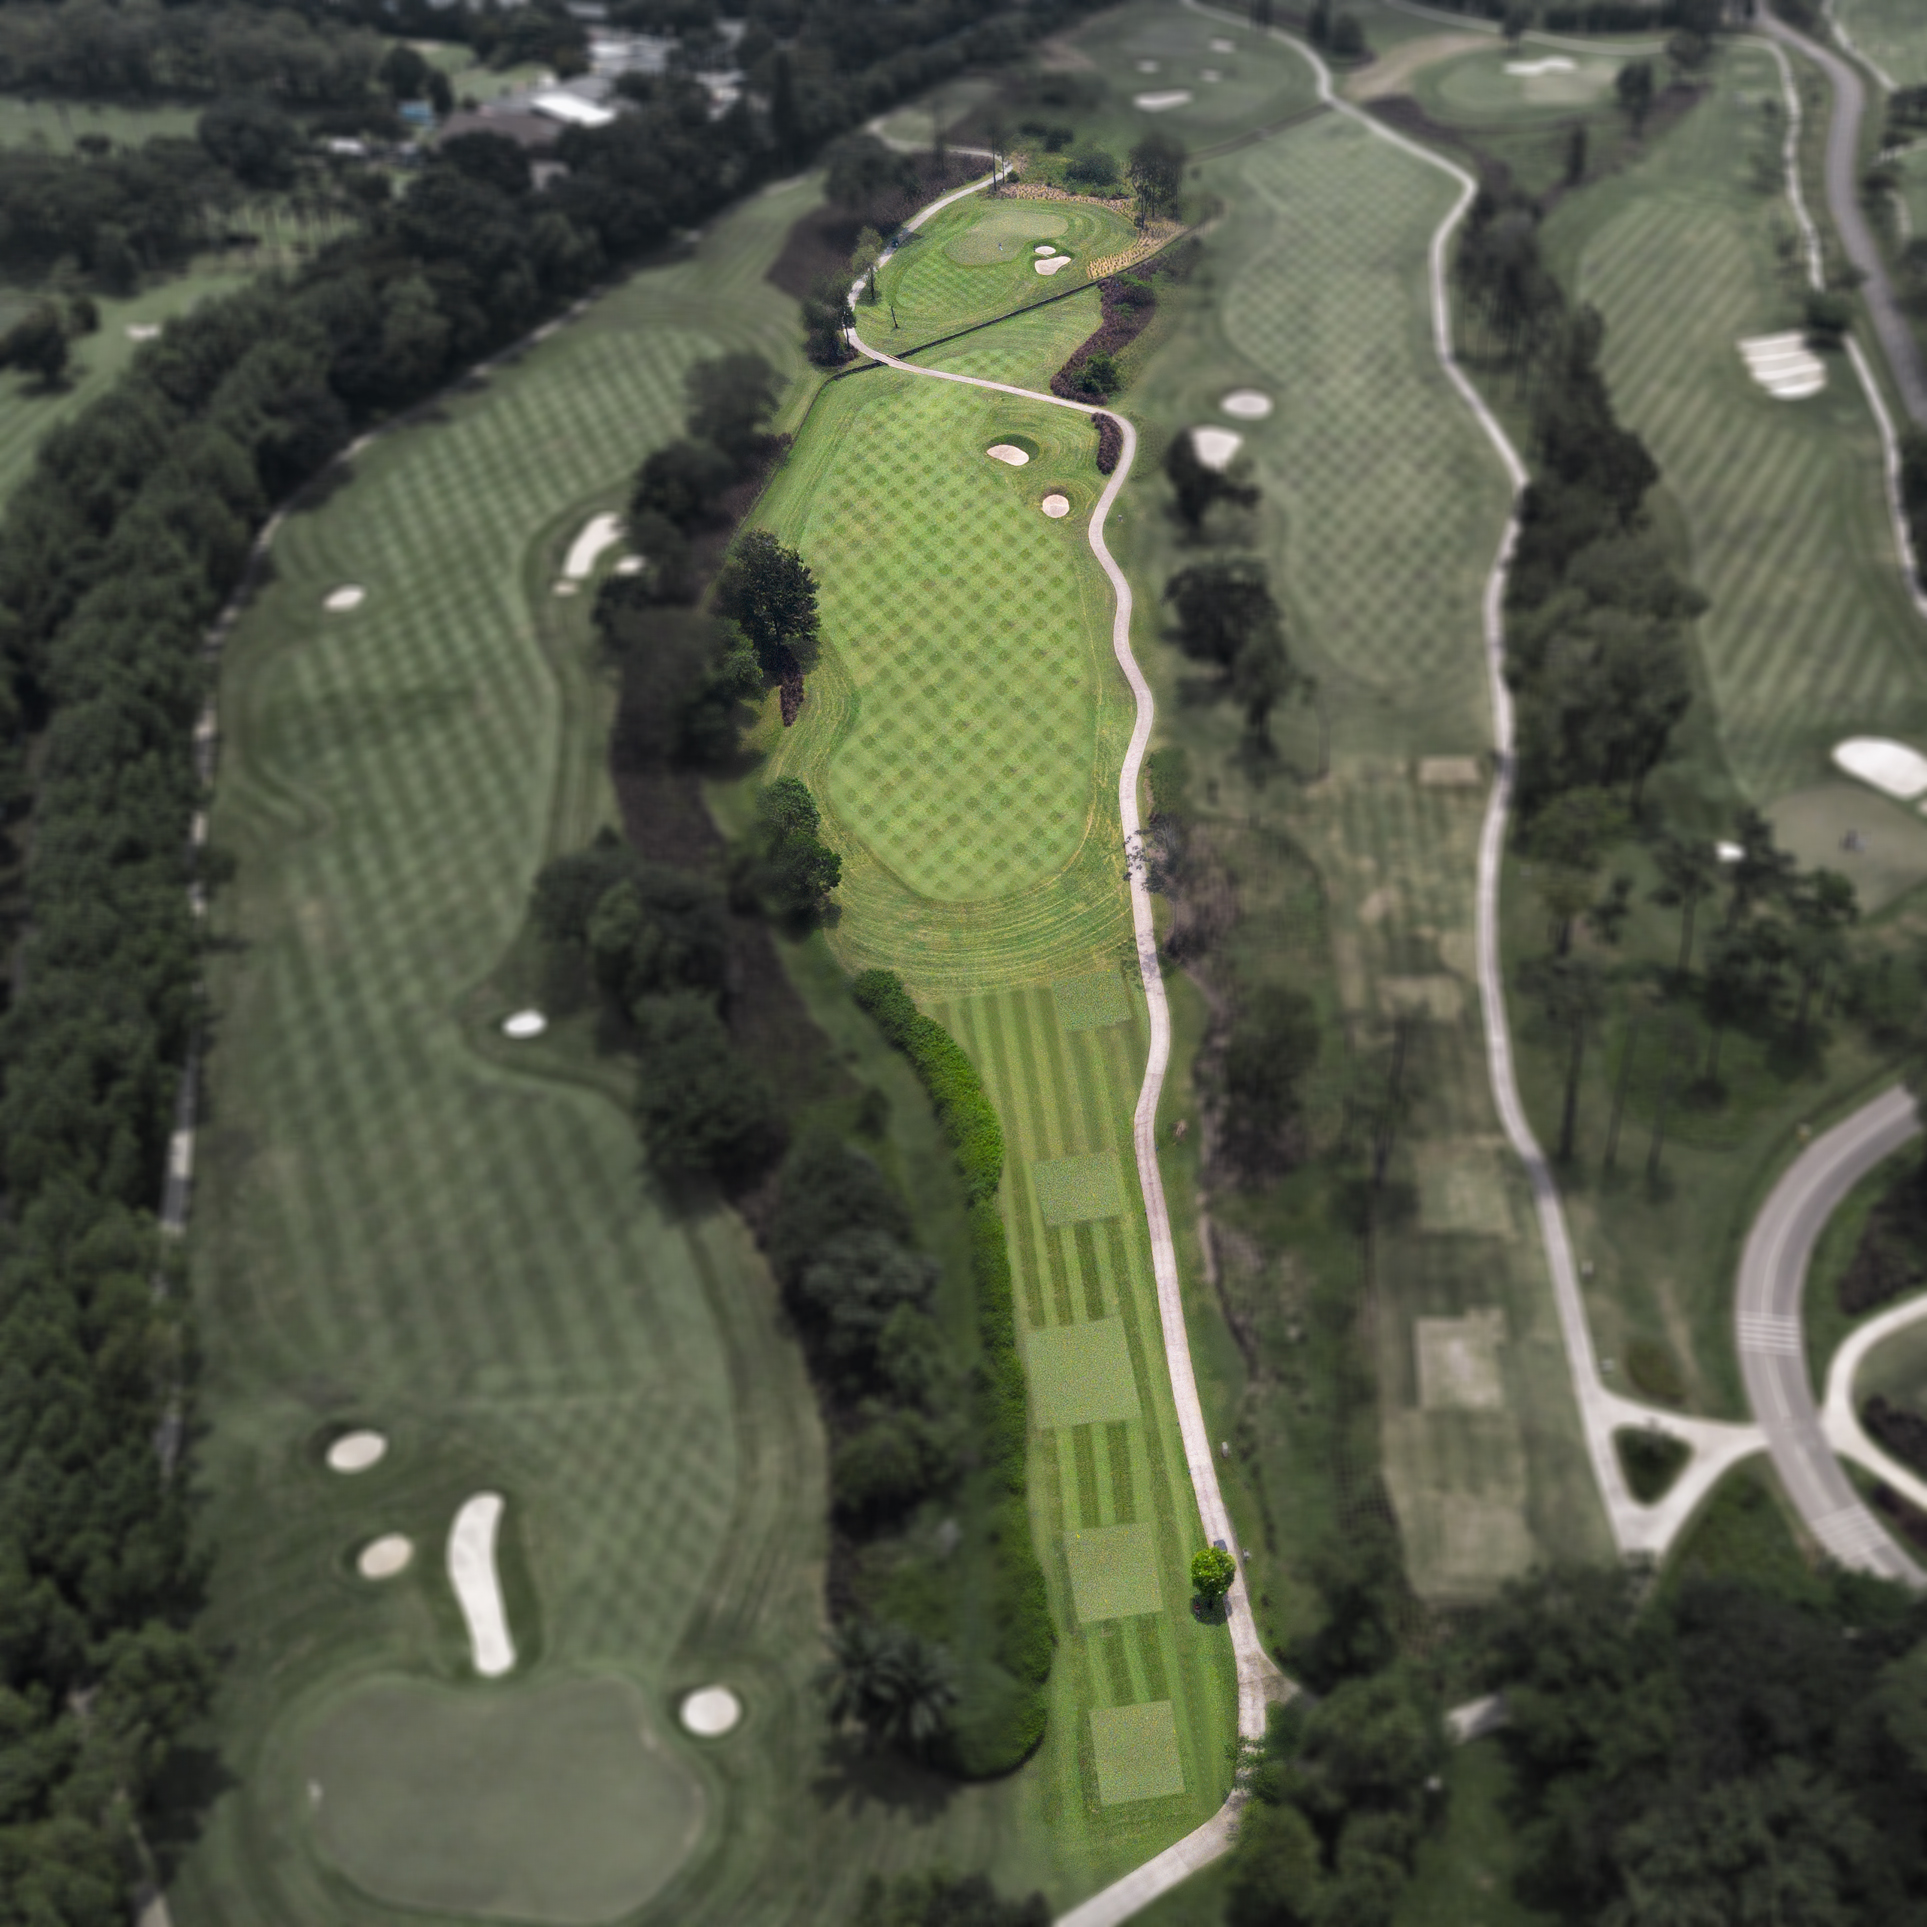
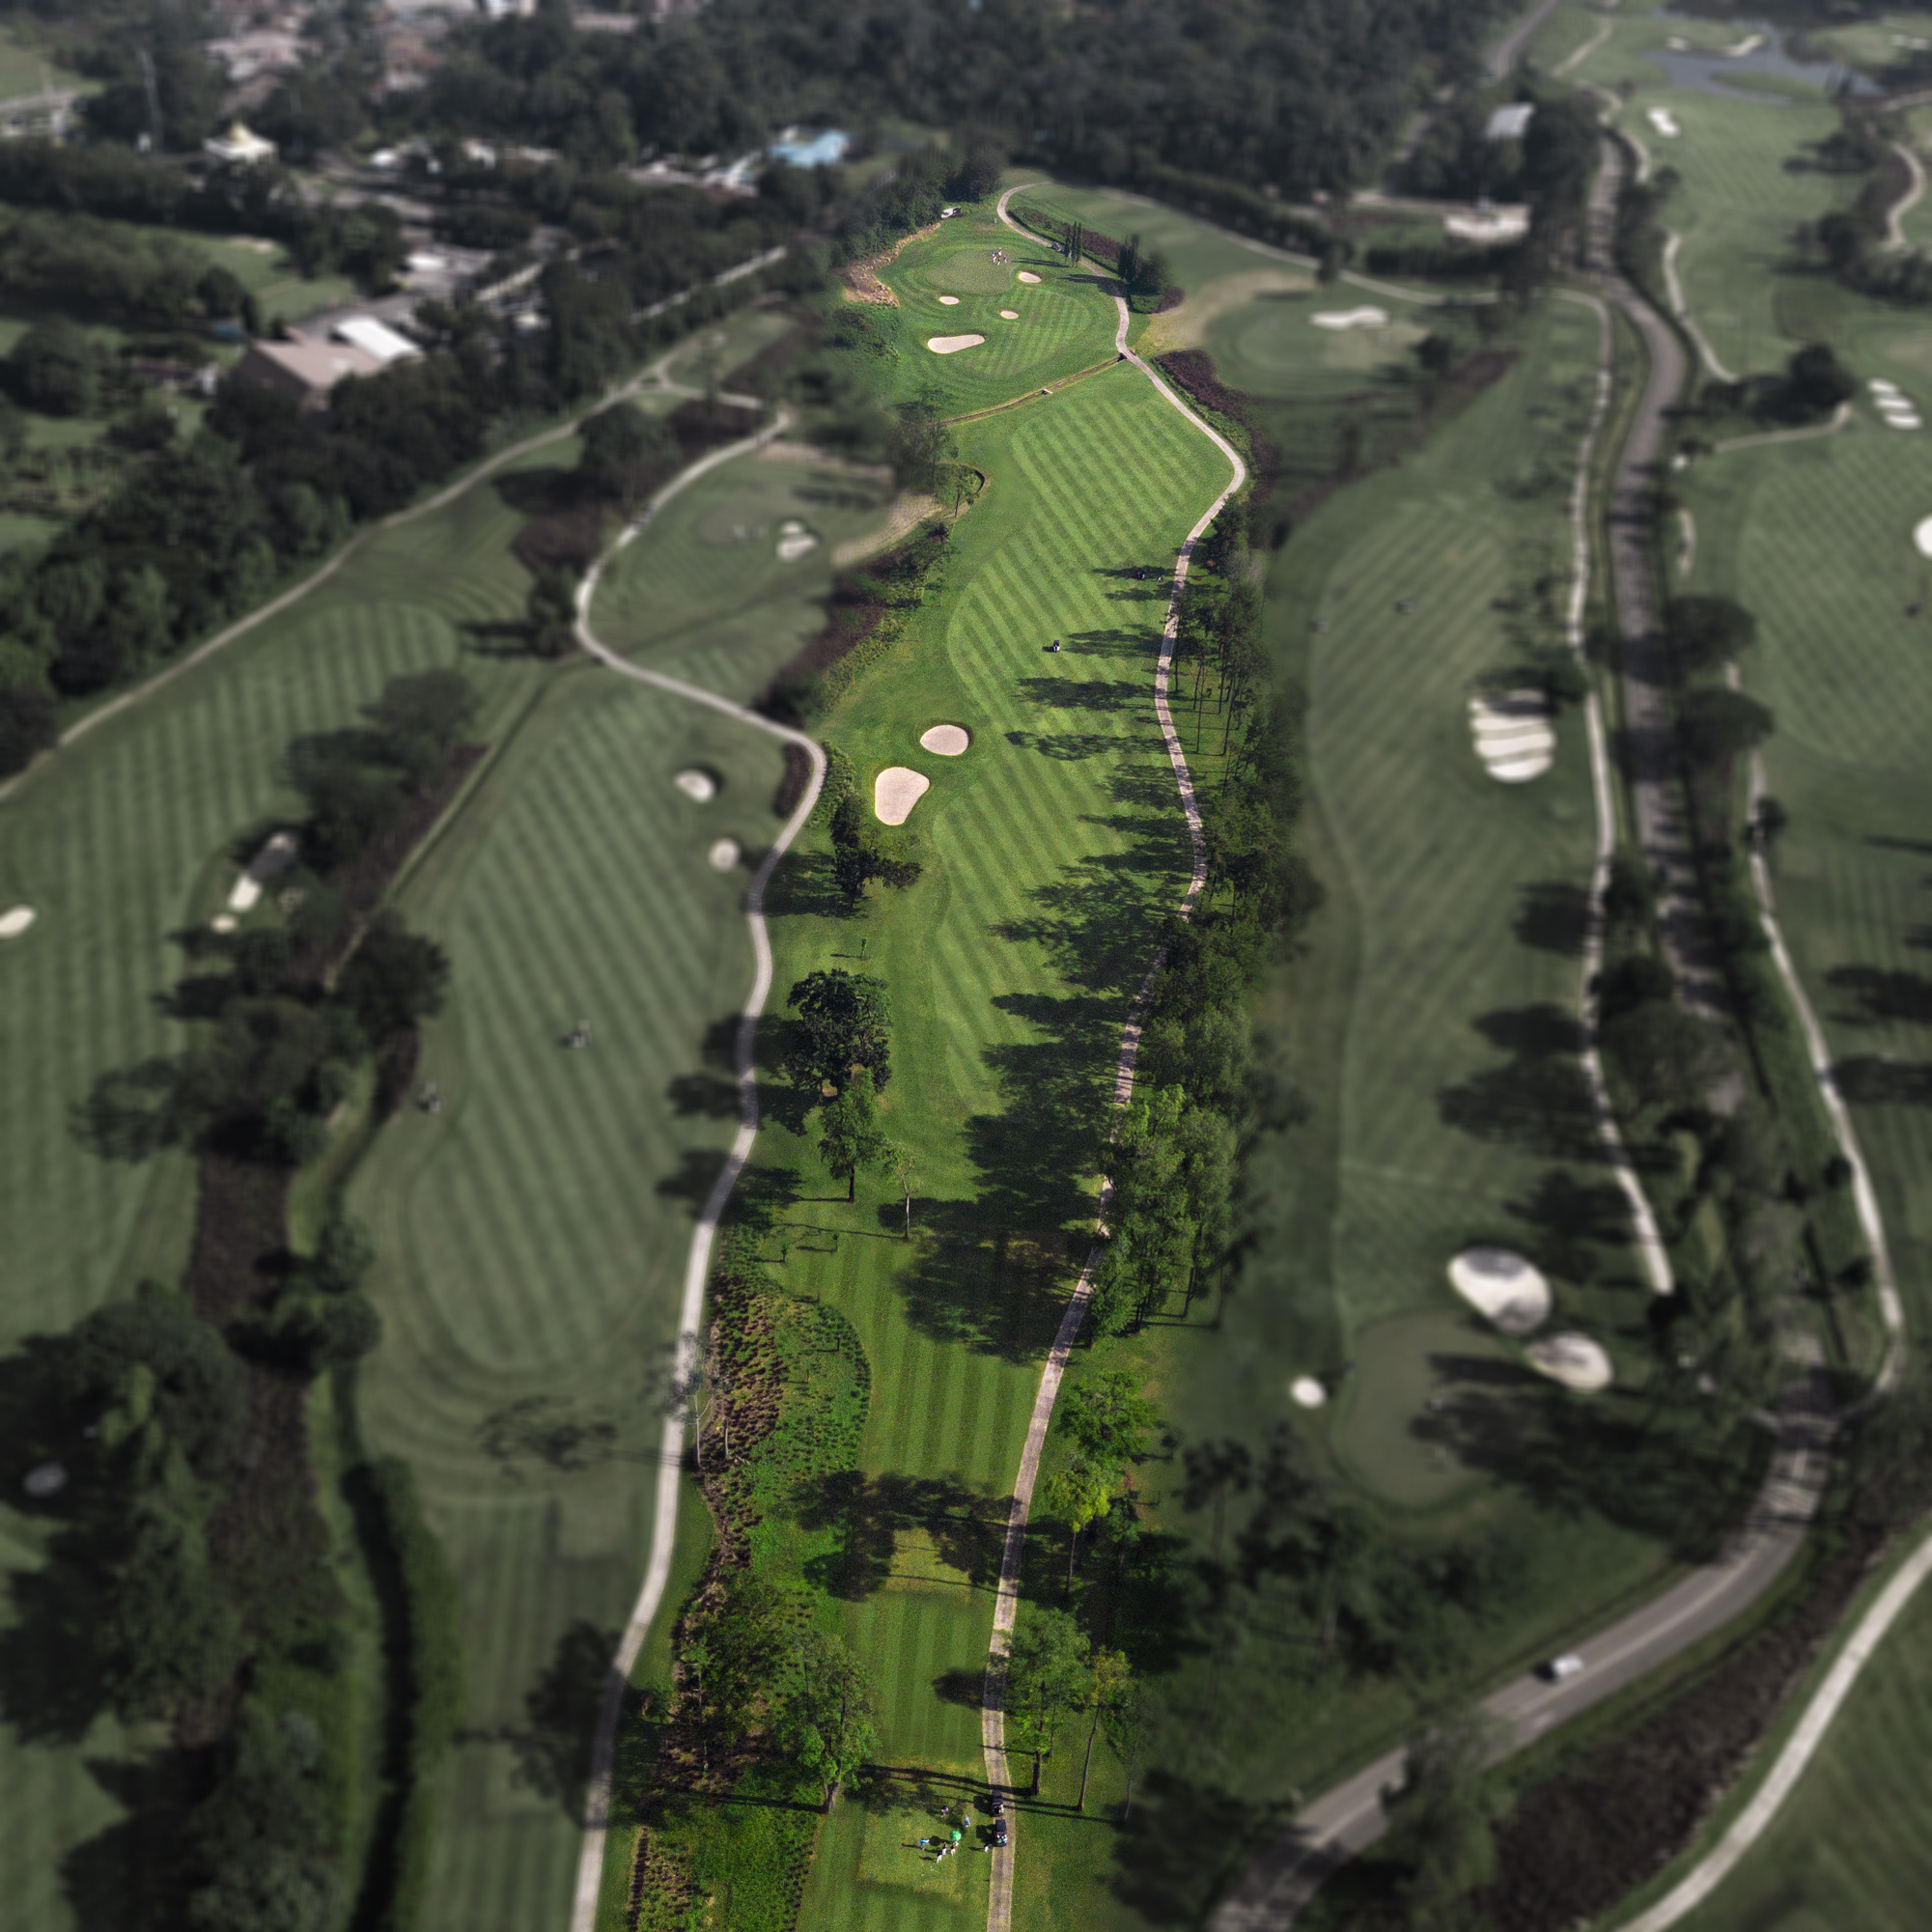
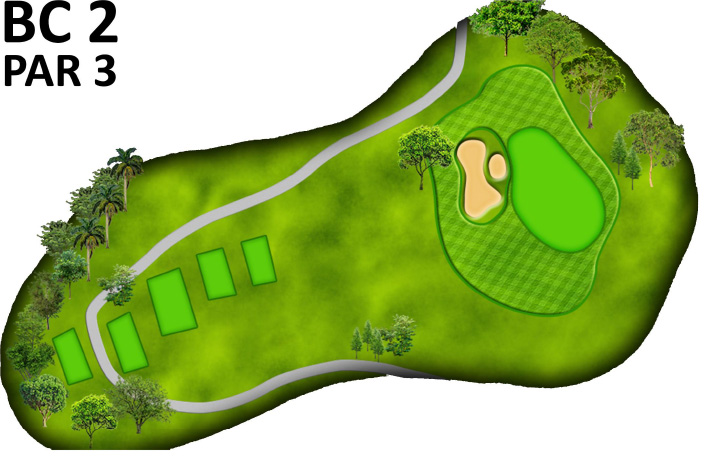
Green Course 2
-
Reachable in two shots, this short par 5 plays slightly uphill. Play to the right side of the fairway will reduce sight-lines, but will also avoid the deep, penal bunkers that define the left side of the fairway. The green provides a small target. It is protected by stacked bunkers and a severe collection area behind.
(Show More)
-
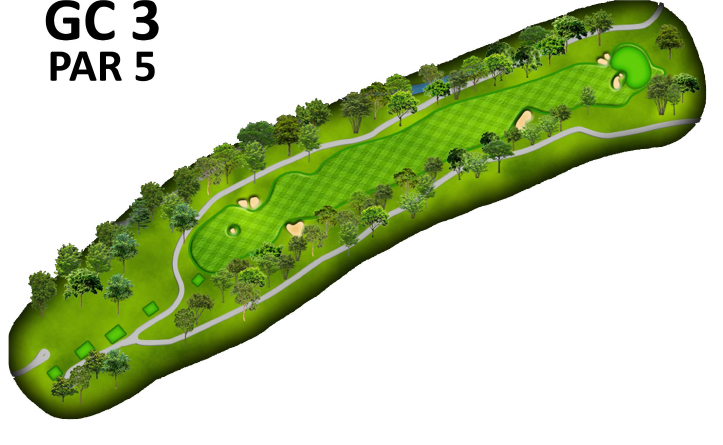
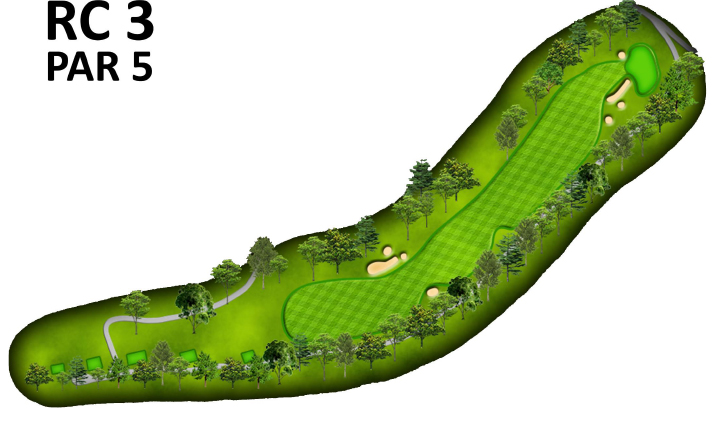
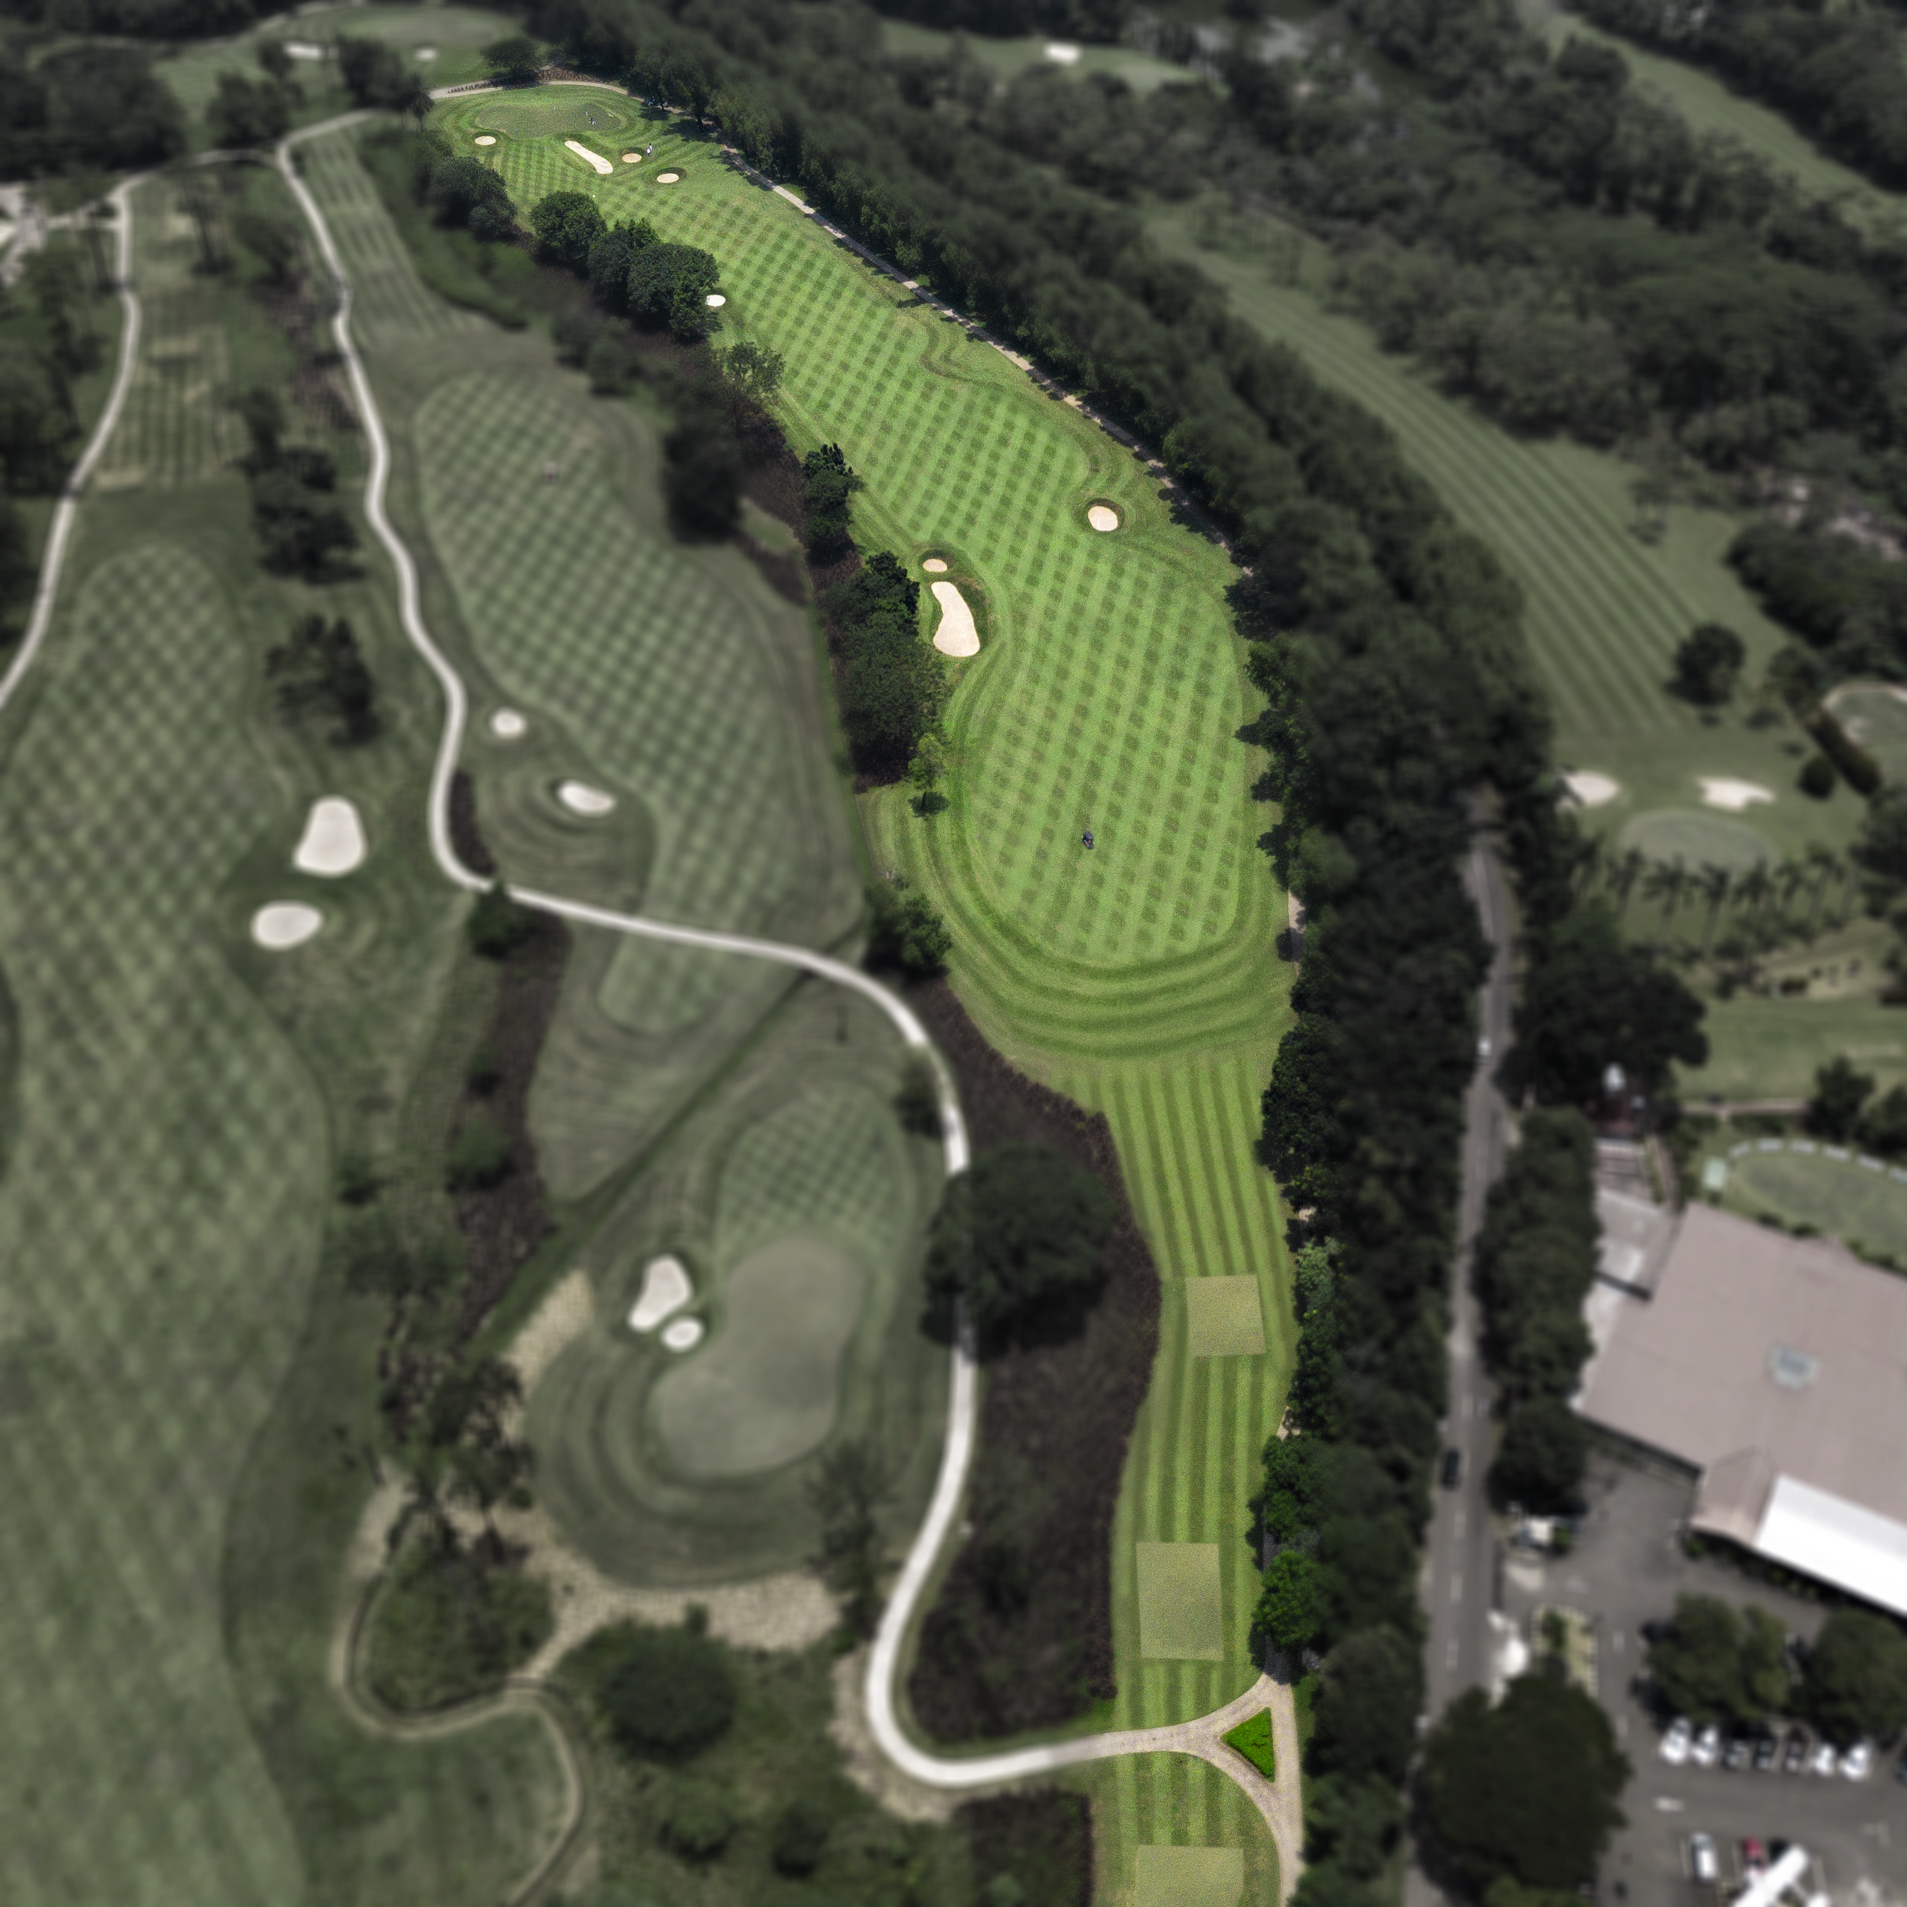
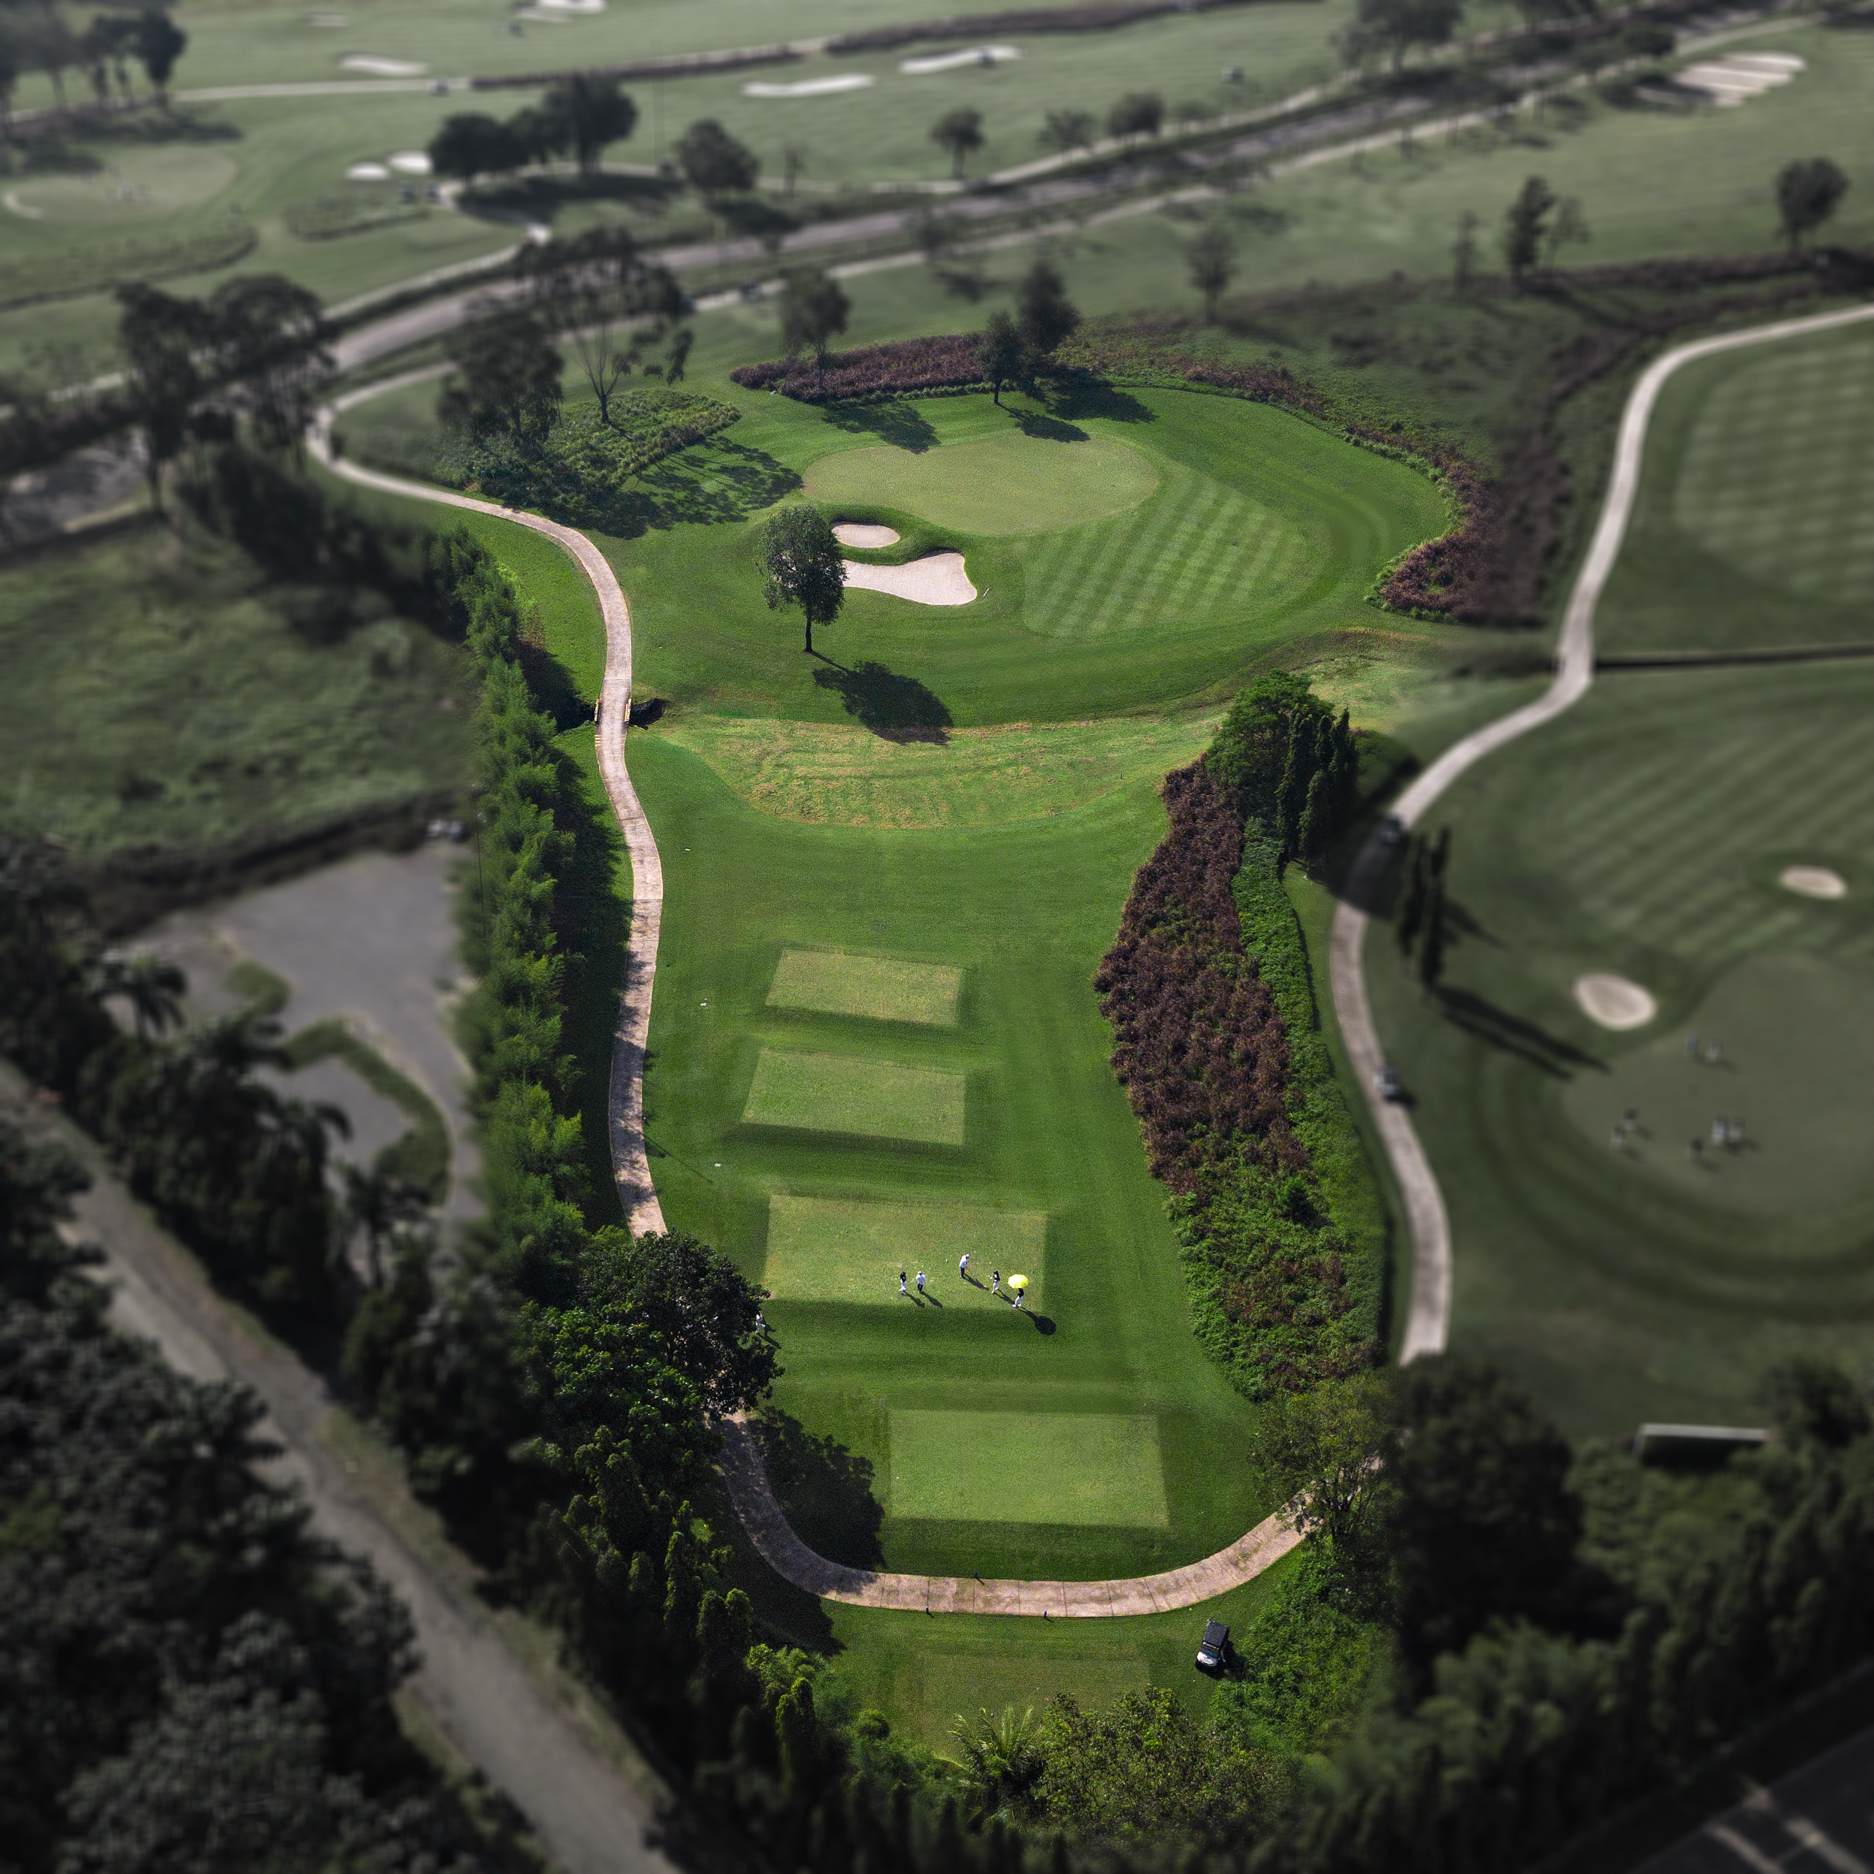
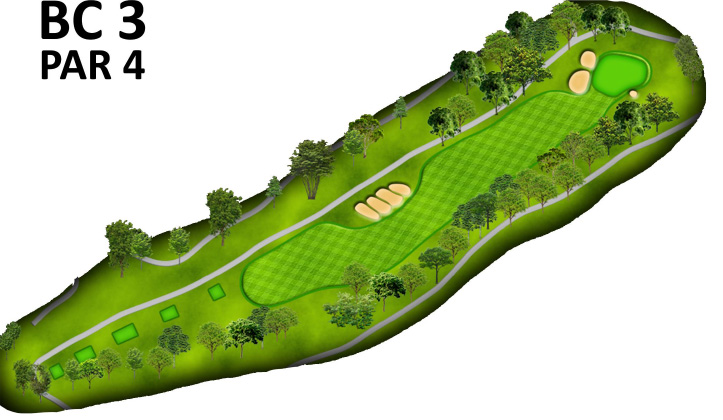
Green Course 3
-
At 600 yards this very challenging par 5 will play as a true three shot hole. The tee shot must at all cost avoid the small pot bunker positioned in the fairway center. A big tee shot will provide the opportunity to position the approach in the low gathering area to the right of the elevated green. The second shot for more conservative play will require a lay-up to avoid the fairway cross-bunkers, leaving a short-mid iron approach. Beware of pins positioned to the right side of this green.
(Show More)
-
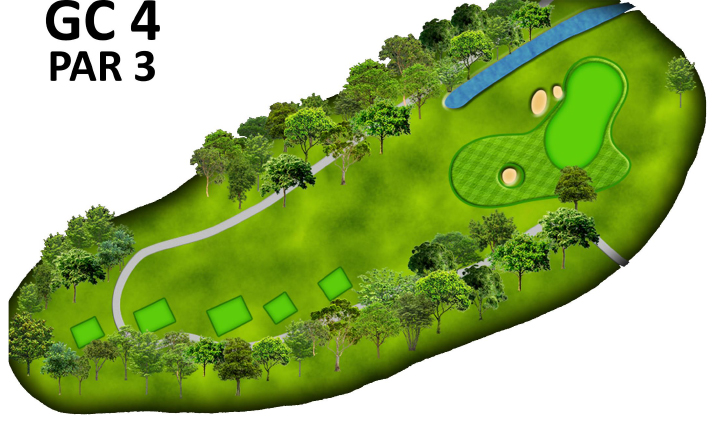
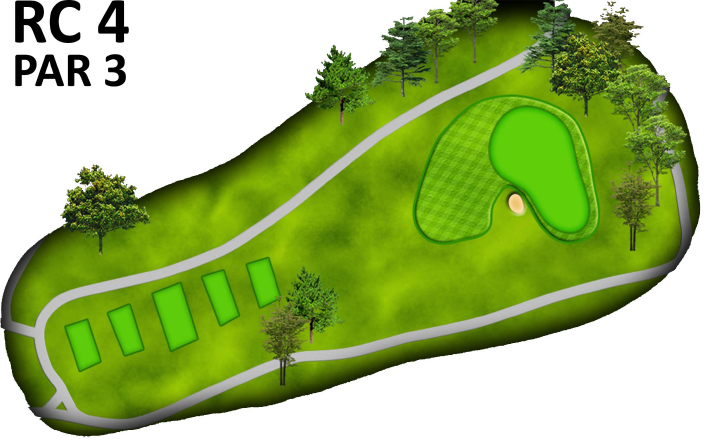
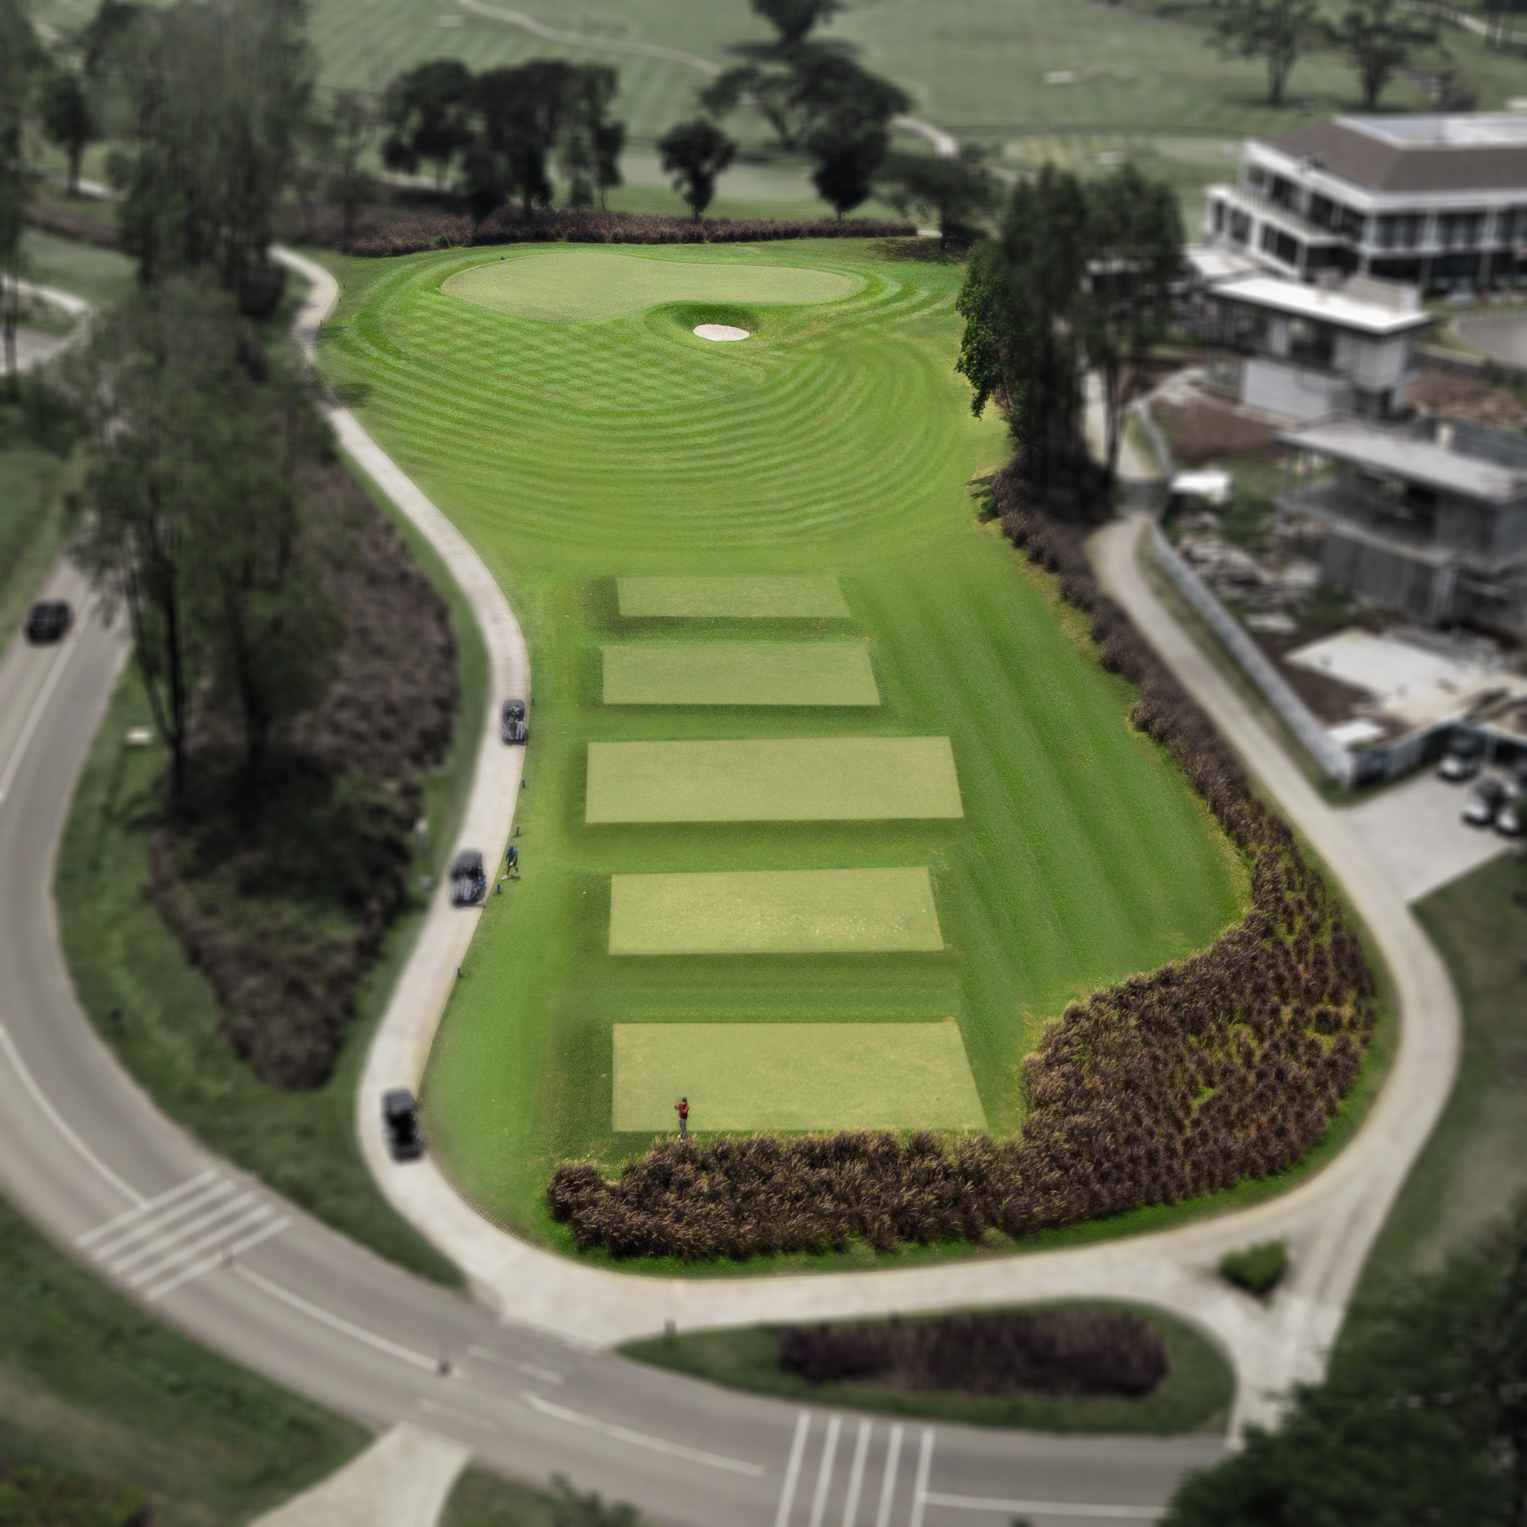
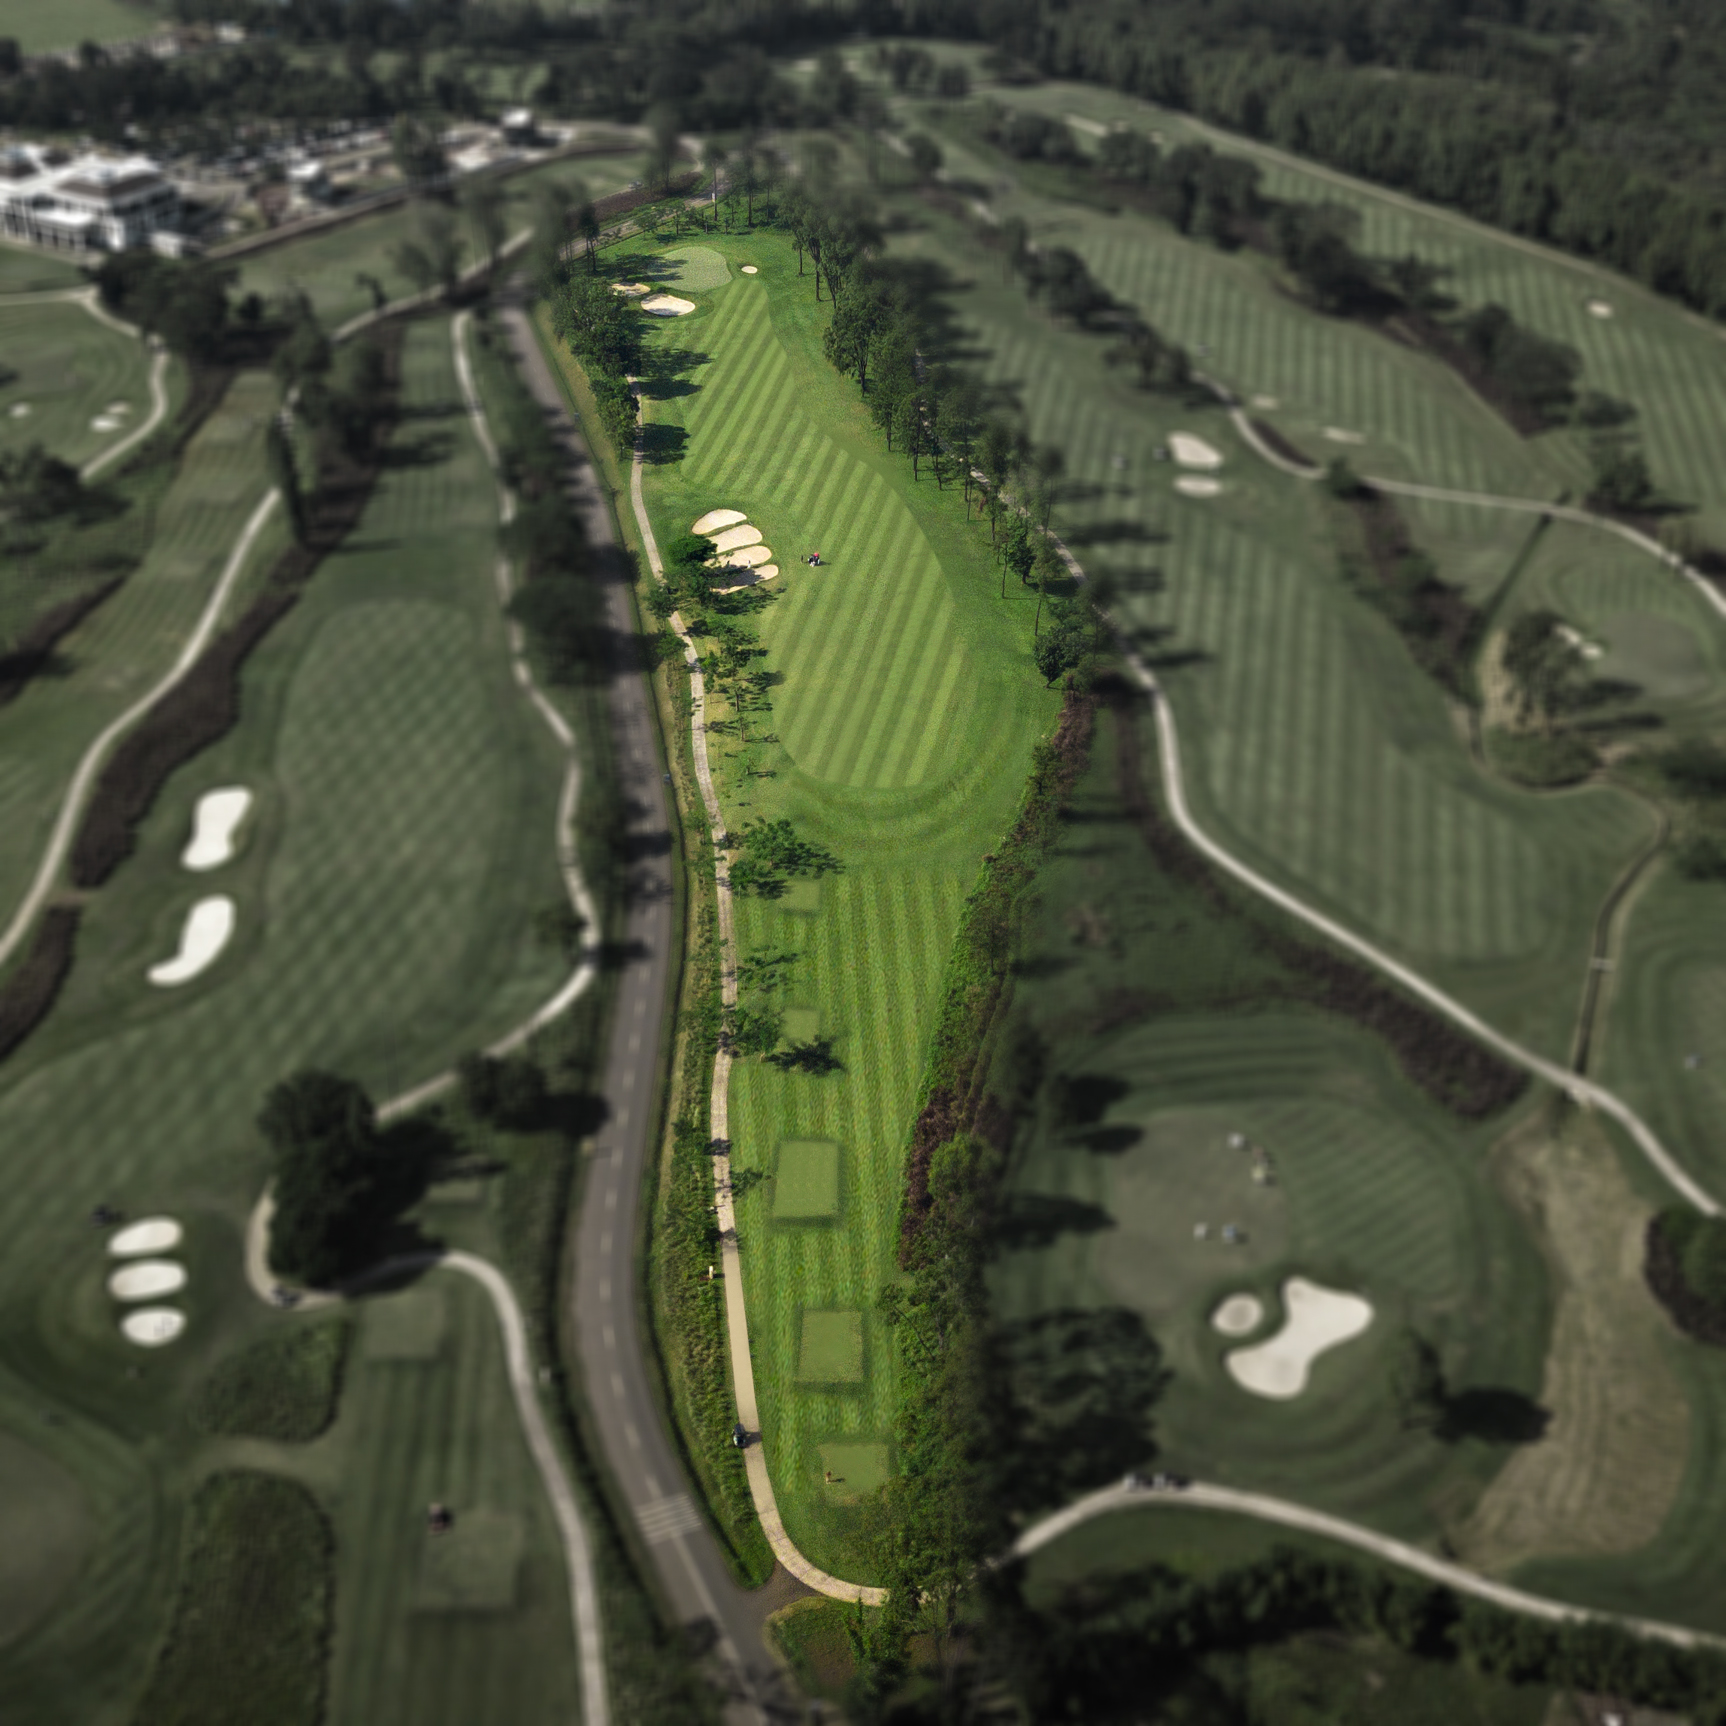
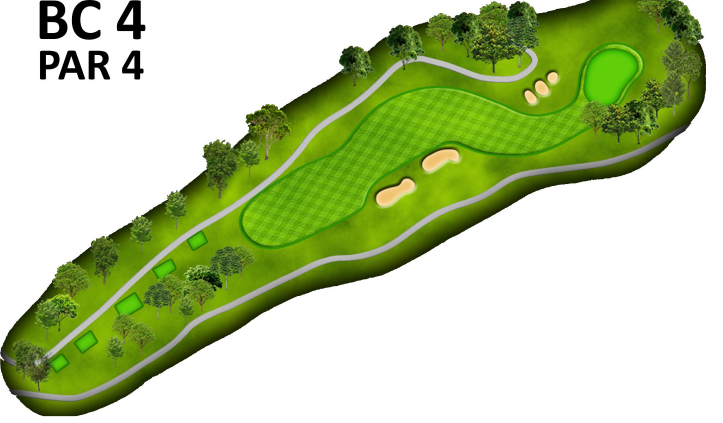
Green Course 4
-
This very long par 3 should not be missed to the left side. The narrow green is quite deep, with a three club difference from front to back. Under adverse conditions it might be best played as a two-shot hole. A lay-up to the short, right side of this green provides a receptive “up & down” approach that will take double-bogey out of play.
(Show More)
-
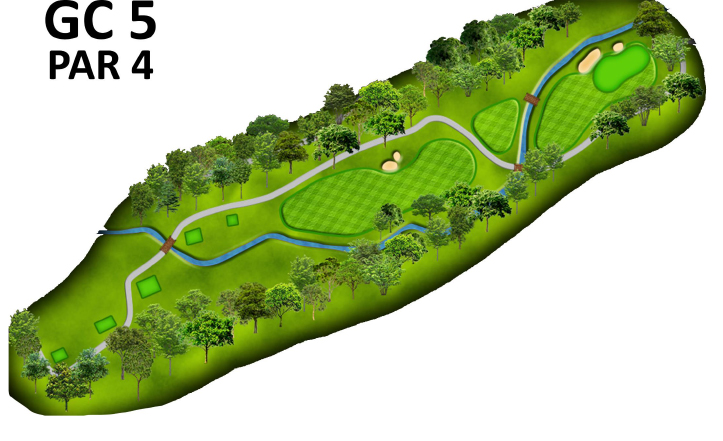
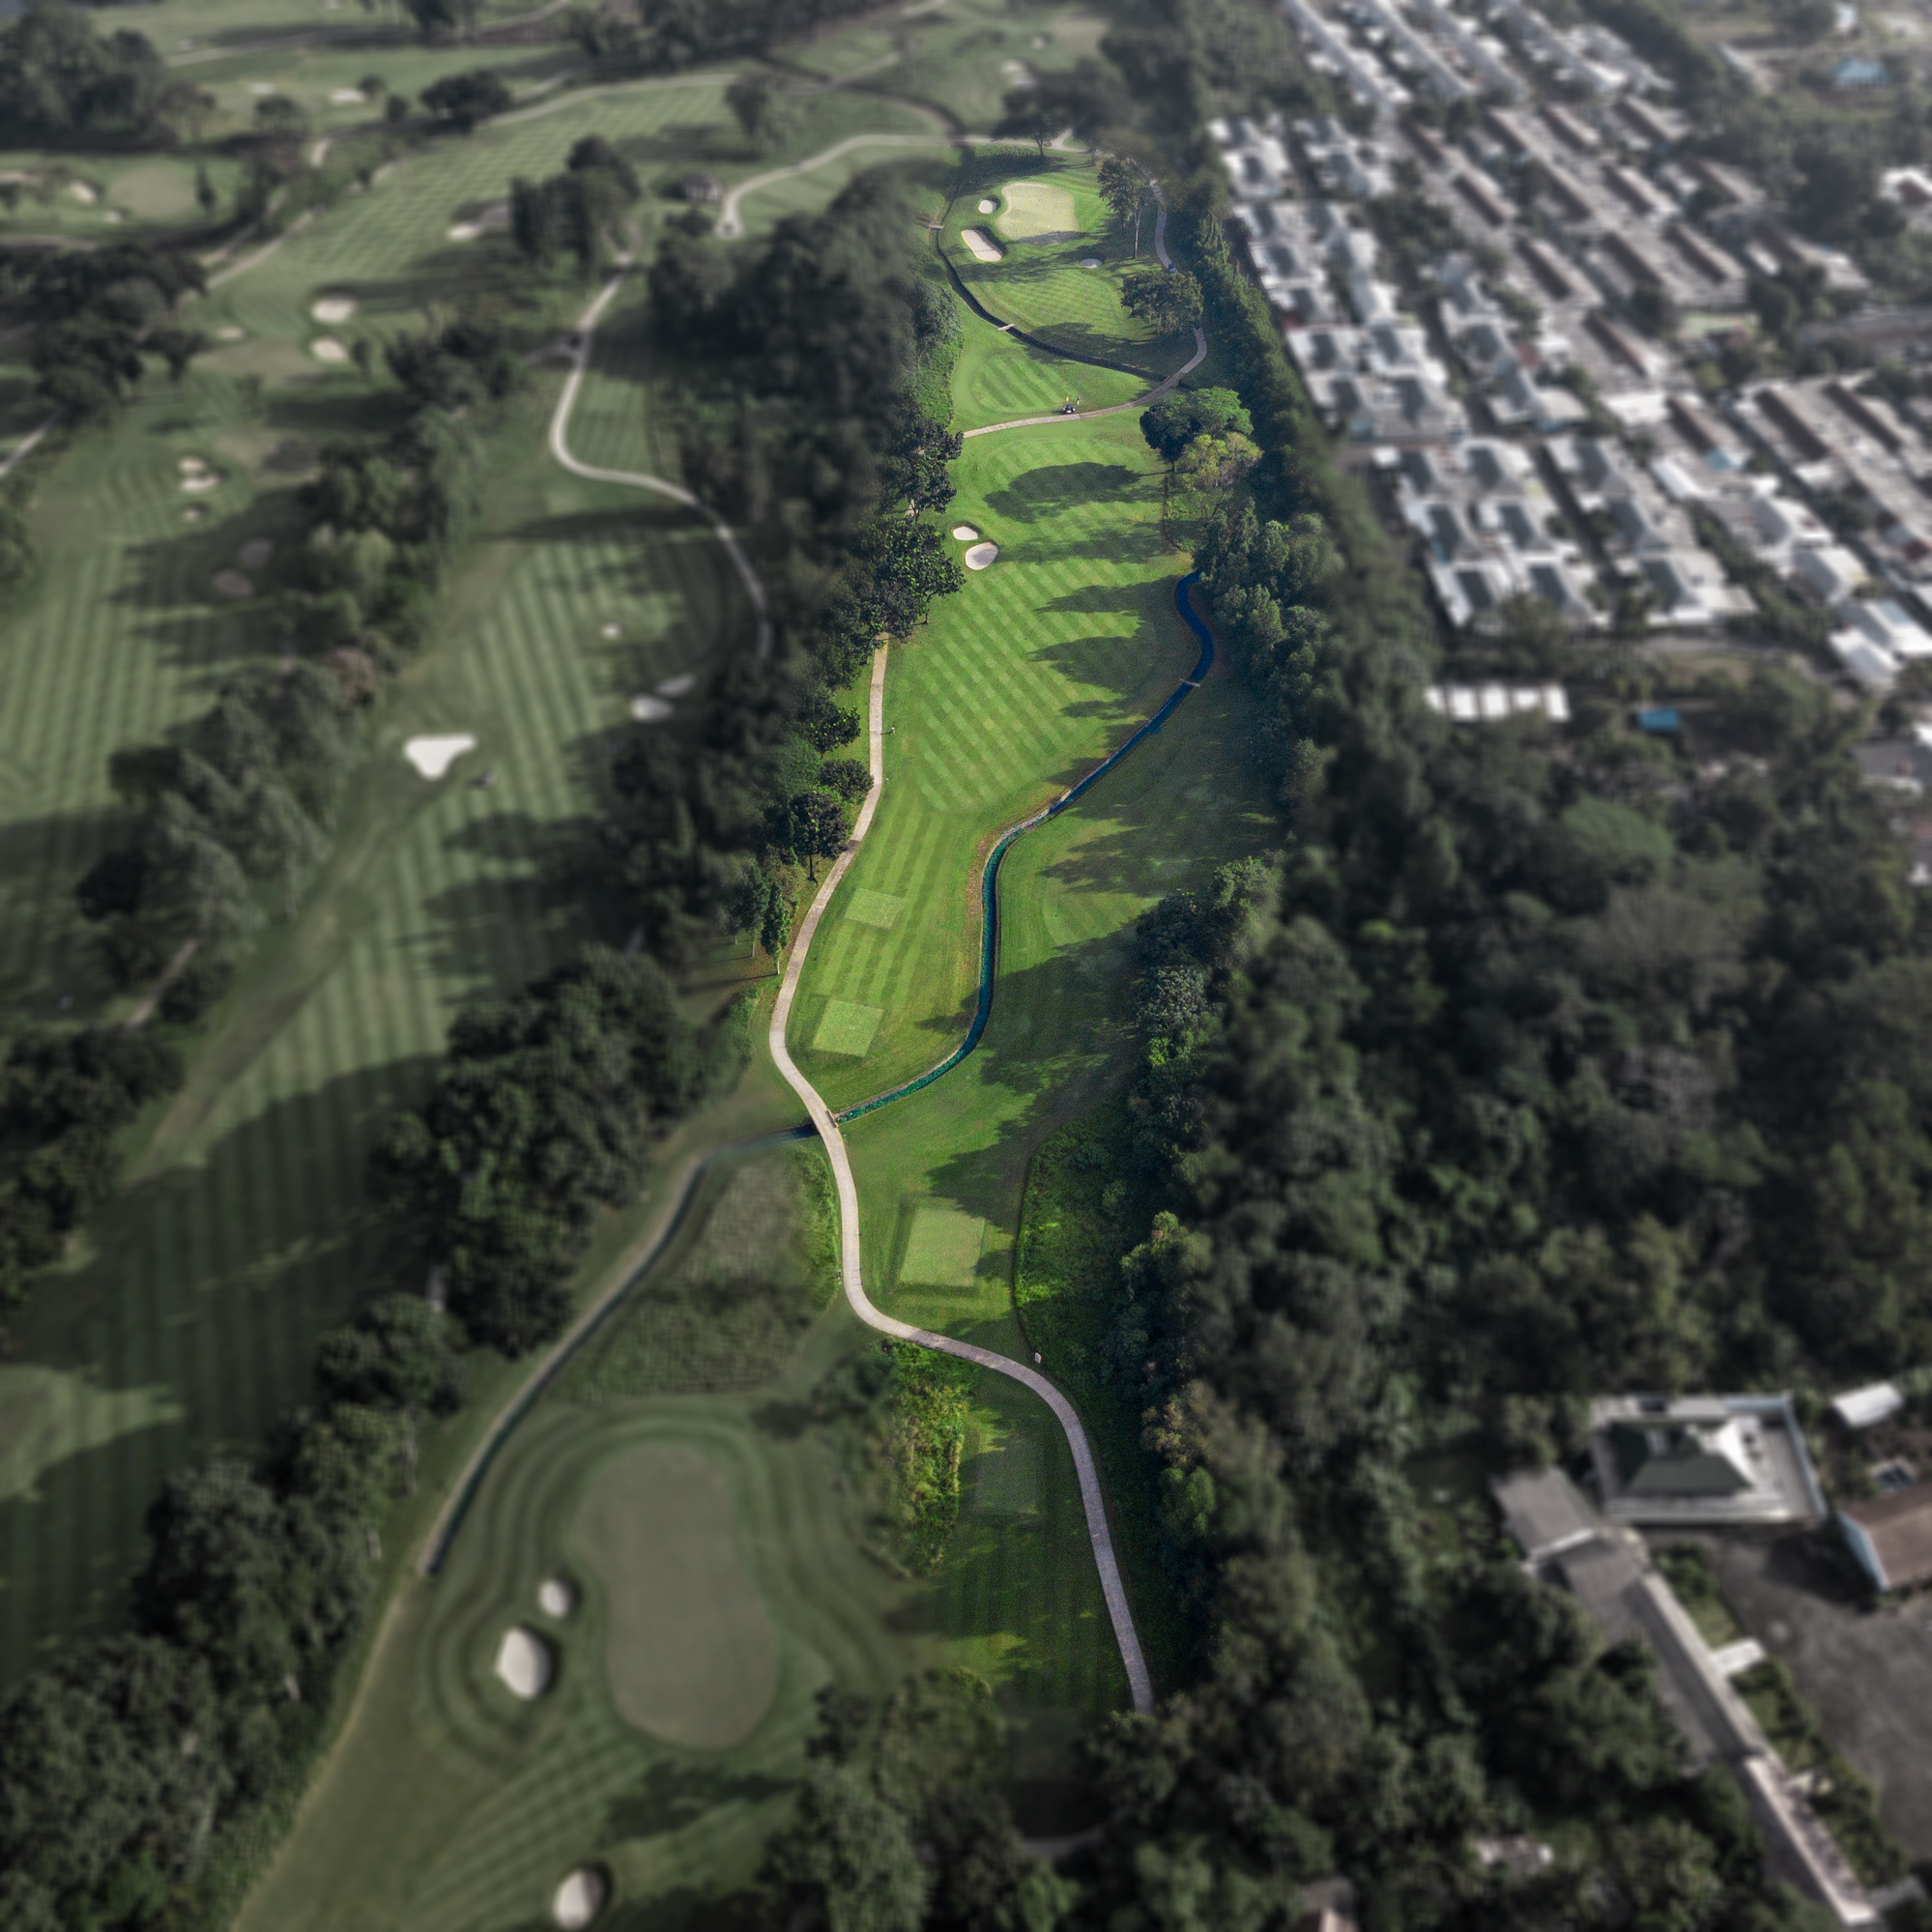
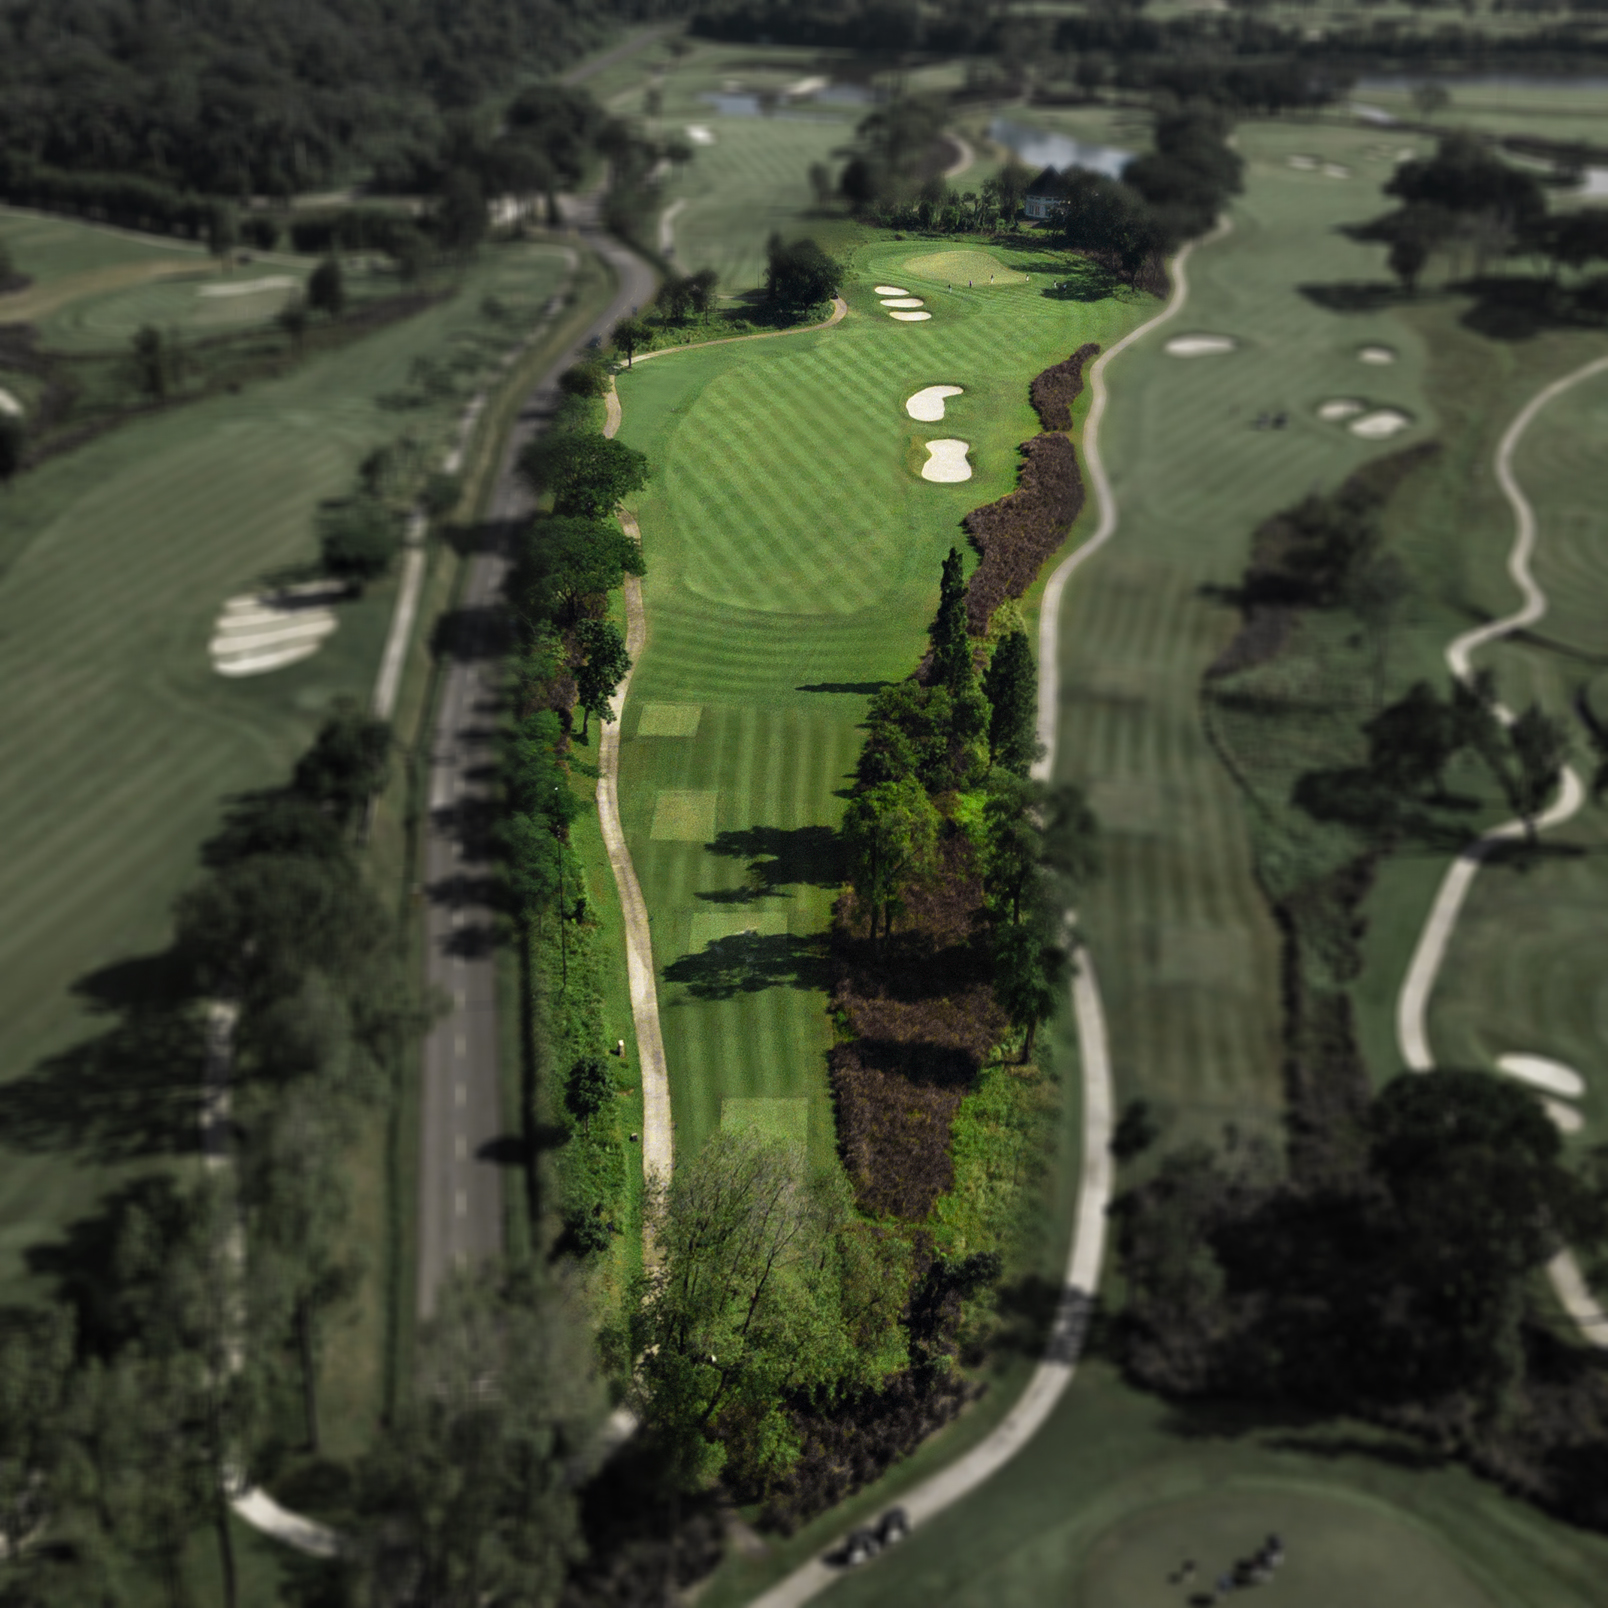
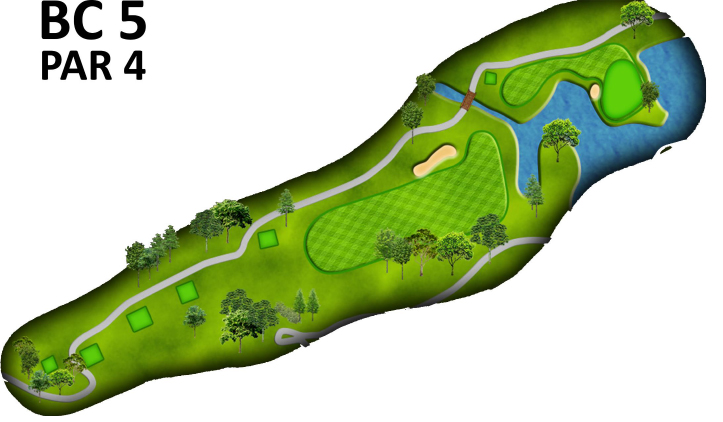
Green Course 5
-
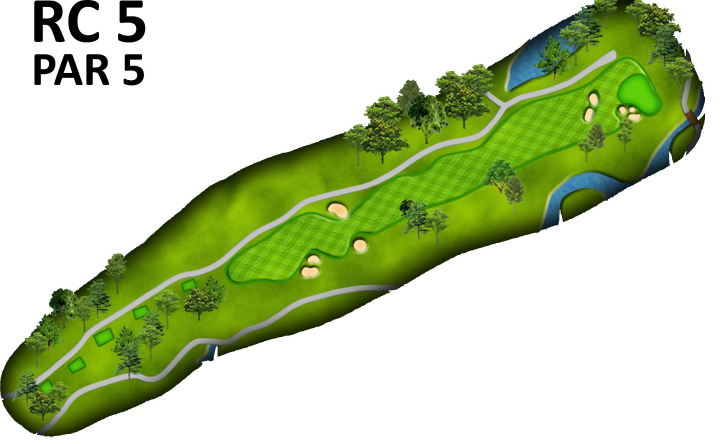
The longest of Suvarna National’s par 4 holes presents a formidable challenge. One of our signature ‘burns’ crosses the fairway two times, influencing both the tee shot and approach. A strong tee shot is a necessity to set up a manageable par. The green complex is framed by large trees, deep bunkers and the ‘burn’ running parallel to the long, linear green. A deep grass hollow to the right of the green will collect errant shots and provides a welcome bail-out area.
(Show More)
-
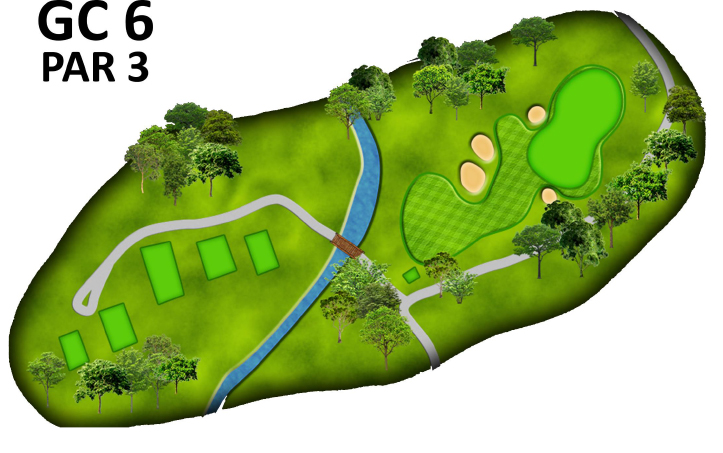
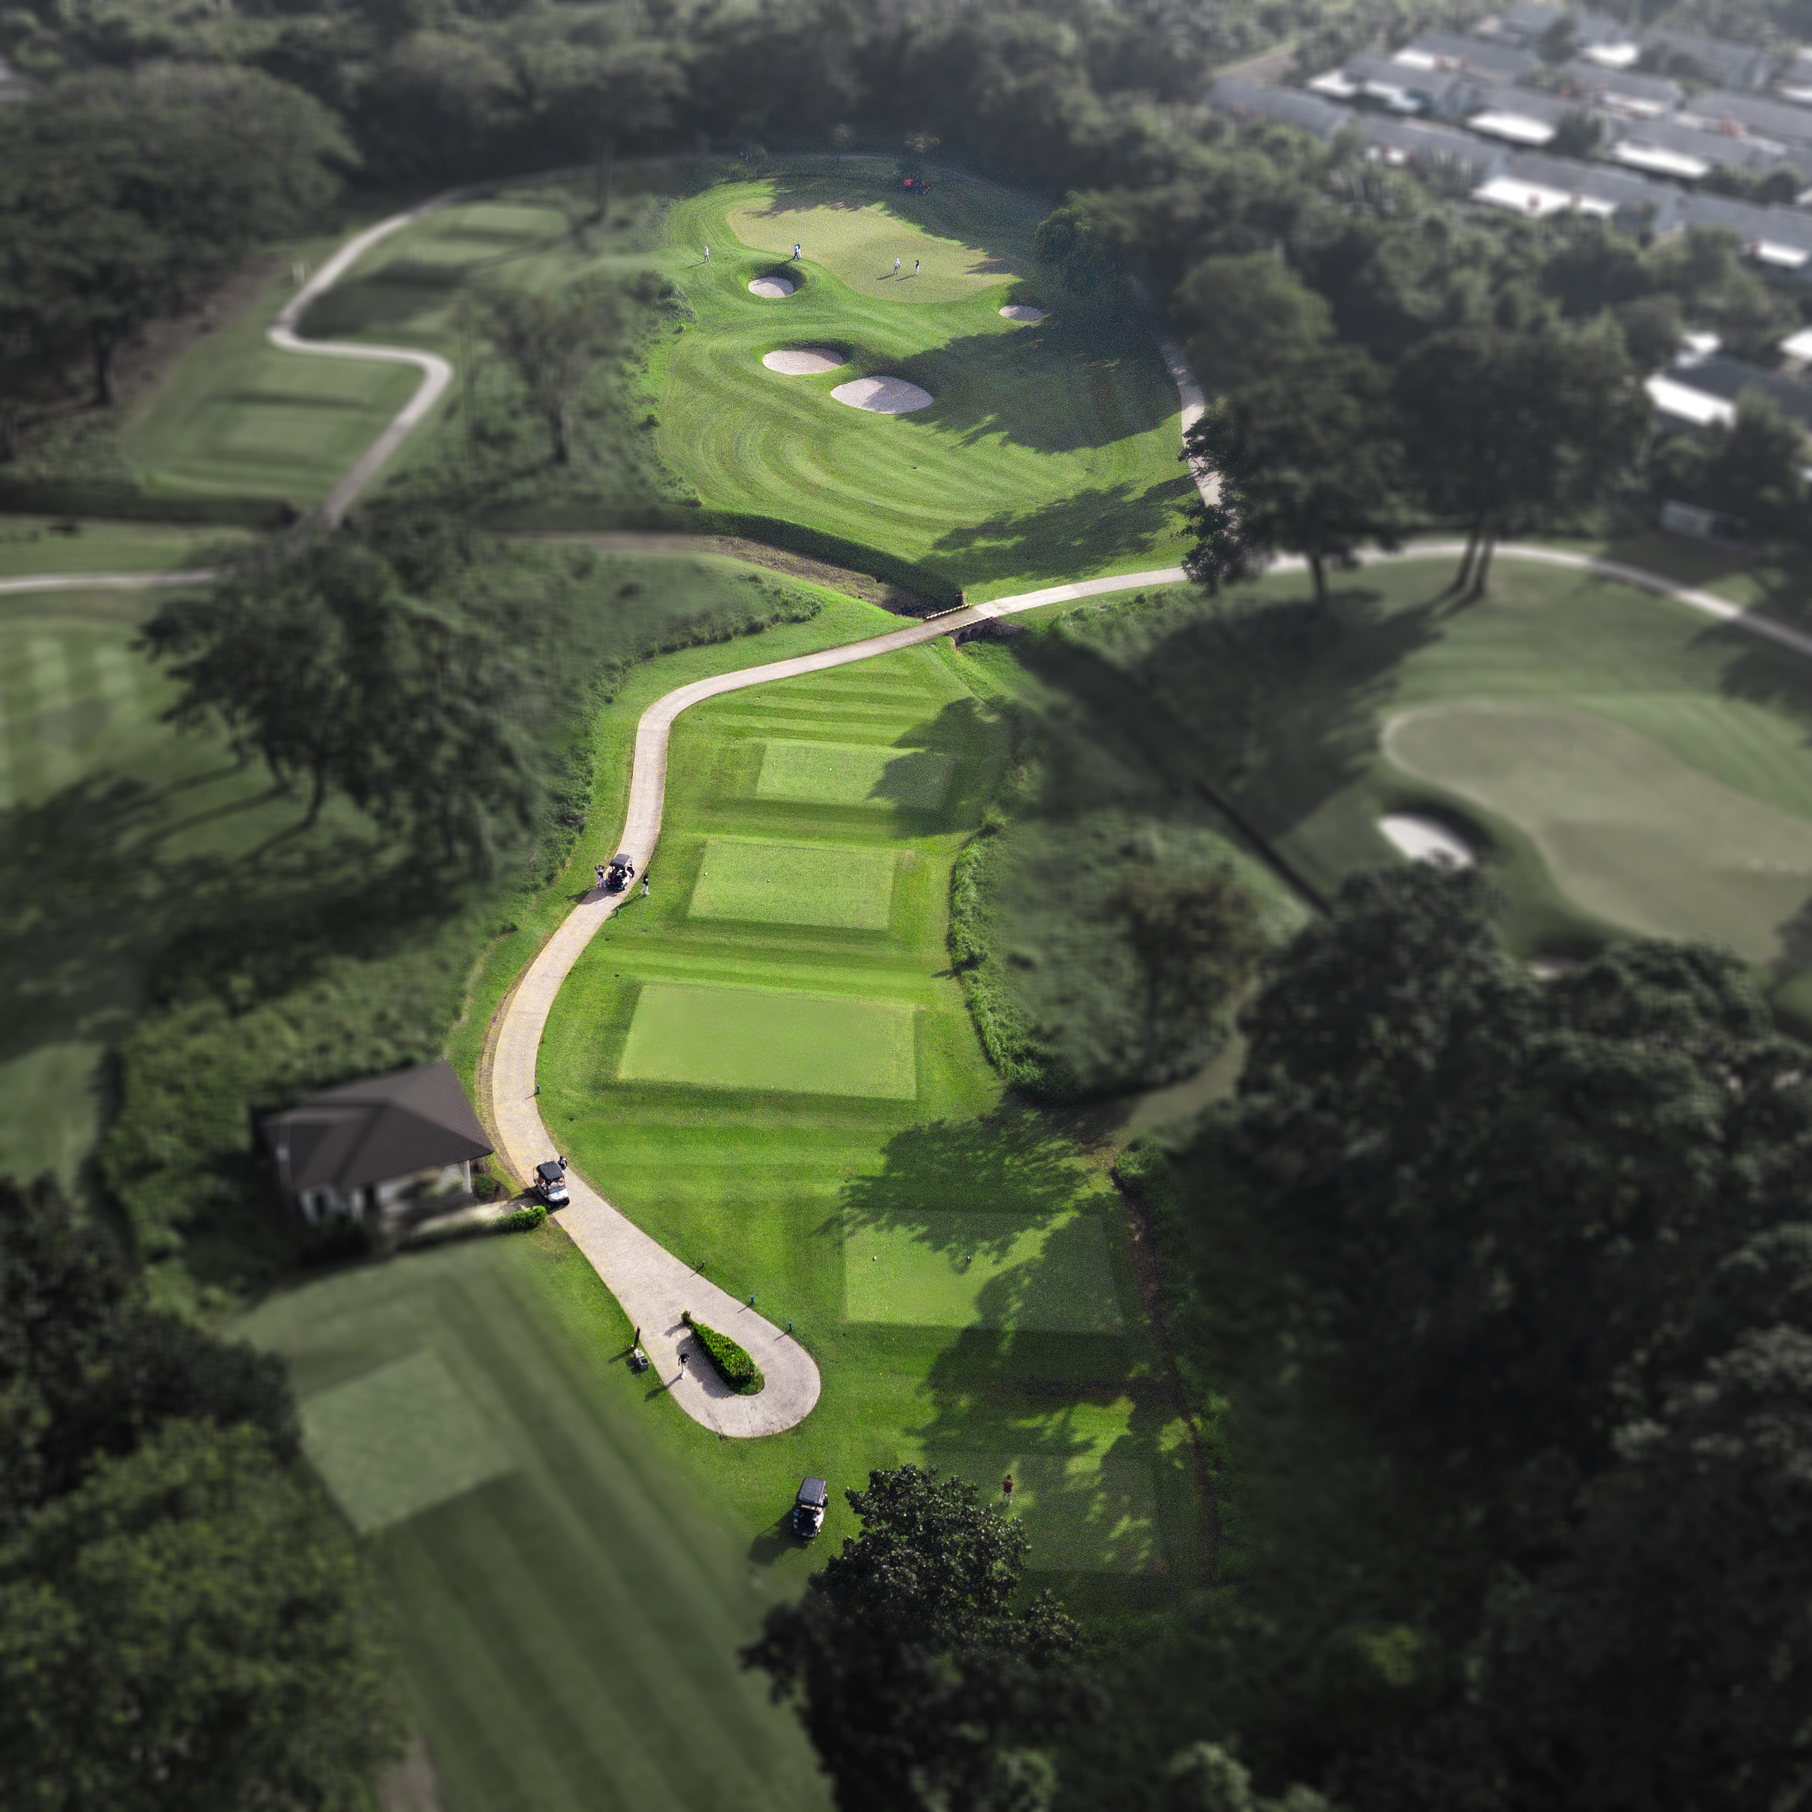
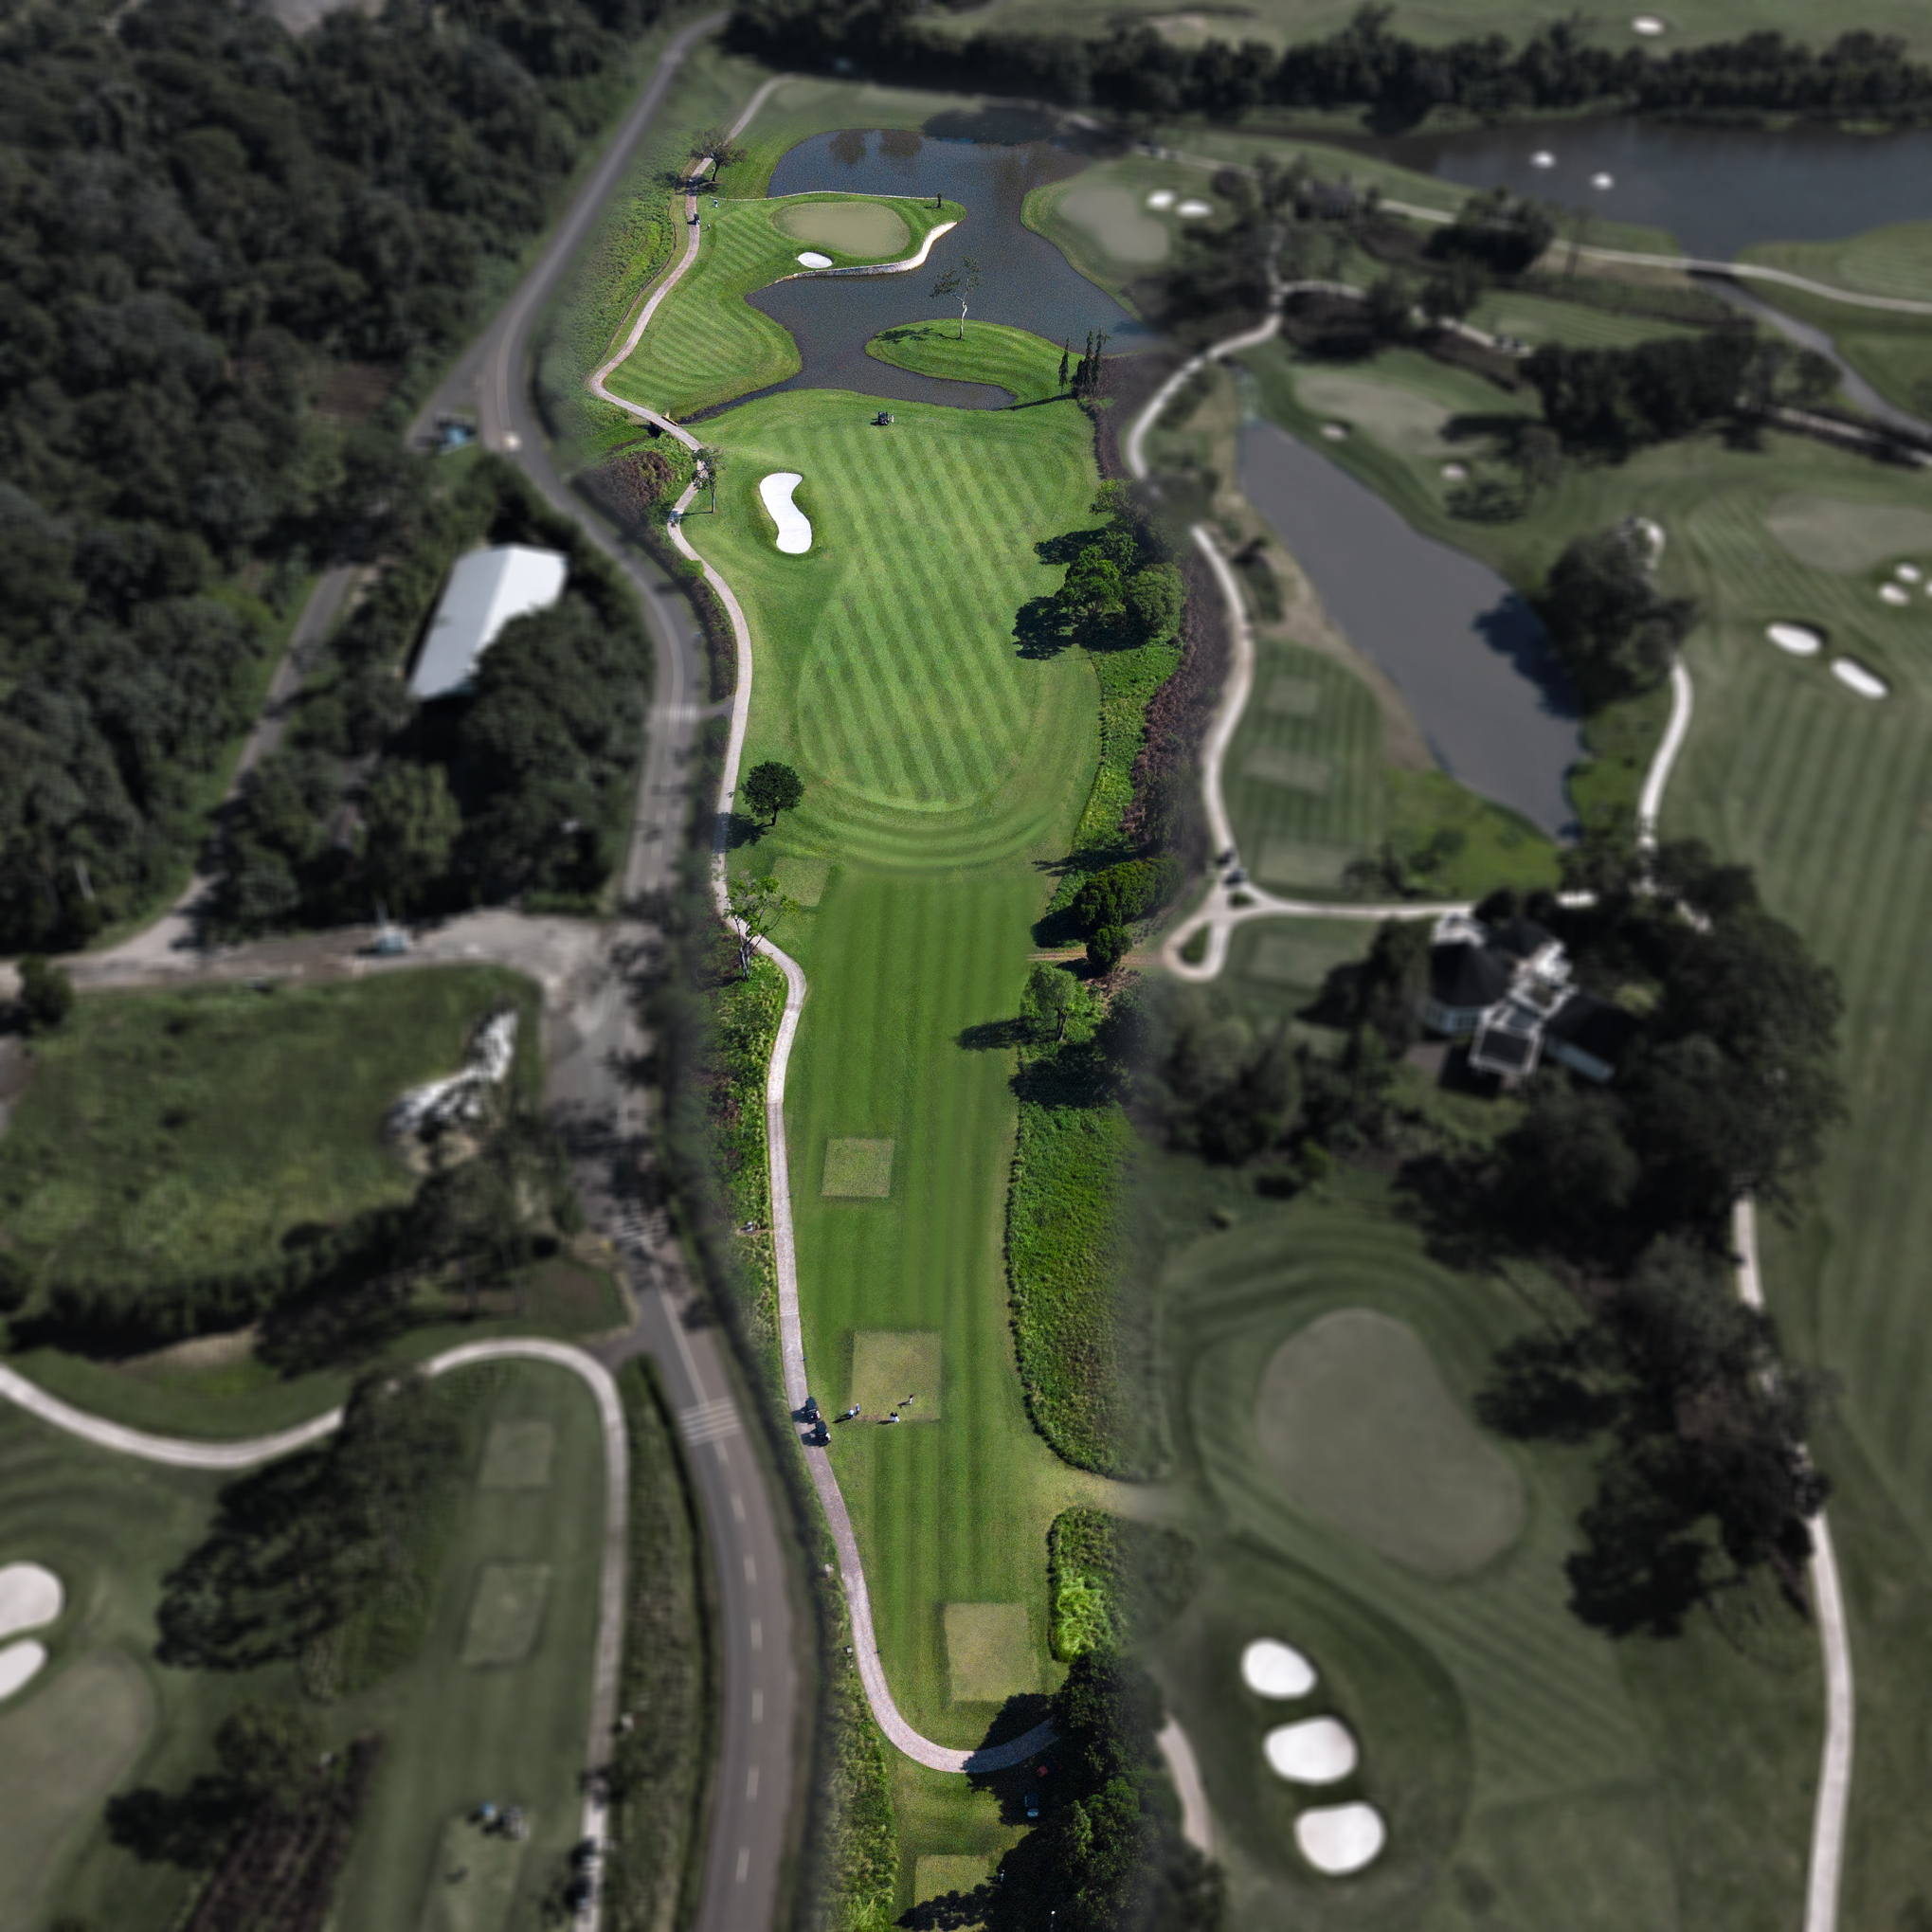
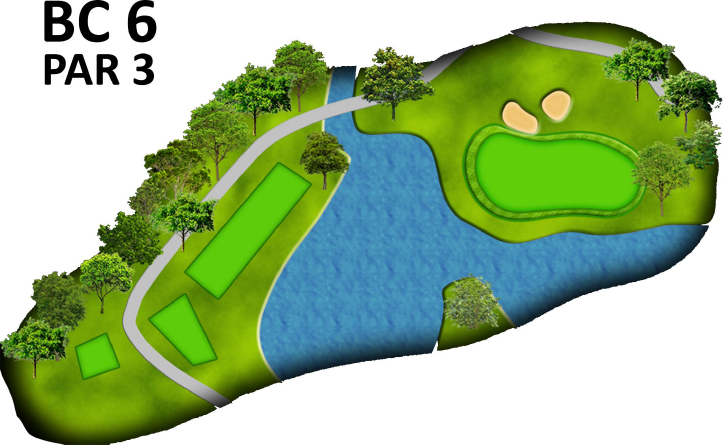
Green Course 6
-
Large, historic trees frame this very handsome green complex. The two centrally located bunkers are a visual illusion. They appear to be much closer to the green than they truly are. The real concerns are the small, deep bunkers tucked tightly to the right and left of the green. When club selection is in doubt choose a longer club
(Show More)
-
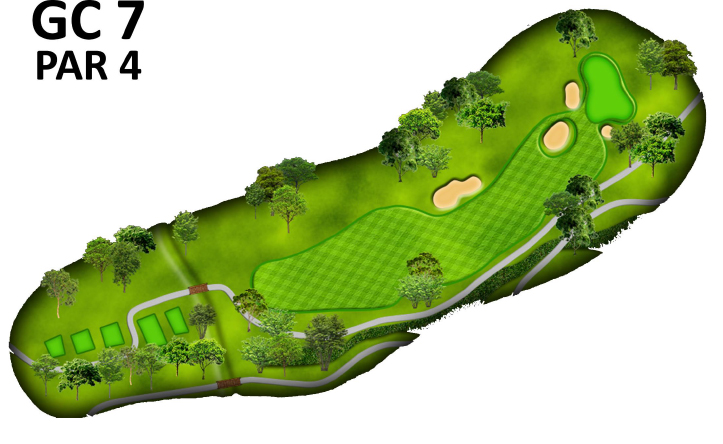
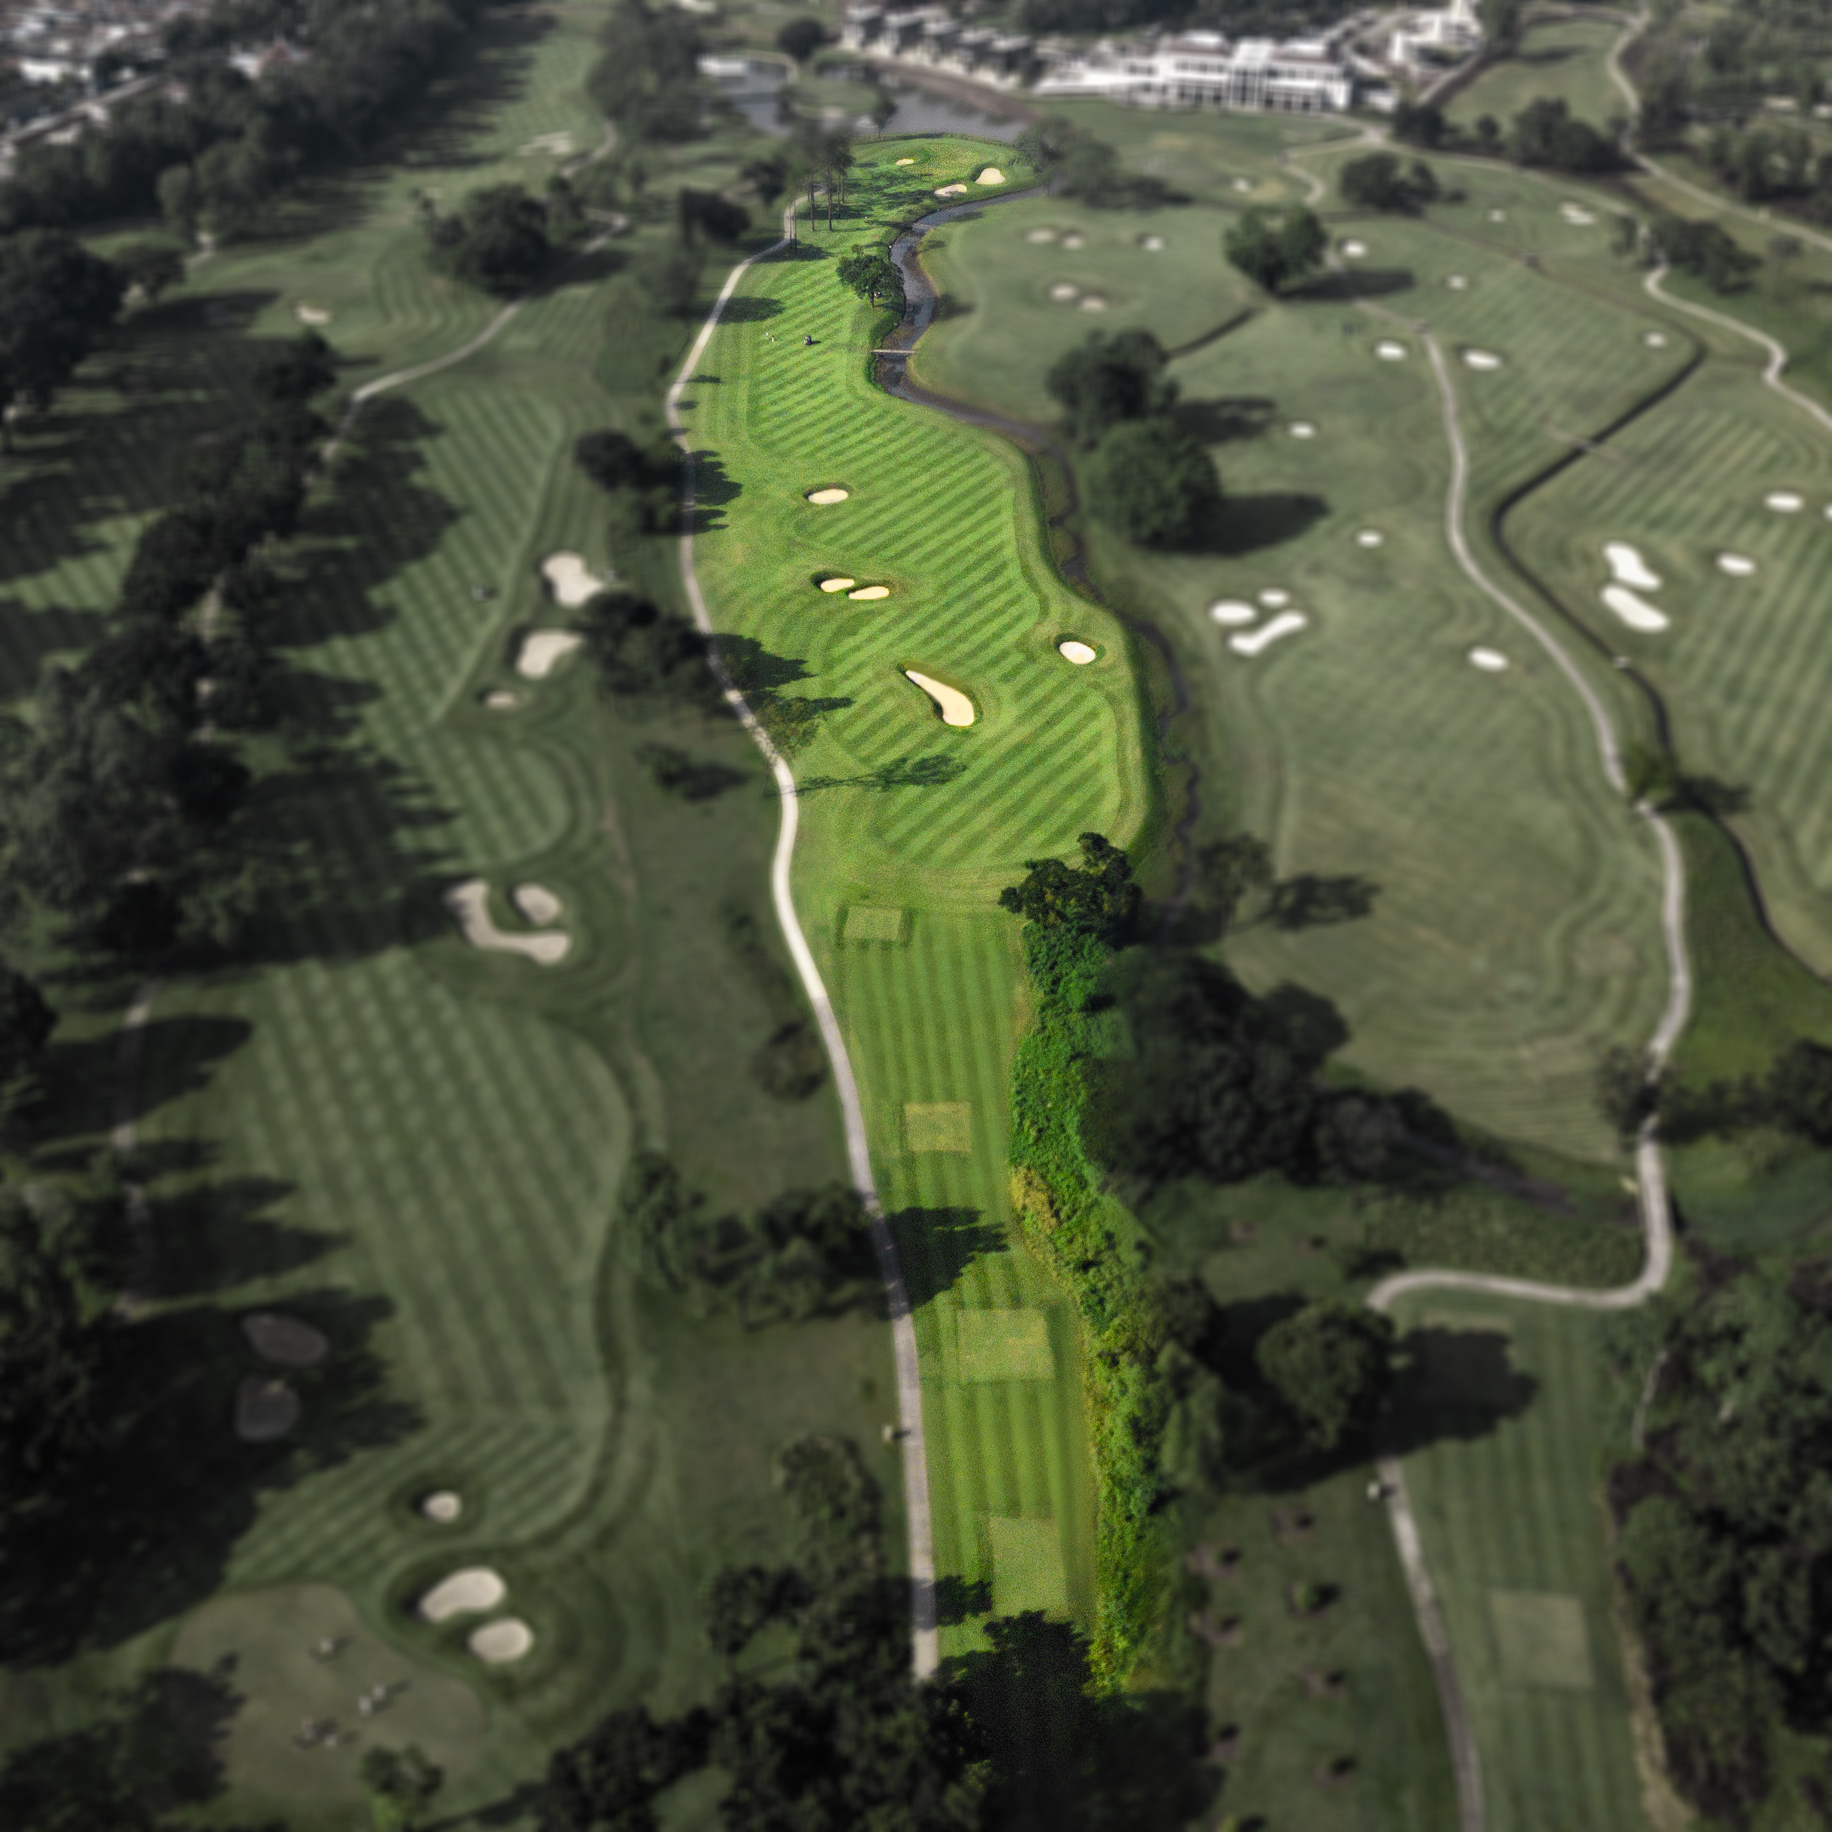
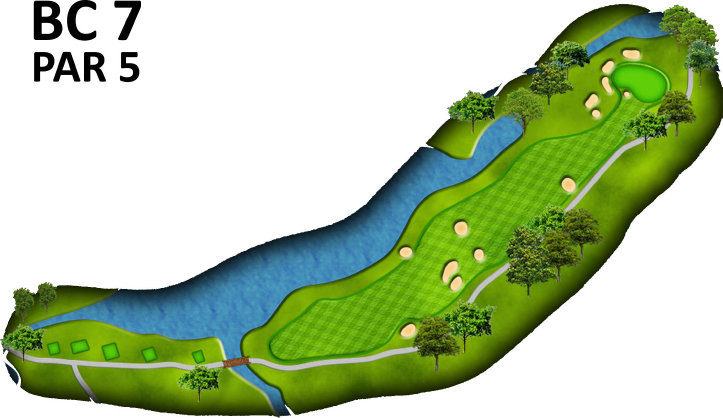
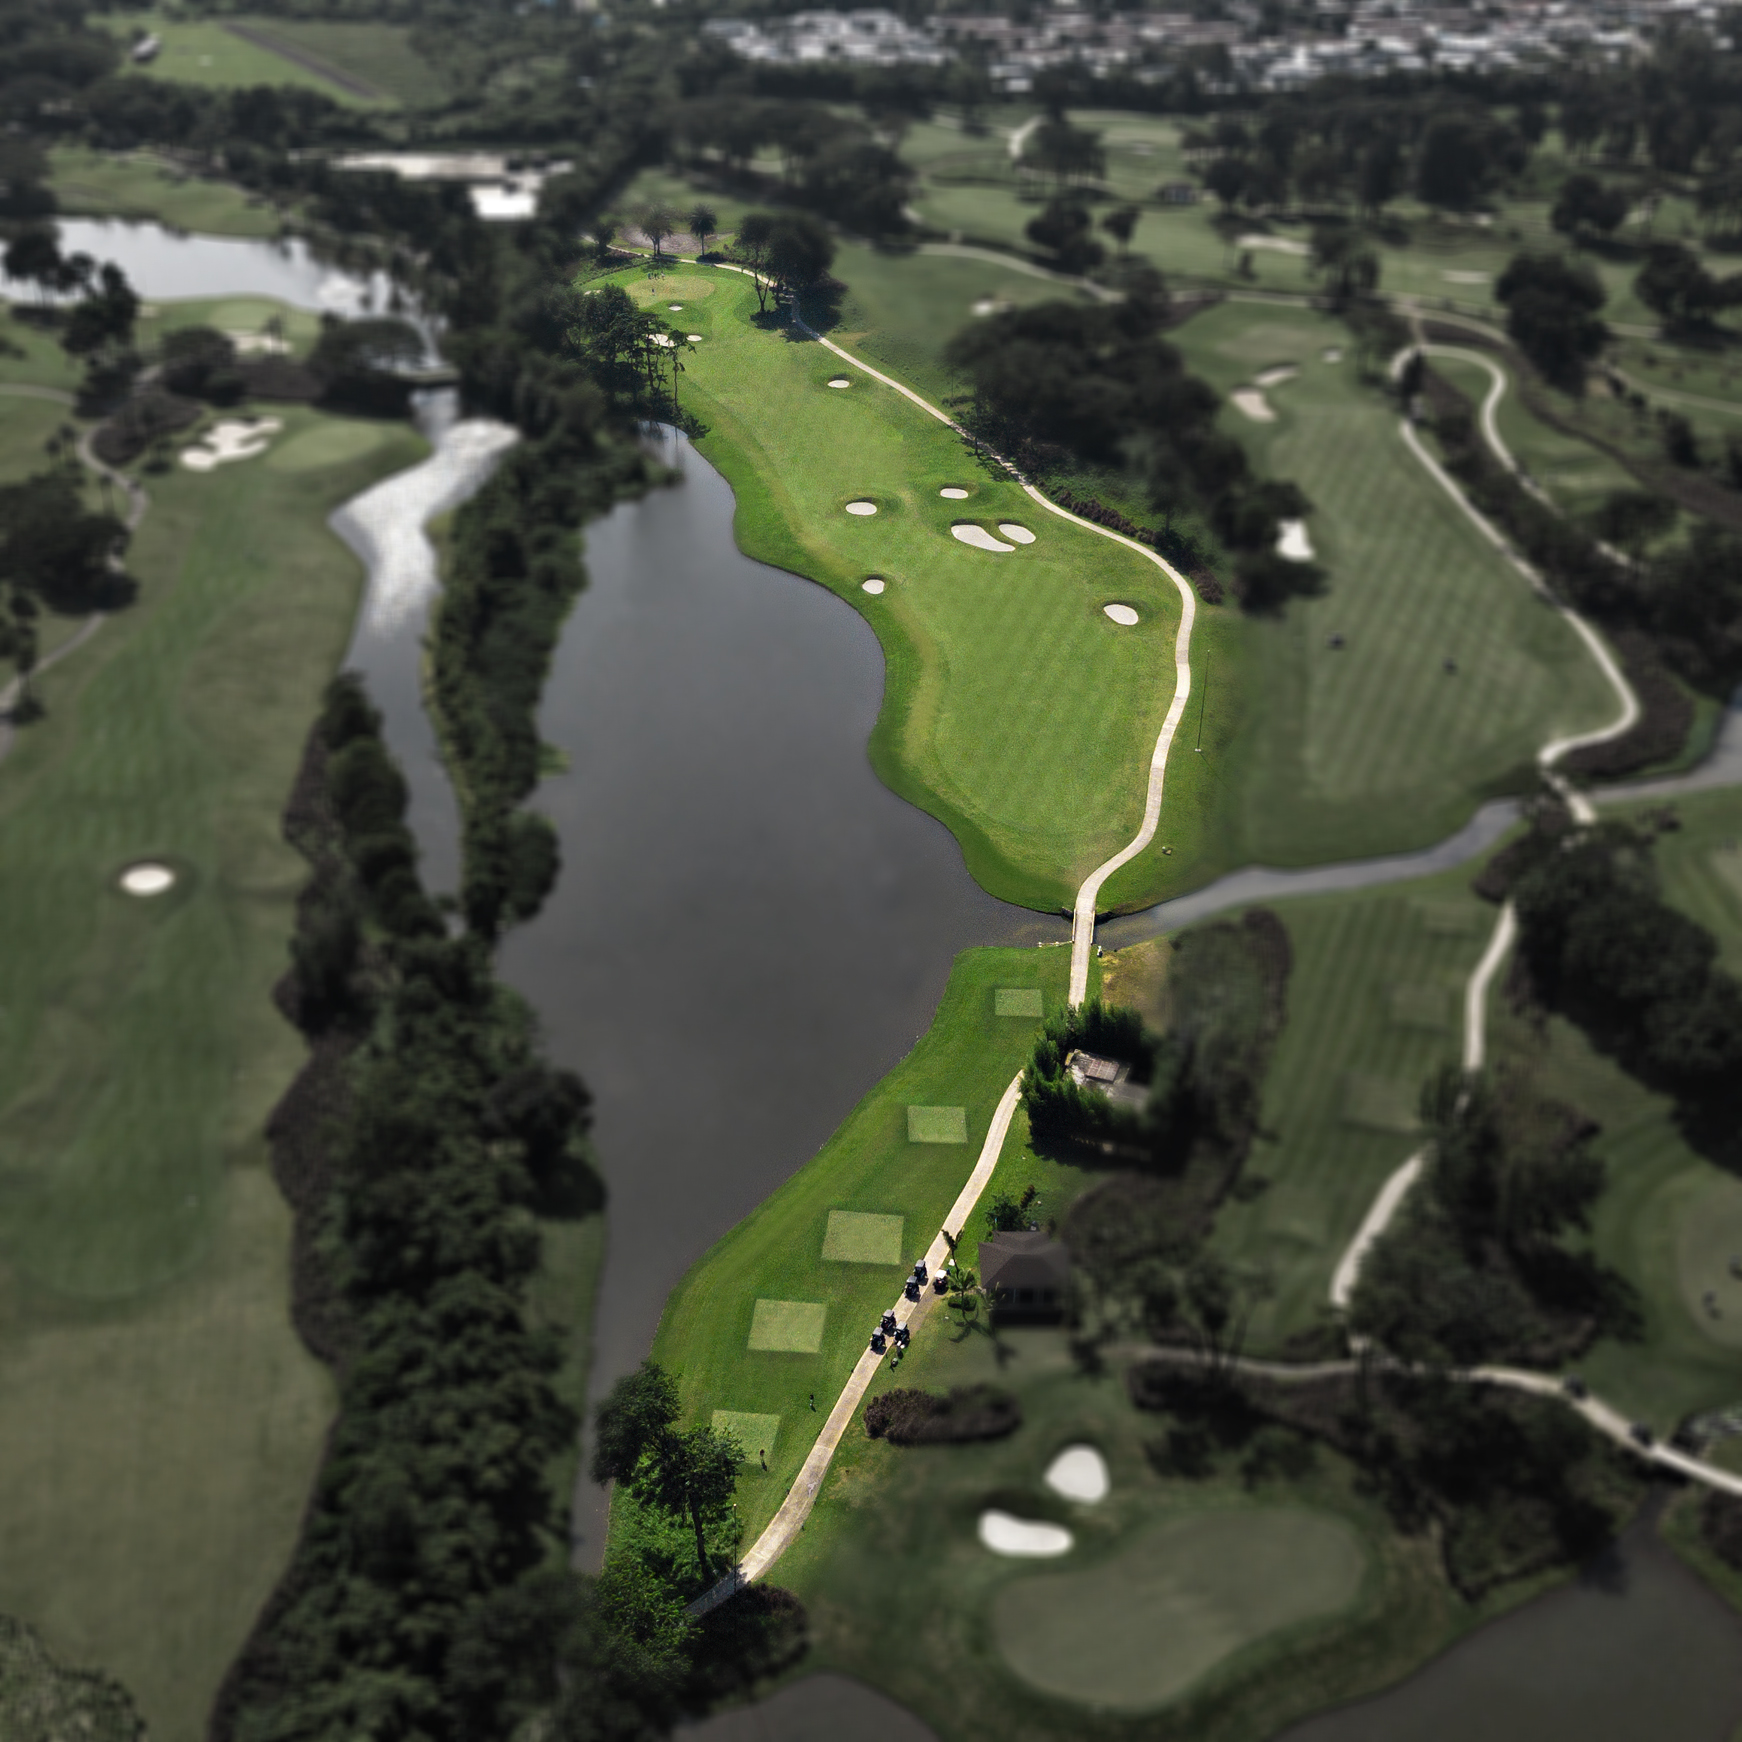
Green Course 7
-
The shortest par 4 on the Green Course plays slightly uphill. Driver may not be the best play because the fairway narrows for long tee shots and features a deep, linear bunker guarding the left side. Yet, those that can execute a big drive will be rewarded with a short wedge into this very shallow and demanding green.
(Show More)
-
Green Course 8
-
This strong par 5 occupies eastern portion of the Elysian Field. Multiple lines of play and a strong emphasis on conservative strategies vs. risk/reward characterize this hole. From the elevated tee the entire hole is visible allowing the golfer to determine the best line of attack. The position of the ‘burn’ demands strong decision making on the second shot. Golfers can choose to play safely wide to the right, setting up a challenging approach, or take a more direct line into a narrow fairway tightly bordered by the ‘burn’. Beware the deep pot bunker tucked tightly into the left side of the green complex.
(Show More)
-
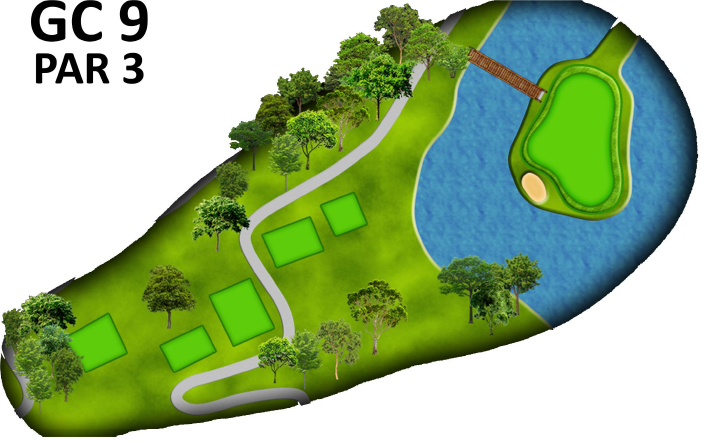
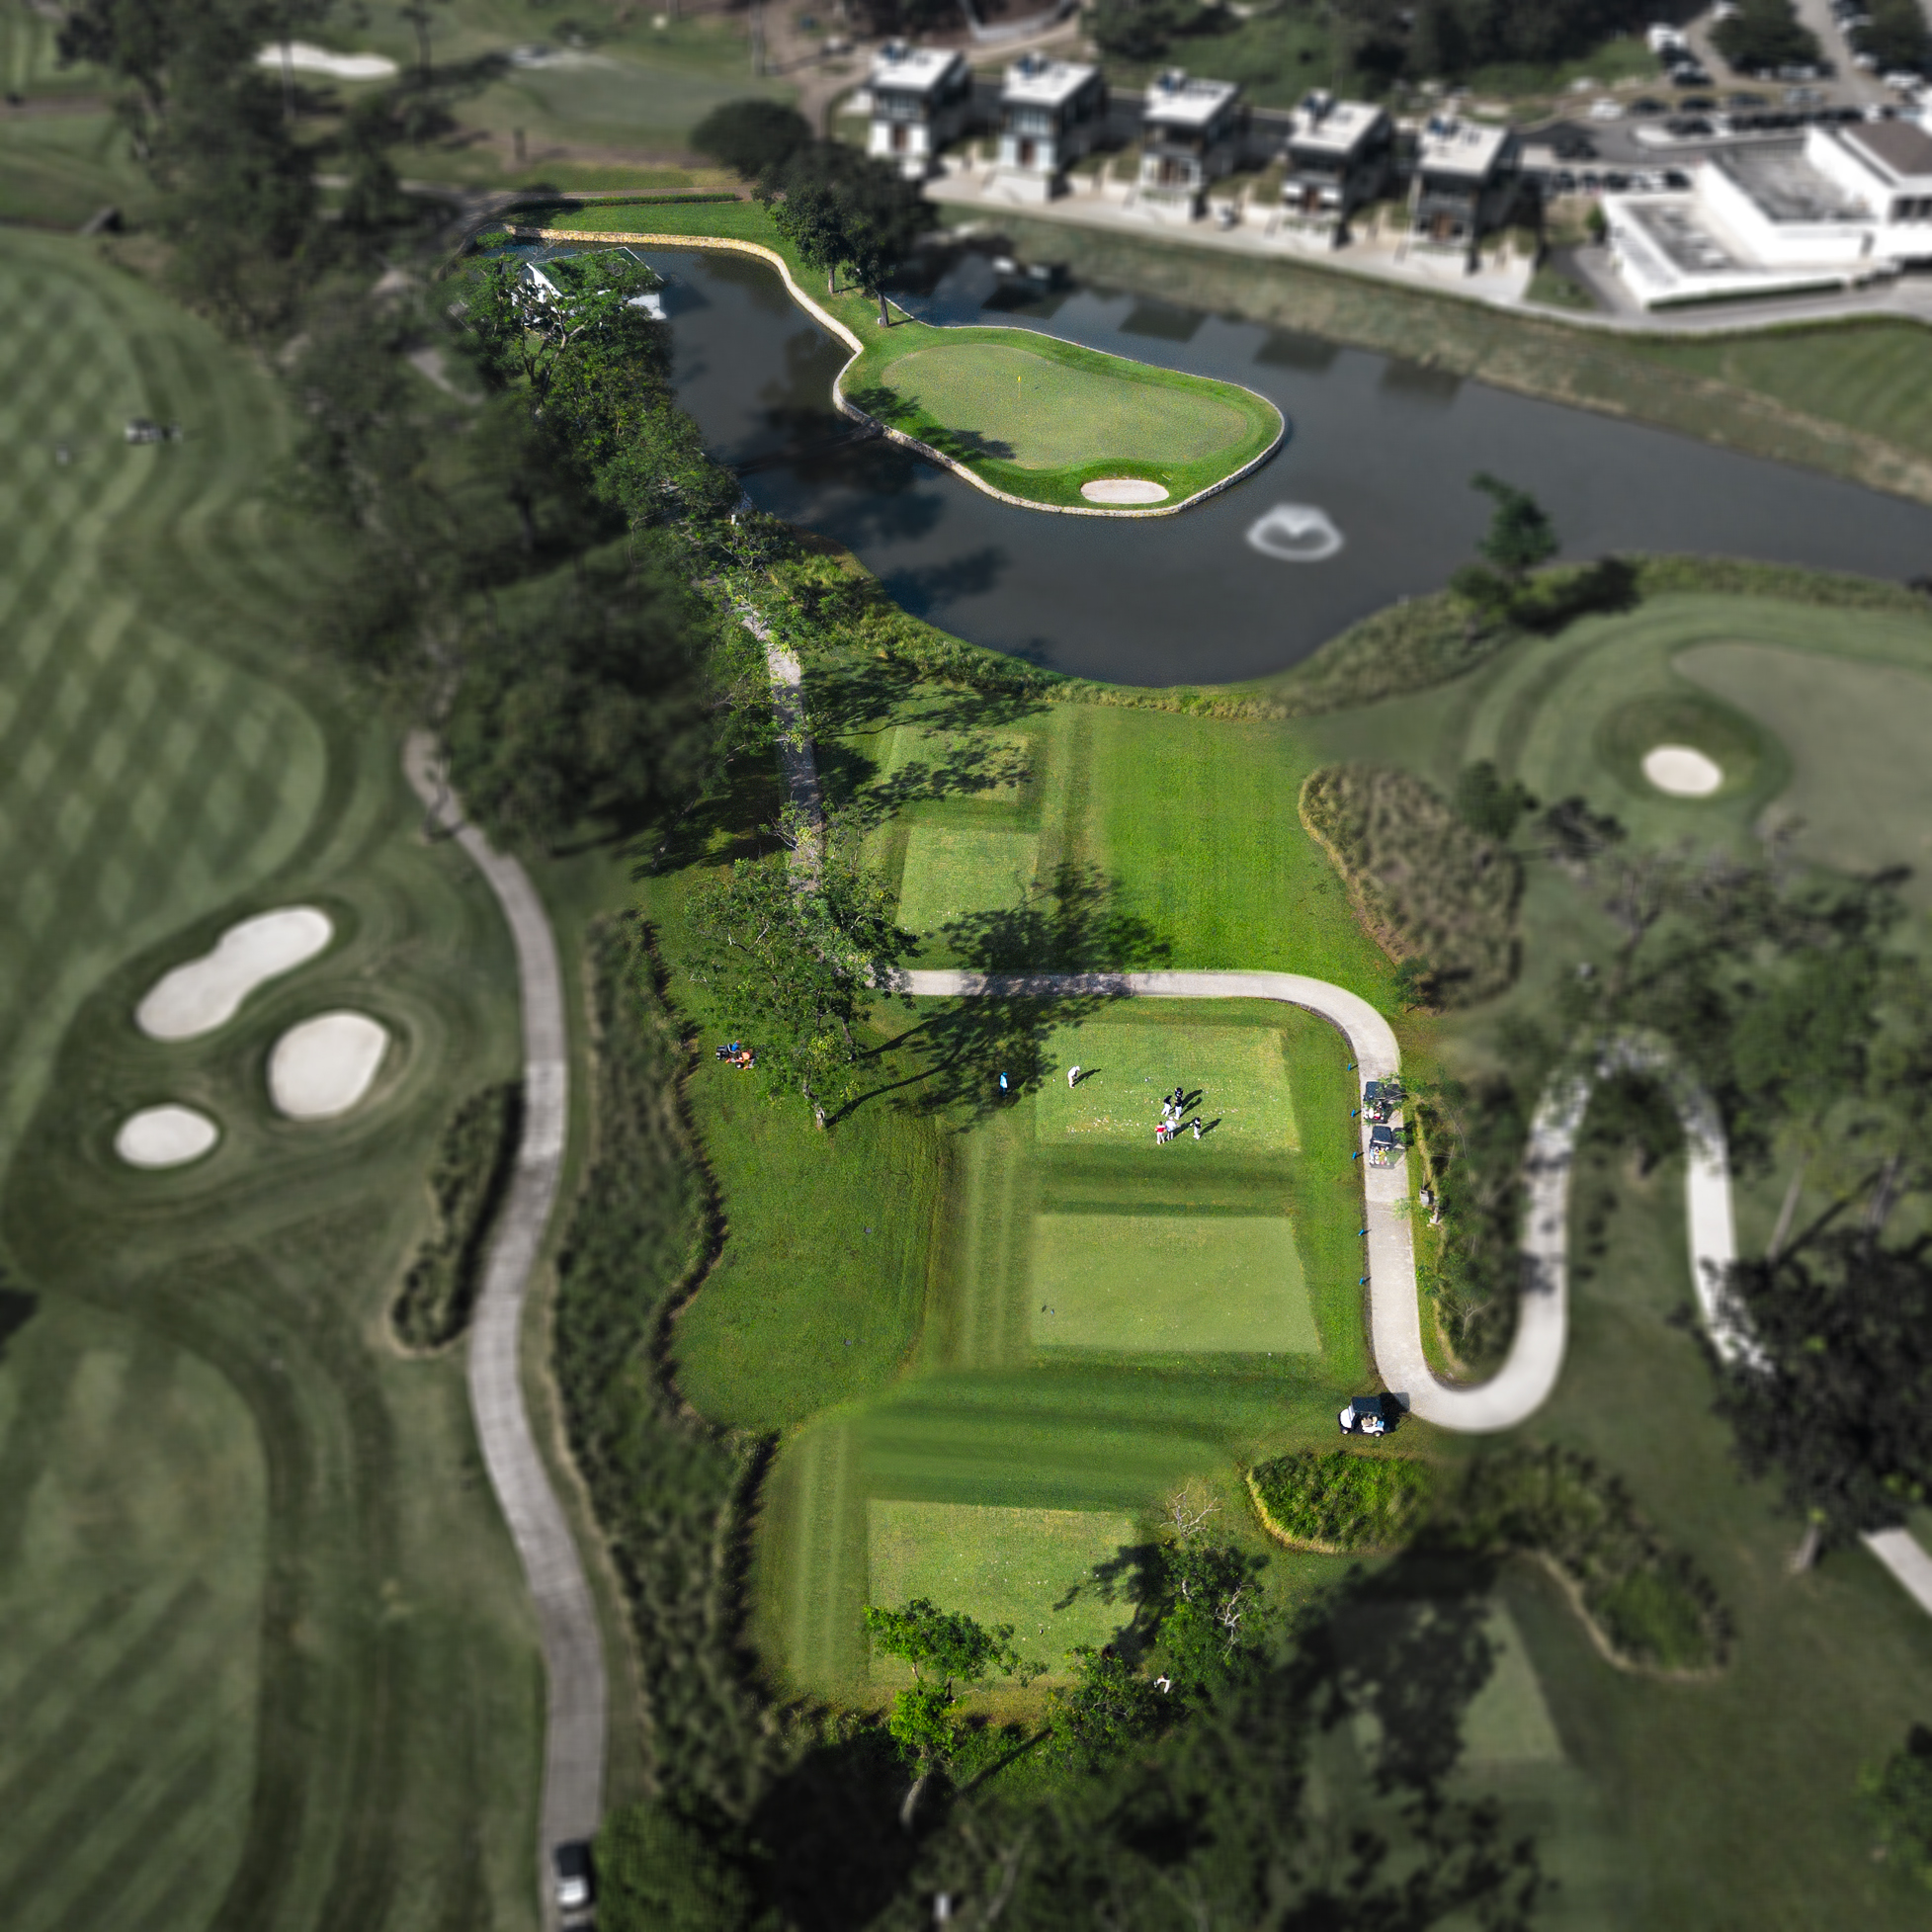
Green Course 9
-
This island green par 3 is inspired by the famous 17th hole at TPC Sawgrass, home of the Tour Championship. The island green features a small bunker front/right and a more generous target to the left side. Two prominent ridges in the putting surface create separation between the left and right sides of the green and make a right side pin placement quite demanding.
(Show More)
-
Red Course 1
-
This short, dogleg left starting hole provides a strong challenge despite its benign appearance. The right side fairway bunker provides framing and is primarily a visual element, but it can affect club selection. Driver is not necessarily the best choice from the tee. Beware visual illusion of the left side cross bunker.
(Show More)
-
Red Course 2
-
A signature ‘burn’ borders the left side of this downhill par 4. The ‘burn’ then swings hard to the right and crosses the fairway approximately 50 yards in front of the green. The position of the ‘burn’ and right side fairway bunkering constrict the landing area for long tee shots. The ‘burn’ and deep bunkering guard the right side of this green complex.
(Show More)
-
Red Course 3
-
Playing uphill at over 560 yards this is a challenging par 5. In order to shorten the hole a tee shot must flirt with three deep fairway bunkers positioned inside the dogleg. A narrow approach to the green opens from the left side, but a series of bunkers guard the approach to the green and will force most golfers to lay-up. Pins positioned to the green’s right side will provide very difficult targets.
(Show More)
-
Red Course 4
-
Club selection is critical when playing to a right side pin placement on this downhill par 3. The left side of this green is much deeper and provides a more receptive target. Regardless of pin position, do no over-club. The slope behind the green runs rapidly away.
(Show More)
-
Red Course 5
-
The location of this green is one of the Suvarna’s most prominent, providing views over many of the northern golf holes. The tee shot is quite demanding and must negotiate a collection of five fairway bunkers. From here the fairway falls into a gentle valley, before rising to the prominent green. Favor the high left side on the approach.
(Show More)
-
Red Course 6
-
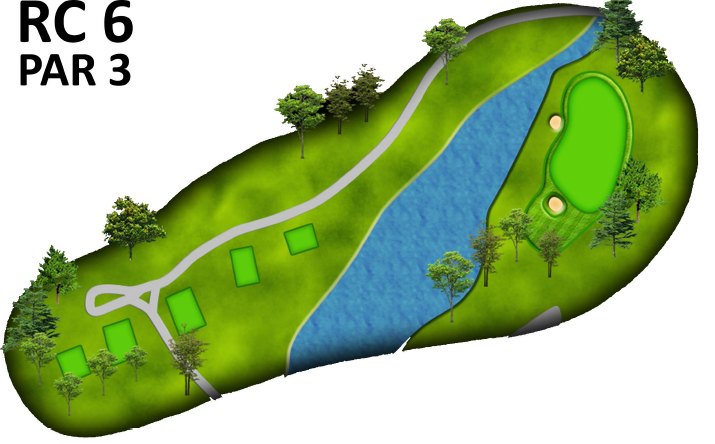
This par 3 requires a forced carry over a small lake. The green mimics the shape of the lake, providing a much shorter carry to the right side. Attacking a left side pin position will require a much longer carry over the lake and will bring a deep lake-side pot bunker into play.
(Show More)
-
Red Course 7
-
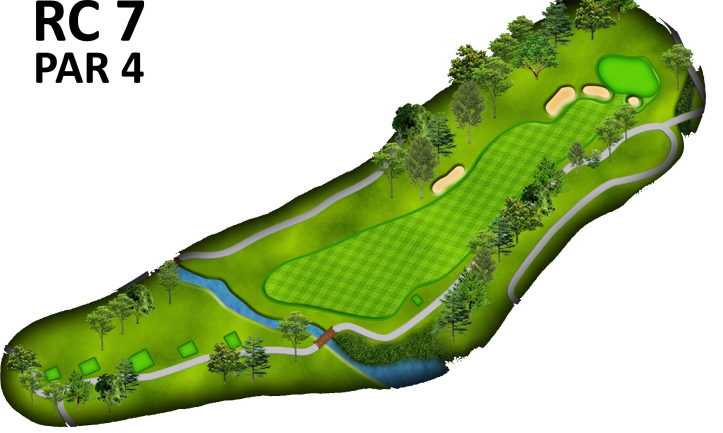
This is a beautiful, medium length par 4 that will play longer than its yardage due to its uphill design. This hole doglegs slightly to the left around a deep, linear fairway bunker. Deep cross-bunkers guard the green and place a premium on club selection. Front-left and back-right pin positions are both difficult targets. The green center provides the most receptive target.
(Show More)
-
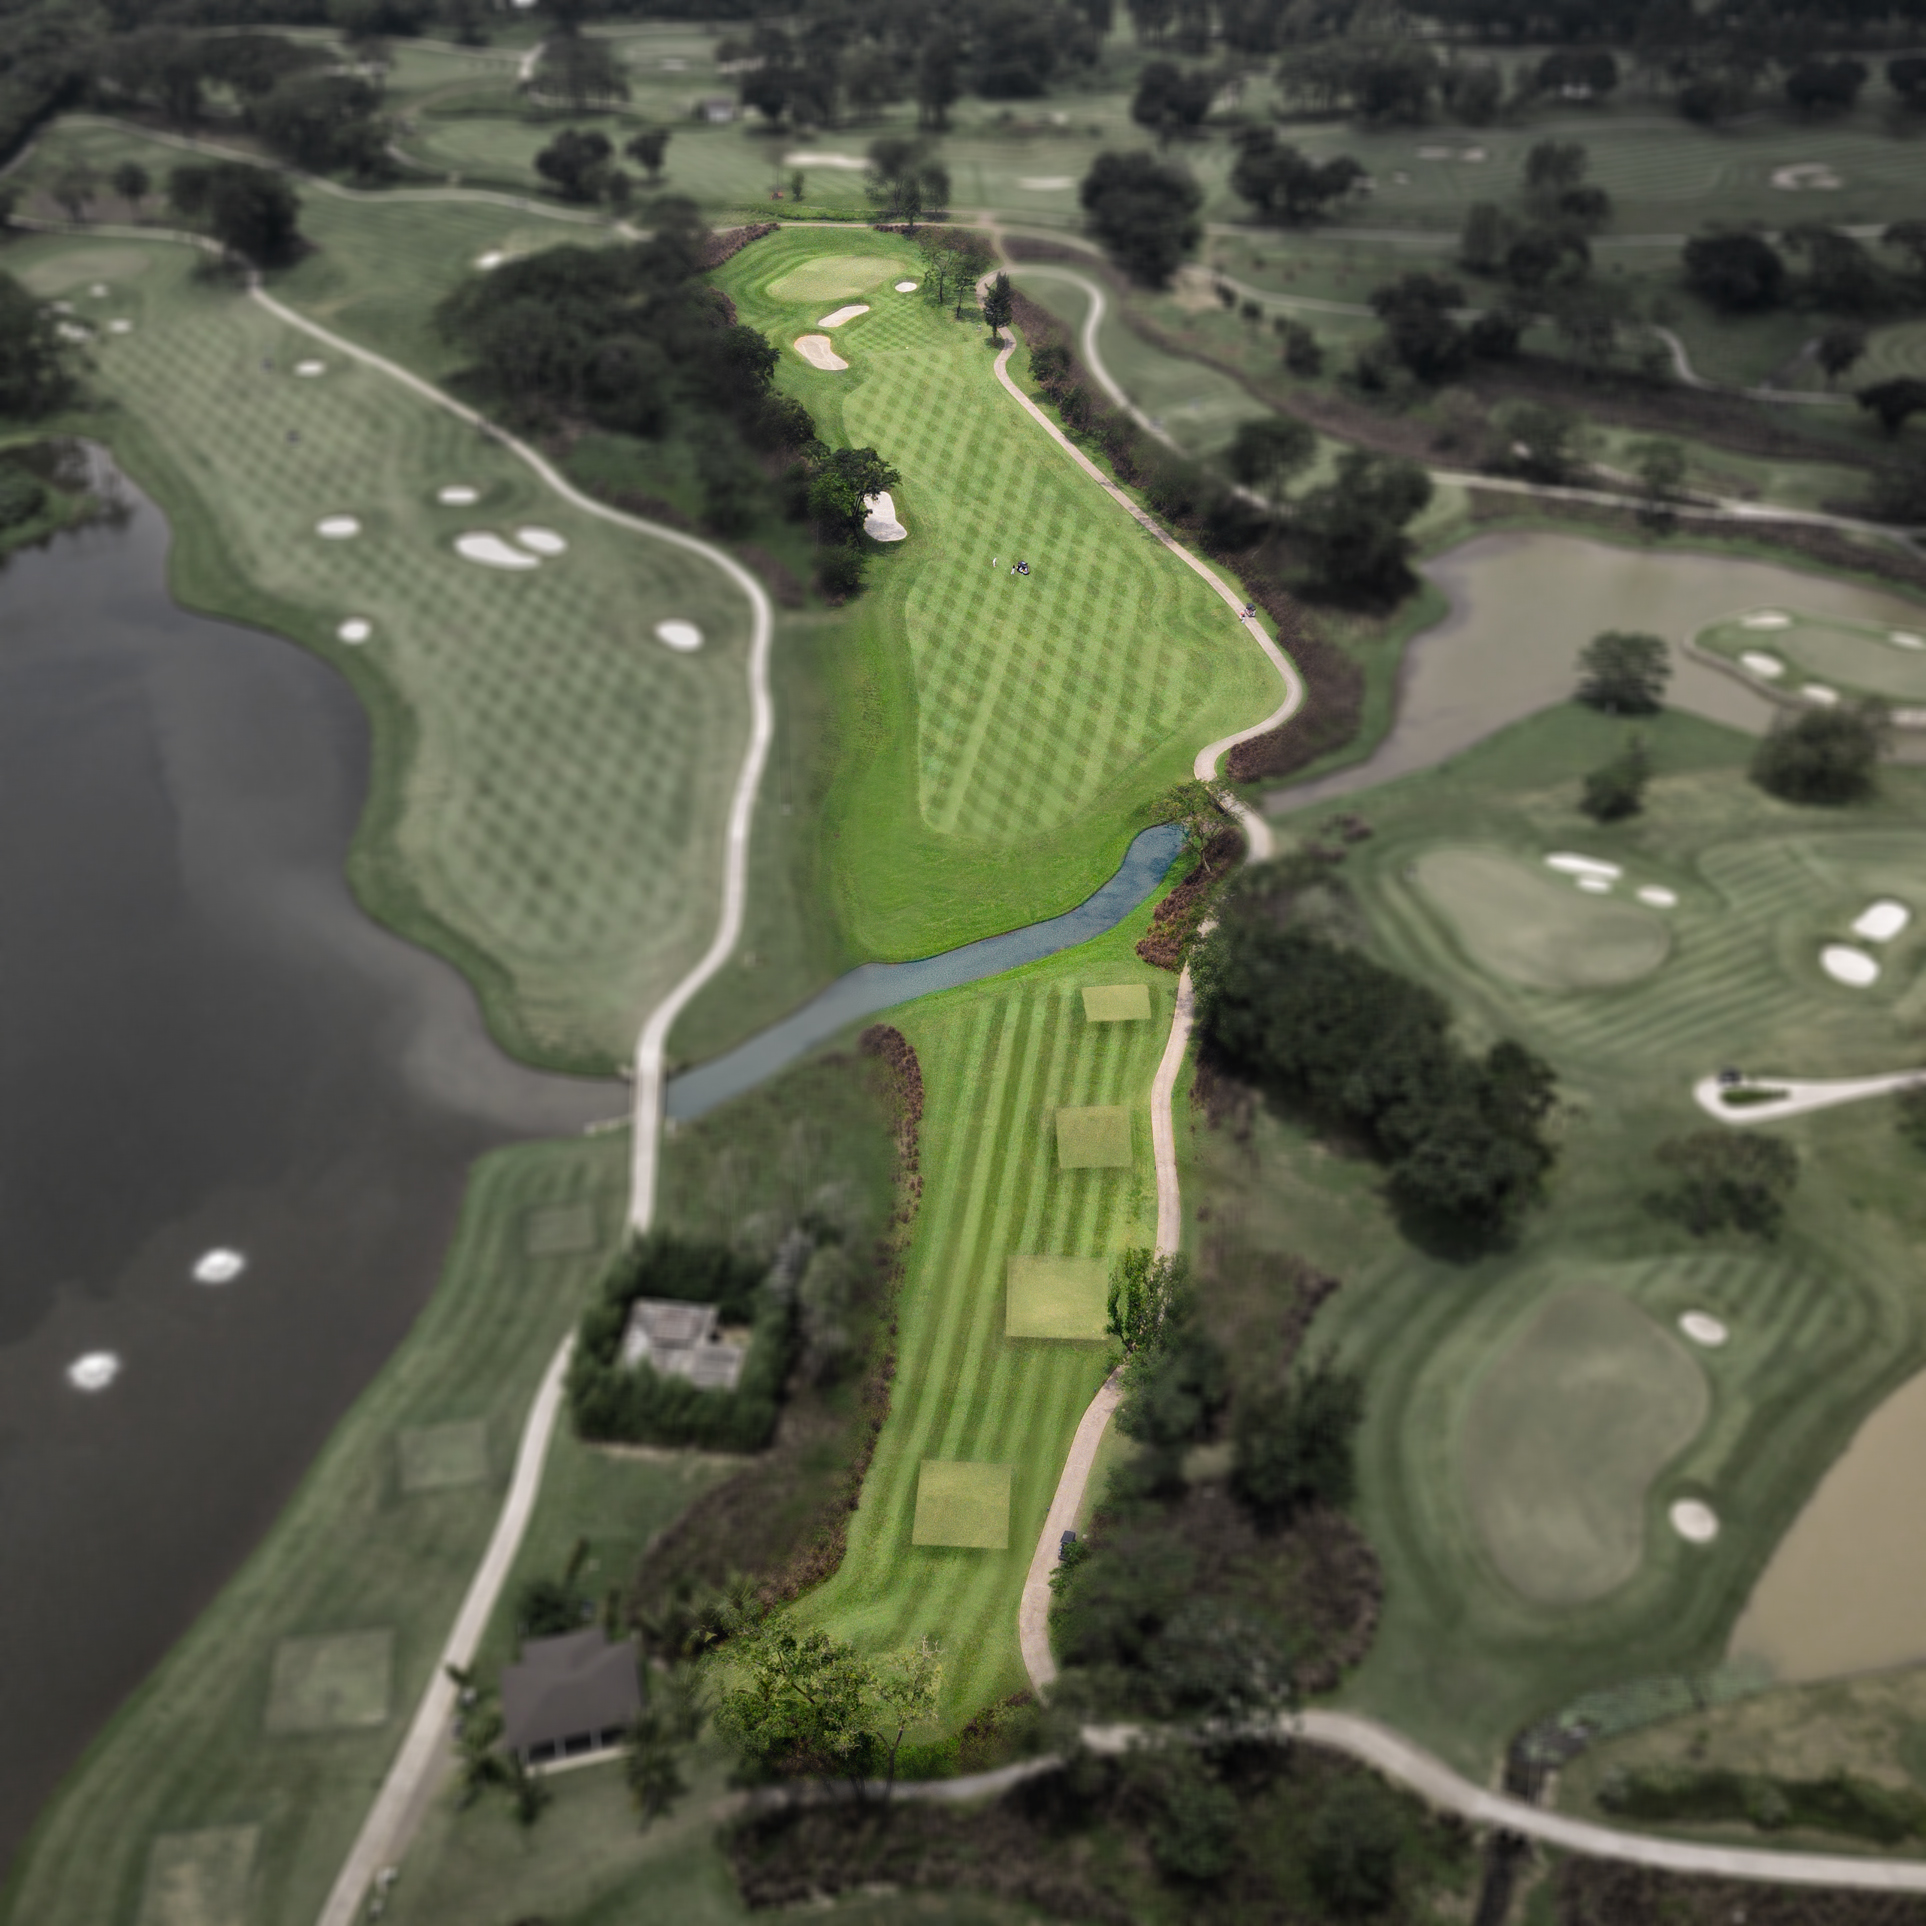
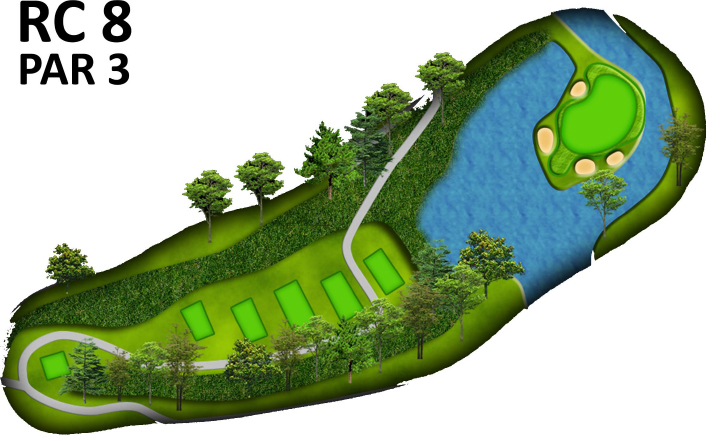
Red Course 8
-
This hole will be one of the world’s most challenging par 3s when played at 242 yards from the “devil’s tee”. The island green complex is heavily bunkered to provide a margin of error, but the elevated tees provide a clear view of the watery grave that frames this signature hole
(Show More)
-
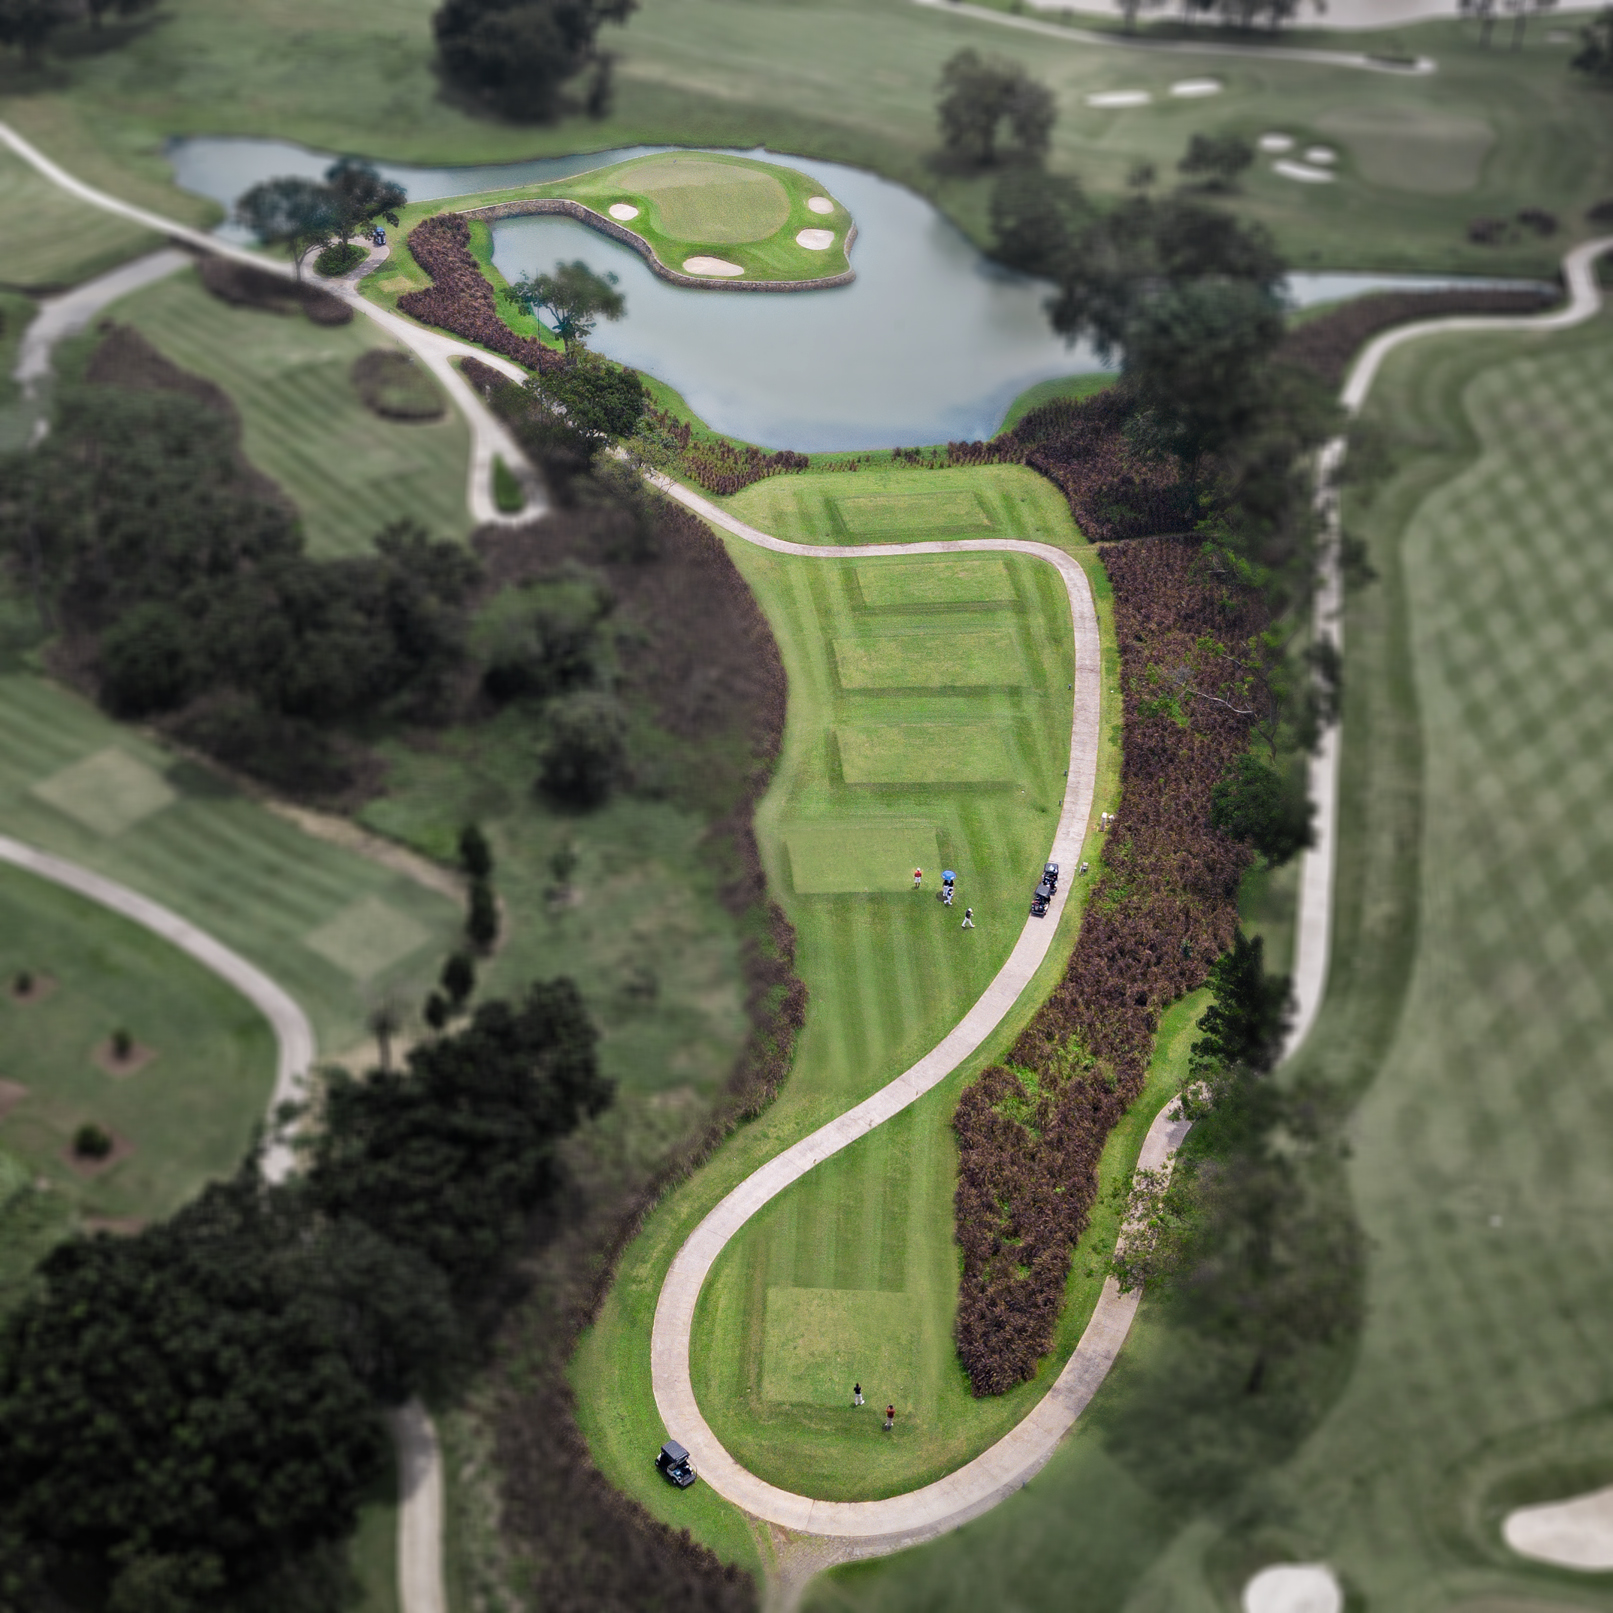
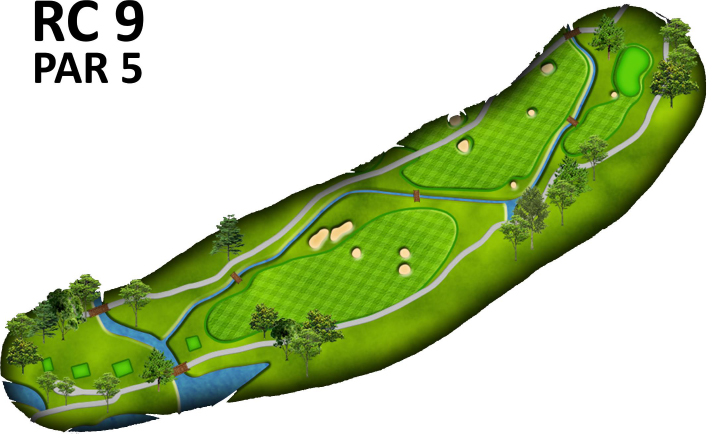
Red Course 9
-
Occupying the western edge of the Elysian Field this par 5 is crossed twice by one of our signature ‘burns’. The combination of wide fairways, strategic bunkering, historic trees and the interplay of the ‘burn’ create multiply routes for attacking this hole. The second shot can take one of three distinct lines of play, depending upon a golfer’s tolerance for risk and reward. The well bunkered green complex is perched above the ‘burn’. Take care not to under-club on the approach.
(Show More)
-
Blue Course 1
-
This is a beautiful, downhill starting hole. Left side bunkers define the landing area for the tee shot. A meandering ‘burn’ which doubles back across the fairway forces a decision to lay-up or attempt the carry on the second shot. Deep bunkers stacked into the left side of the elevated green make this par 5 a real challenge to reach in two shots.
(Show More)
-
Blue Course 2
-
A very strategic par 3 playing slightly downhill, across an environmentally sensitive wetland and framed by numerous heritage trees. The high left portion of the green is the most challenging target, protected by deep bunkers. Yet the right front portion of the green is no bargain due to a false front that will carry slightly misplayed shots away from the putting surface.
(Show More)
-
Blue Course 3
-
At over 450 yards uphill this par 4 is framed by numerous heritage trees. The left to right sloping fairway doglegs slightly left around stacked bunkers that must be challenged in order to shorten the approach. The green is guarded by a deep linear left side bunker, but opens from the right side. Beware the back-left tournament pin position.
(Show More)
-
Blue Course 4
-
The fairway of this gentle, downhill dogleg right is defined by deep, linear bunkers. A tee shot finding one of these bunkers will bring bogey or worse into play. The green is partially concealed by elevated bunkers. The approach must carry these bunkers, but take care to not over-club as the slope behind the green runs hard away.
(Show More)
-
Blue Course 5
-
This downhill hole is not an overly long par 4, but it is without doubt one of Suvarna’s most challenging due to the demands of the approach shot. The green complex is positioned on a stone wall peninsula that extends into the ‘fish pond’. The short iron approach allows very little room for error, but will provide an excellent opportunity for birdie for the well executed shot.
(Show More)
-
Blue Course 6
-
The shortest of Suvarna’s par 3s, yet this hole does not provide a routine par. The green is set at an angle along the ‘fish pond’. Club selection will vary by three clubs from front to back of the narrow green. A shot missed into the left side bunkers will present a formidable recovery played directly toward the pond.
(Show More)
-
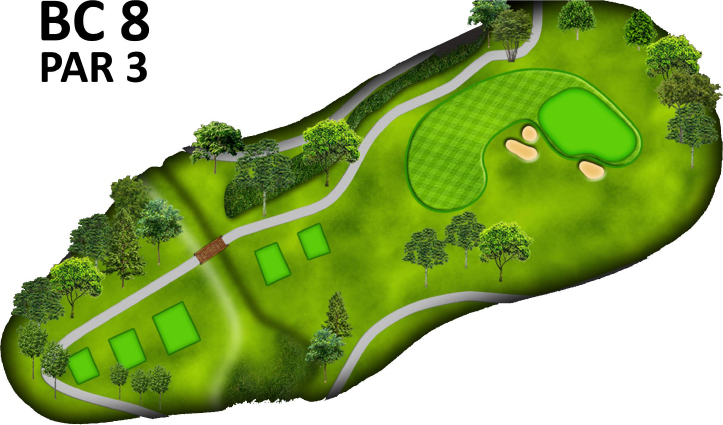
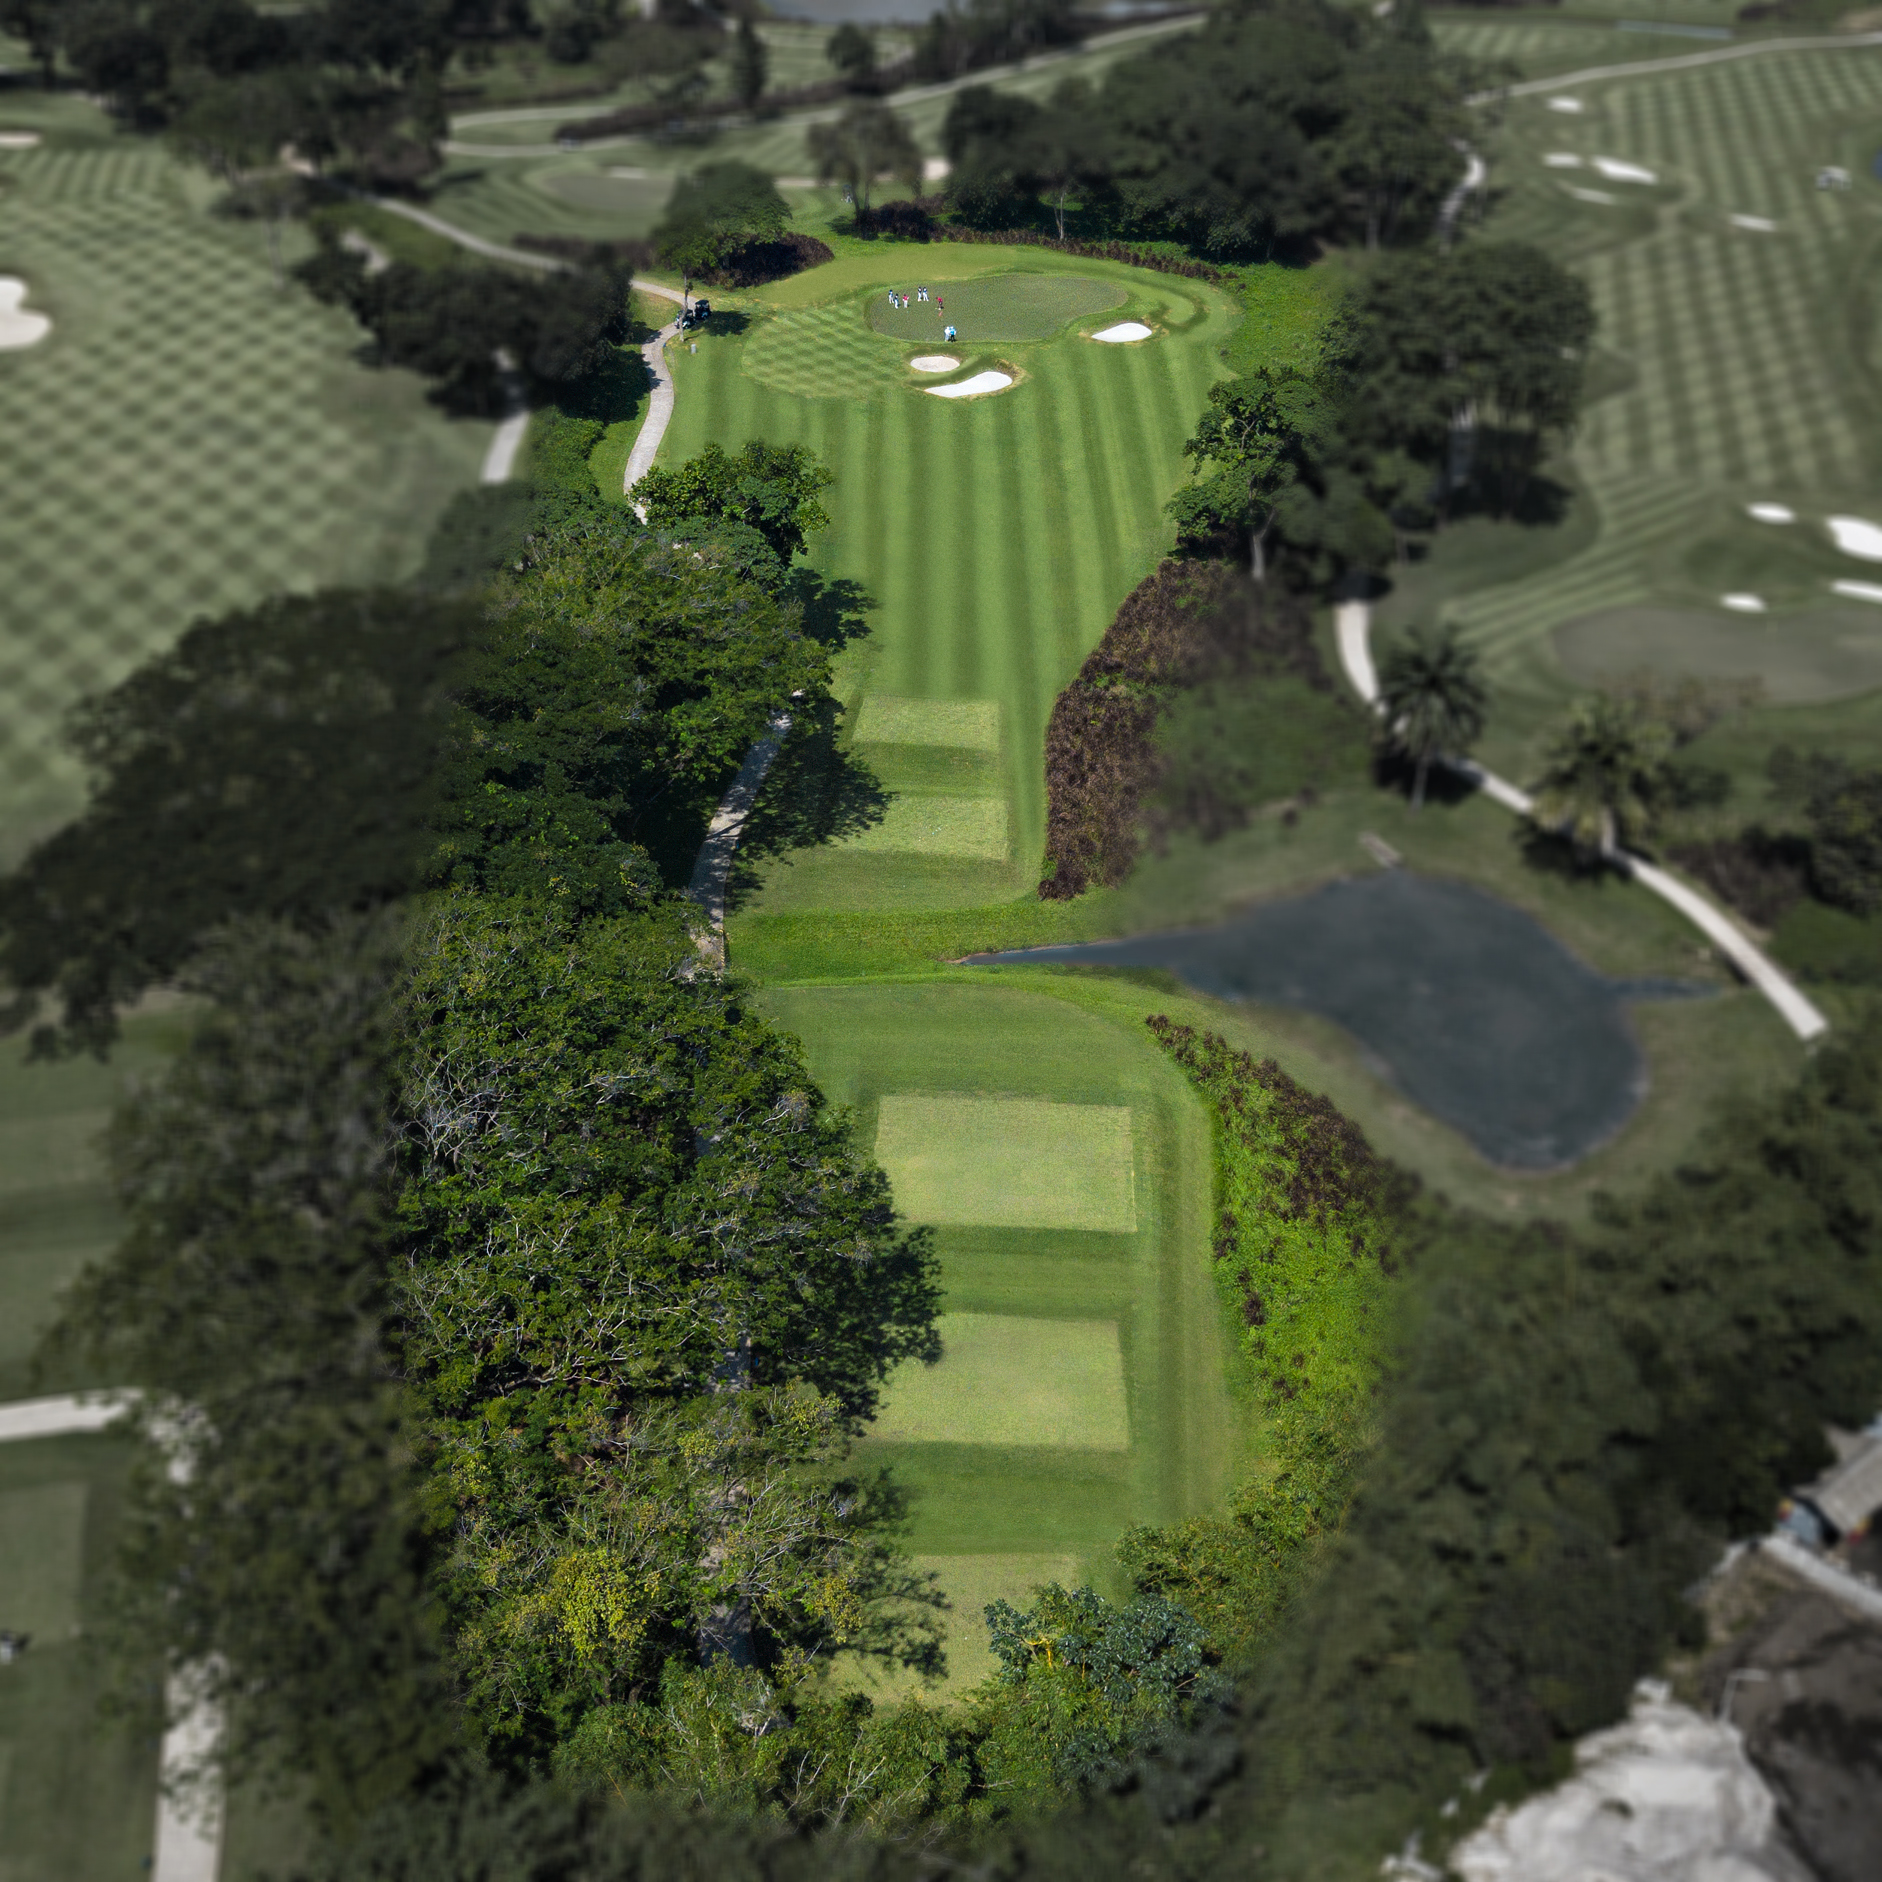
Blue Course 7
-
This is a short par 5 with significant risk reward design. Golfers can shorten the hole by attacking the large lake bordering the left side of the fairway. The second shot can be shortened by over 50 yards with an aggressive tee shot. The approach is guarded by numerous bunkers on the downhill side, but opens from the right side allowing a run-in shot. Take great care in attacking the left side of the angled green.
(Show More)
-
Blue Course 8
-
This may not appear to be one of Suvarna’s more challenging par 3s, but a shot missed to the right will undoubtedly lead to bogey. Favor the receptive, high left side of the green complex. Even a recovery shot is more manageable from this high side.
(Show More)
-
Blue Course 9
-
Located in the center of the Elysian Field, this demanding finishing hole shares play with its neighboring holes to the east and west. The elevated tees provide a panoramic view of the three holes occupying the Field. The pin location will dictate the positioning of the second shot. The fairway for the second shot is one of the world’s widest at over 100 yards. Yet this wide fairway is not an open field. It meanders around and through ‘burns’, bunkers and historic trees providing many strategic and heroic options for play.
(Show More)